

Start with a safe workbench, a few sharp tools, simple wood, and patient practice.
Learning how to start woodworking with hand tools is less about buying a large kit and more about building useful skills one step at a time. With the right tools, safe habits, and a simple project plan, you can make strong, attractive pieces in a garage, basement, or small apartment.
Why Start Woodworking With Hand Tools?
Hand tools give you direct control over the wood. You feel the grain, hear changes in the cut, and learn how each tool behaves. That feedback helps you understand woodworking at a deeper level.
Power tools can save time, but they can also hide mistakes. A hand plane shows you how grain direction affects a cut. A chisel teaches you how much force is enough. These lessons improve your work even when you later use machines.
Learning how to start woodworking with hand tools also has practical benefits:
• Hand tools make less noise than power tools.
• They create less dust when used correctly.
• They need little space and no large power supply.
• Quality tools can last for decades.
• They help you work slowly and with greater focus.
• They let you repair and adjust furniture with precision.
Hand-tool woodworking is not always faster. A hand saw may take longer than a powered saw, and a hand plane needs practice. Still, many woodworkers enjoy the quiet pace and the strong connection to the material.

Build a Safe and Useful Workspace
You do not need a full workshop to begin. A stable bench, good light, and enough room to move safely are more important than expensive equipment.
A solid workbench should not rock when you saw or plane. You can buy one, build one, or start with a sturdy table. Add a vise if possible. A vise holds the work while your hands guide the tool.
Your first workspace should include:
• A sturdy bench or table
• Bright overhead or task lighting
• A bench vise or portable work-holding clamp
• A dustpan and small brush
• Safety glasses
• Hearing protection if you use power tools later
• A first-aid kit
• A clear floor area
Keep your tools where you can reach them without crossing over the workpiece. Good organization prevents many accidents. It also makes practice more enjoyable.
Wood dust can irritate your eyes and lungs. The Occupational Safety and Health Administration recommends controlling dust at the source and using suitable personal protective equipment. Hand tools create less airborne dust than many power tools, but sanding still requires care.
Never hold a small board in your hand while cutting it. Clamp it down. Keep both hands behind the cutting edge, and make sure the blade path is clear before each stroke.
Choose the Essential Hand Tools
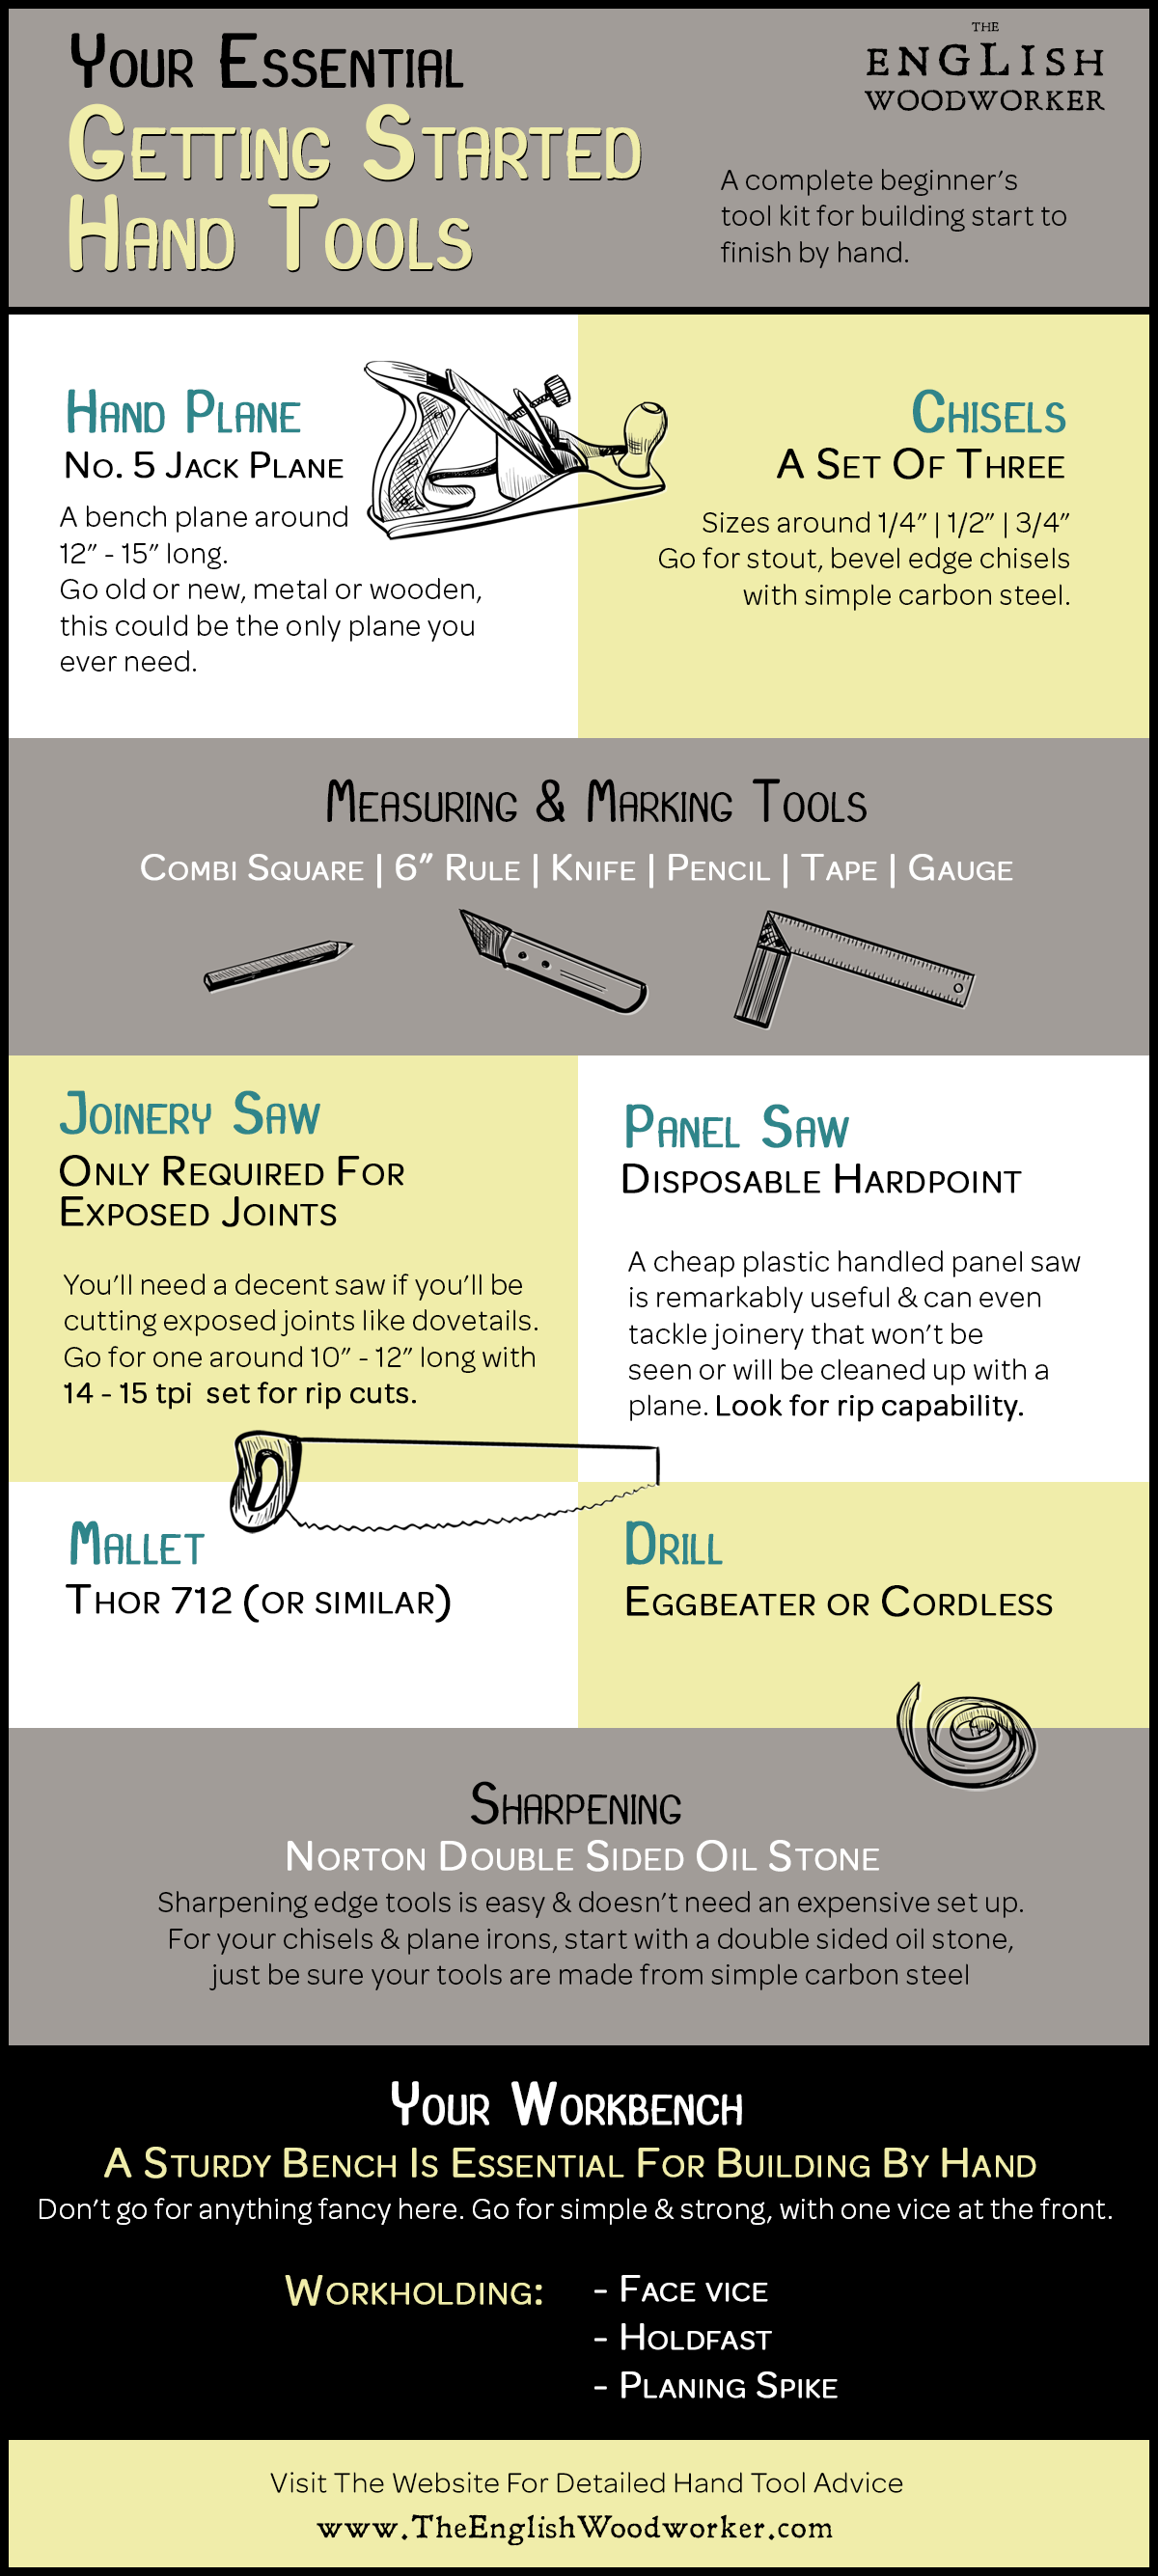
A beginner does not need every tool in a catalog. Start with tools that help you measure, hold, cut, shape, and smooth wood.
Measuring and marking tools
Accurate marking is the base of accurate woodworking. A small error at the start can grow into a visible gap later.
Begin with:
• A 12-inch or 24-inch combination square
• A sharp pencil or marking knife
• A tape measure
• A straightedge
• A set of simple layout rulers
A combination square helps you mark 90-degree and 45-degree lines. A marking knife creates a thin, clear line that guides a saw or chisel. For fine joinery, a knife line is often more reliable than a thick pencil mark.
Cutting tools
A crosscut saw cuts across the grain. A rip saw cuts along the grain. Many modern beginners choose a Japanese pull saw because it is thin, light, and easy to control.
A useful beginner set may include:
• A tenon or panel saw
• A small backsaw
• A coping saw
• A utility knife
Choose a saw with a comfortable handle and teeth that are not badly damaged. A sharp, well-set saw is easier to control than a large, dull one.
Chisels
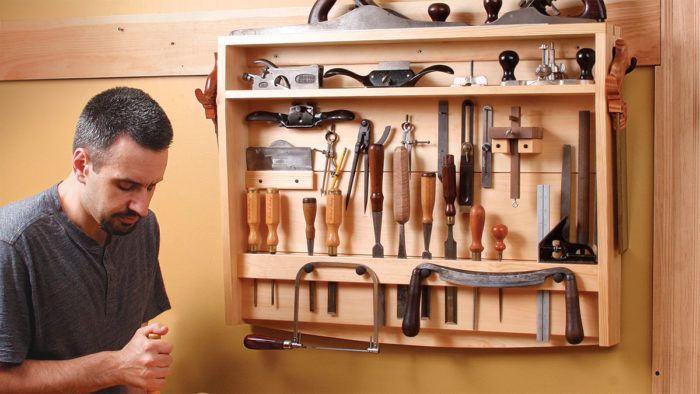
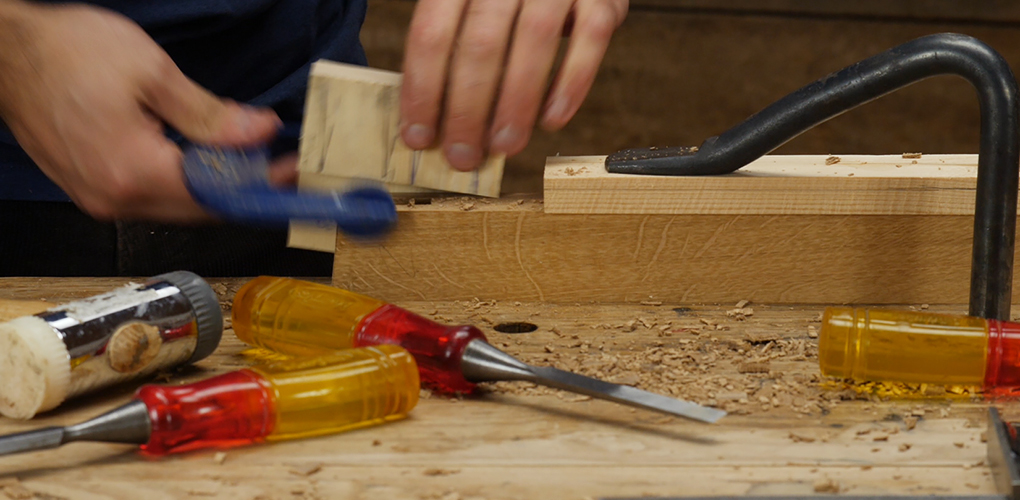
Start with a few bevel-edge bench chisels. Sizes around ¼ inch, ½ inch, ¾ inch, and 1 inch cover many basic tasks.
Use chisels for:
• Cleaning saw cuts
• Cutting small joints
• Removing waste
• Paring end grain
• Fitting hinges
Protect the cutting edge with a blade cover when the chisel is stored. Do not use a fine chisel as a screwdriver or pry bar.
Planes
A block plane is a good first plane. It can trim end grain, soften edges, and remove small amounts of wood.
A No. 4 smoothing plane is also useful, but it requires more setup and sharpening skill. Beginners sometimes buy a plane and assume it will work immediately. Many older planes need cleaning, flattening, and blade adjustment before they perform well.
Holding tools
Holding the work securely is just as important as cutting it. Add these tools as your budget allows:
• Wooden or metal bench dogs
• Quick clamps
• Bar clamps
• A shooting board
• A bench hook
A bench hook is easy to make and very useful. It supports a board during sawing and gives the saw a solid stop.

Buy Fewer Tools, but Buy Better Ones
The best beginner woodworking tools are not always the most expensive. Look for sound construction, comfortable handles, and replacement parts that are easy to find.
A used tool can be an excellent choice. Vintage hand planes, chisels, and backsaws are often available at estate sales, flea markets, and online marketplaces. Avoid tools with deep rust, cracked handles, bent backs, or missing parts unless you enjoy restoration work.
When buying a used tool, inspect:
• The blade for cracks and excessive pitting
• The handle for splits
• The sole of a plane for severe warping
• The saw plate for bends
• The screws and fasteners for damage
• The tool’s overall comfort in your hand
A low-cost tool with a sharp edge can outperform a costly tool with poor maintenance. Sharpness, setup, and technique matter more than brand names.
One common beginner mistake is buying a large tool set before choosing a project. That often creates clutter and confusion. Pick a project first, then buy the tools it requires.
Learn to Sharpen Your Tools
Sharp tools are safer and easier to control. A dull blade needs more force, and extra force increases the chance of a slip.
For chisels and plane irons, beginners often start with water stones, oil stones, or diamond plates. Each system can work well. The key is consistency, not the type of stone.
A basic sharpening process is:
Flatten the back of the blade.
Establish a primary bevel, often around 25 degrees.
Add a small secondary bevel, often around 30 degrees.
Remove the burr from the back.
Polish the edge until it cuts cleanly.
These angles are common starting points, not strict rules. Some tools work better with different bevels. A low-angle block plane, for example, is designed for a different cutting geometry than a standard bench plane.
Test sharpness on scrap wood. A sharp chisel should pare end grain smoothly. A sharp plane iron should produce thin, even shavings instead of dust or torn fibers.
Do not chase a mirror finish if the tool already cuts well. Beginners can spend too much time polishing and too little time making. A clean, durable edge is the real goal.
Select Beginner-Friendly Wood
Softwoods are often easier to cut, but not all softwoods behave the same way. Pine is affordable and widely available, though it can be resinous and prone to dents. Poplar is stable, easy to shape, and useful for painted projects.
Good beginner choices include:
• Poplar for small boxes and utility projects
• Clear pine for practice cuts
• Select spruce for simple shop projects
• Basswood for carving
• Straight-grained maple or cherry for later projects
Avoid warped, cracked, or very wet boards at the beginning. A straight board makes learning much easier.
Learn the difference between hardwood and softwood. These terms describe the type of tree, not simply how hard the wood feels. Balsa is a hardwood botanically, while some softwoods can be quite dense.
Before cutting, inspect the grain. Look for knots, changes in direction, and end splits. Grain is like a road for your tool. When the road changes direction, the blade may lift fibers instead of slicing them.

Practice the Core Hand-Tool Skills
Learning how to start woodworking with hand tools becomes easier when you separate the skills. Practice one movement at a time instead of trying to build a perfect project immediately.
Measuring and marking
Measure from a consistent reference edge. Mark that edge with a small symbol so you do not lose track of it.
Use a knife line for important cuts. Place the square firmly against the reference edge, then score the line with light pressure. Make several light passes instead of one deep pass.
Sawing straight
Let the saw do the work. Use long, relaxed strokes and avoid pushing hard. Start with the saw at a shallow angle, then lower it after the kerf begins.
A simple practice exercise is to cut several lines across scrap wood. Check the cuts with a square. Do not worry about speed. Straight cuts matter more than fast cuts.
Chiseling safely
Keep the chisel edge facing away from your body. When possible, pare toward an open area rather than toward your hand.
For chopping, place the bevel in the direction that gives you control. Take shallow cuts and remove waste in stages. Deep cuts can split the wood or damage the edge.
Planing
Check the grain before planing. If the fibers tear, turn the board around or adjust the plane for a lighter cut.
Start with the plane iron barely extended. It is easier to remove more wood than to repair a deep gouge. Keep the plane flat at the beginning and end of the stroke.

Start With Simple Woodworking Projects
Your first project should teach useful skills without requiring complex joinery. A small item that you can finish in a weekend is often better than an ambitious table that remains unfinished for months.
Good first projects include:
• A bench hook
• A wooden mallet
• A small tray
• A simple picture frame
• A plant stand
• A clamp rack
• A basic bookshelf
• A small storage box
A bench hook is especially useful because it teaches measuring, sawing, drilling if needed, and fastening. It also becomes a tool you can use on later projects.
A small box introduces more advanced skills, such as fitting corners and working with end grain. Keep the design simple. Use butt joints or rabbet joints before attempting dovetails.
Do not judge your early work too harshly. Your first project is partly a finished object and partly a training tool. Small gaps and uneven surfaces are useful feedback.
One practical lesson is to make a second version of the same project. The first version teaches the process. The second version often shows a major improvement because your hands now understand the steps.
Understand Basic Wood Joinery
Joinery is the way two or more pieces of wood connect. Strong joinery depends on accurate surfaces, correct grain direction, and proper fit.
Begin with these joints:
• Butt joint: Two pieces meet at their ends or edges. It is simple but often needs screws, nails, dowels, or glue.
• Rabbet joint: A step-shaped cut along an edge. It is common in boxes, cabinets, and shelves.
• Dado joint: A groove cut across the grain. It supports shelves and dividers.
• Mortise and tenon: A projecting tenon fits into a matching mortise. It is strong and traditional.
• Dovetail joint: Interlocking pins and tails provide strong resistance to pulling apart. It takes more practice.
Wood glue works best when the joint fits well. Glue cannot reliably fill large gaps in a poor joint. A thin, even layer on clean surfaces is usually enough.
Wood movement also matters. Boards expand and contract as their moisture content changes. The U.S. Forest Service explains that wood movement varies with moisture, grain direction, and species. Allow for this movement in wide panels and furniture tops instead of trapping every board rigidly.
Make a Simple Learning Plan
A clear plan keeps you from jumping between tools and techniques. Give yourself time to build control.
Try this four-stage approach:
Spend the first week measuring, marking, and making saw cuts on scrap wood.
Spend the second week sharpening a chisel and practicing straight paring cuts.
Spend the third week learning to use a block plane on edges and end grain.
Spend the fourth week building a small project.
Keep notes about what works. Record the wood species, tool settings, blade angles, and problems you notice. This turns random practice into useful experience.
Expect mistakes. A board may split, a cut may wander, or a finish may look uneven. These are normal parts of learning. The goal is not to avoid every mistake; it is to understand why it happened and prevent it next time.
Limit your project choices at first. Switching between carving, furniture making, joinery, and turning can slow progress. Choose one skill and repeat it until it feels familiar.
Avoid Common Beginner Mistakes
Many new woodworkers struggle for predictable reasons. Knowing these problems ahead of time can save money and frustration.
• Buying too many tools before learning basic skills
• Using dull blades
• Skipping clamps
• Measuring from different edges
• Cutting directly on a workbench
• Rushing the first cut
• Ignoring grain direction
• Sanding instead of fixing poor joinery
• Using wet or warped lumber
• Applying finish before testing it on scrap
Do not use sanding to hide every problem. Sanding can smooth a surface, but it cannot correct a badly twisted board or a joint with a large gap.
Do not force a plane through a difficult area. Stop, inspect the grain, reduce the blade depth, and try again. Slow adjustments often solve problems faster than extra strength.
Another common mistake is comparing your early work with professional furniture. Skilled makers may have years of practice, specialized tools, and carefully selected wood. Compare your current project with your last one instead.
Use Finishes Safely
A finish protects wood and changes its color and feel. For early projects, choose a finish that is simple and forgiving.
Common options include:
• Hard-wax oil for a natural feel
• Water-based polyurethane for low odor and quick drying
• Oil-based polyurethane for a warm tone and durable film
• Paste wax for a soft sheen, usually over another finish
• Mineral oil for some cutting boards and food-contact items
Read the product label carefully. Drying time, ventilation needs, and food-contact safety vary by product.
Never leave oil-soaked rags in a pile. Some drying oils can heat up and ignite as they cure. Lay used rags flat outdoors to dry, or place them in a suitable metal safety container according to local safety guidance.
Test the finish on an offcut from the same board. Wood species can absorb finishes in different ways, and a test piece prevents unpleasant surprises.
Know When Hand Tools Have Limits
Hand tools are powerful, but they are not ideal for every task. Cutting thick stock by hand can take time and physical effort. Flattening a large tabletop with a hand plane also requires skill and stamina.
Power tools may be useful when:
• You need many repeated cuts
• You are working with thick or large boards
• You need to remove a lot of material
• Physical limitations make hand work difficult
• A project has strict production deadlines
Using power tools later does not mean you failed at hand-tool woodworking. Many experienced makers combine both methods. Hand tools often provide the final accuracy, while machines handle rough preparation.
Be honest about your space, budget, health, and goals. The best method is the one that lets you work safely and enjoy the craft.
Frequently Asked Questions About How to Start Woodworking With Hand Tools
What hand tools should a beginner buy first?
Start with a combination square, marking knife, hand saw, bench chisel, block plane, clamps, and sharpening equipment. These tools cover measuring, cutting, shaping, and basic surface preparation.
Is woodworking with hand tools difficult?
Woodworking with hand tools takes practice, but the first skills are easy to learn in small steps. Sharp tools, secure work-holding, and simple projects make the process much more manageable.
Can I start woodworking without a workbench?
Yes. You can begin with a sturdy table, portable vise, or clamp-on work surface. The work area must remain stable and should hold the wood securely during cutting.
What is the best wood for beginner woodworking projects?
Poplar, clear pine, basswood, and straight-grained softwood are good starting choices. Avoid badly warped boards, large knots, and wet lumber until you gain more experience.
How often should I sharpen hand tools?
Sharpen whenever a tool begins to require extra force or leaves a rough cut. Light, regular sharpening is usually easier than waiting until the edge becomes badly dull.
Are hand tools safer than power tools?
Hand tools can reduce noise and some dust, but they are not automatically safe. Sharp edges, flying chips, poor work-holding, and careless body position can still cause serious injuries.
How long does it take to learn woodworking?
You can learn basic cuts and simple projects within a few weeks of regular practice. More advanced skills, such as fine dovetails and furniture joinery, may take months or years to develop.
Conclusion
Learning how to start woodworking with hand tools begins with a small, safe workspace, a few dependable tools, and regular practice. Focus first on measuring, marking, sawing, chiseling, planing, sharpening, and reading the grain.
Choose simple projects that help you repeat these skills. Keep your blades sharp, clamp your work, respect wood movement, and treat mistakes as useful lessons. You do not need a large workshop to make something valuable.
Start with one board and one project this week. Keep practicing, explore trusted woodworking books and classes, and share what you make with other woodworkers.
