

To use a hand knurling tool, align the wheels, apply steady pressure, and feed smoothly.
Learning how to use a hand knurling tool is easier when you treat the process like forming metal, not cutting it. The tool presses a pattern into a workpiece, so correct alignment, firm support, suitable speed, and steady feed matter more than brute force. This guide explains the setup, technique, safety steps, common errors, and practical tips that help produce clean, useful knurling.
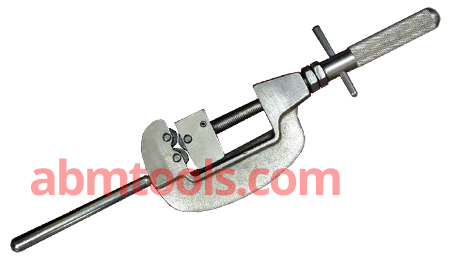
What Is a Hand Knurling Tool?
A hand knurling tool is a device that forms a raised or recessed pattern on a metal surface. It uses one or more hardened steel wheels with teeth called knurls. As the wheel rolls against the workpiece, it displaces metal and creates a textured grip.
Most hand knurling tools are used with a metal lathe. Some compact tools can work by hand on soft materials, but a lathe gives better control and a more even pattern. The tool may create straight, diagonal, or diamond knurling.
Common knurl patterns include:
- Straight knurling, which creates lines parallel to the workpiece axis
- Right-hand diagonal knurling, which creates angled lines
- Left-hand diagonal knurling, which crosses with the right-hand pattern
- Diamond knurling, which creates a familiar crisscross grip
- Fine, medium, and coarse patterns, based on tooth size and pitch
The main purpose is often to improve grip on knobs, handles, shafts, tool parts, and adjustment screws. Knurling can also add a decorative finish, but it is not a replacement for threads, splines, or a precision gear surface.

How Does a Hand Knurling Tool Work?
A hand knurling tool works by cold-forming the surface of the metal. Unlike a cutting tool, it usually does not remove chips. Instead, its teeth press into the surface and push the material into a new shape.
The tool needs enough force to make the wheel teeth engage. It also needs enough movement to roll the teeth along the workpiece. If the wheel slips during the first few rotations, it can create a double pattern, often called tracking or mismatching.
This is why learning how to use a hand knurling tool starts with choosing the correct wheel and setting the tool square to the workpiece. A small setup error can repeat across the entire part.
The amount of metal displaced depends on several factors:
- Workpiece diameter
- Material hardness and ductility
- Knurl pitch
- Wheel diameter
- Tool rigidity
- Lubrication
- Feed rate and spindle speed
Ductile metals such as mild steel, aluminum, brass, and some stainless steels often knurl well. Very hard or brittle materials may crack, chip, or resist forming. Always check the material’s properties before starting an important job.

Tools and Materials You Need
Before you learn how to use a hand knurling tool, gather the correct equipment. A stable setup reduces mistakes and keeps your hands away from moving parts.
You may need:
- A hand knurling tool with clean, sharp wheels
- A lathe with a properly secured workpiece
- Calipers or a micrometer
- Cutting oil or suitable metalworking lubricant
- A small brush for removing chips
- Safety glasses or a face shield
- A file or deburring tool
- A test piece made from similar material
- A rag for cleanup, used only when the machine is stopped
Inspect the knurling wheels before use. Their teeth should be clear and free from packed metal. Check that each wheel turns freely and has no visible cracks.
Measure the workpiece before and after knurling. Knurling often increases the outside diameter because metal is displaced outward. The final size depends on the wheel pitch, material, and pressure, so a test piece is the safest way to confirm the result.
Do not wear loose sleeves, jewelry, or gloves near a rotating lathe. Gloves can catch on the workpiece or tool. Eye protection is essential because small chips and broken wheel fragments can move quickly.

How to Use a Hand Knurling Tool Step by Step
The best way to learn how to use a hand knurling tool is to follow a repeatable process. Do not begin with a valuable finished part. Practice on scrap stock first.
1. Prepare and secure the workpiece
Cut the workpiece slightly longer than the final required length. Install it in the chuck or collet, then tighten it firmly.
Keep the amount of material sticking out as short as practical. Long, thin stock can flex under knurling pressure. That flex can cause a shallow pattern, chatter, or a tapered result.
If the part is long, use a tailstock center or another suitable support. Make sure the workpiece runs true. A bent or poorly centered part will produce uneven knurling.
2. Mark the knurled area
Use a marker, layout fluid, or a light tool mark to identify the beginning and end of the pattern. Leave a small margin if the part will later be faced or turned to final length.
A clear boundary makes the finished part look better. It also prevents the wheels from running onto a shoulder, thread, or unsupported edge.
3. Select the correct knurl wheels
Choose a wheel pattern that matches the design. Use straight wheels for a lengthwise grip and paired diagonal wheels for a diamond pattern.
Select the wheel pitch according to the workpiece diameter and desired texture. Coarse wheels suit larger handles, while fine wheels work better on smaller parts.
The wheel must be suitable for the metal. A fine wheel may clog or fail to form properly on some soft materials. A coarse wheel may require more force and can distort a small part.
4. Set the tool at the correct height
Position the knurling wheels on the centerline of the workpiece. The wheel axle should be parallel to the workpiece axis unless the tool design requires another angle.
A tool set too high or too low may create uneven contact. It may also place excess force on the lathe cross-slide or on the tool itself.
For a standard lathe setup, place the tool in the tool post and bring the wheels close to the surface. Keep the tool holder rigid and avoid unnecessary extension.
5. Align the tool square to the workpiece
Set the tool square to the axis of the workpiece. On a diamond knurl, both wheels must meet the surface in a balanced way.
Alignment is one of the most important parts of how to use a hand knurling tool. If the tool sits at an angle, one side of the pattern may be deeper than the other. The knurl may also wander along the part.
Some adjustable tools allow you to set each wheel independently. Adjust them so both wheels touch the workpiece evenly.
6. Start the lathe at a low speed
Choose a slow spindle speed. Knurling creates high pressure, and a slow speed gives you time to watch the pattern and stop the machine if something goes wrong.
The correct speed depends on the material, diameter, wheel size, and machine rigidity. There is no single speed that works for every job. As a practical starting point, use a slower speed than you would use for ordinary turning, then adjust based on the result.
Avoid sudden speed changes while the wheels are engaged. Stop the lathe before making major adjustments.
7. Apply firm, direct pressure
Bring the wheels into the workpiece with a firm movement. Do not creep into the surface with very light pressure. Light contact can make the wheels skate instead of forming the pattern.
The goal is to seat the wheel teeth quickly and evenly. Once the pattern starts, maintain steady pressure. Excessive force can crush the surface, damage the wheel, or overload the lathe.
This step is often where beginners struggle. They fear pressing hard enough, then see a faint or double pattern. A rigid tool and a decisive approach usually work better than repeated small adjustments.
8. Feed along the marked area
Once the wheels have engaged, move the tool smoothly along the workpiece. Use a consistent feed rate and avoid stopping in the middle of the pattern.
A hand knurling tool may be fed by the lathe carriage or by hand, depending on the tool and machine. Carriage feed usually gives more uniform results. If you feed manually, move slowly and steadily.
Keep the wheels lubricated. Apply cutting oil with a brush only when it can be done safely. Never place your fingers near rotating wheels.
9. Make enough passes
Many materials need more than one pass to reach full depth. Continue until the pattern is sharp and complete, but do not keep increasing pressure without checking the surface.
Withdraw the tool slightly, stop the lathe, and inspect the workpiece. Look for:
- A clean, continuous pattern
- No double tracking
- Even depth across the full width
- No torn metal or large burrs
- No excessive workpiece deflection
- No damaged or clogged wheel teeth
If the pattern is incomplete, make another controlled pass. Use the same alignment and pressure each time.
10. Finish and inspect the part
Stop the machine before touching the workpiece. Remove loose burrs with a file or deburring tool. Do not use your hands to wipe a rotating knurled surface.
Measure the finished diameter and compare it with the required size. Check the pattern under good lighting. A clean knurl should feel even when you run a fingertip across it after the machine is completely stopped.

How to Use a Hand Knurling Tool on Different Metals
The material strongly affects the result. Learning how to use a hand knurling tool means adapting pressure, speed, lubrication, and wheel choice to the workpiece.
Aluminum
Aluminum is usually easy to form, but it can smear and clog the wheels. Use a sharp wheel, moderate pressure, and a lubricant that suits aluminum.
A fine or medium pitch often gives a clean grip on aluminum knobs. Avoid excessive pressure because soft aluminum can build a heavy ridge at the pattern edges.
Mild steel
Mild steel is a common choice for knurling. It generally needs firm pressure and good tool support.
Use cutting oil to reduce friction and heat. If the pattern is shallow, check alignment and pressure before simply forcing the tool harder.
Stainless steel
Stainless steel can work-harden quickly. If the wheel rubs without forming a full pattern, the surface may become harder and more difficult to knurl.
Use a rigid setup, suitable pressure, and a controlled feed. Do not let the tool dwell in one place. Test the process on scrap before working on a finished stainless part.
Brass
Brass often knurls well, but some grades can chip or produce a rough edge. Use a sharp wheel and avoid excessive pressure.
A fine pattern may be more suitable for small brass parts. Check the finished surface for lifted edges or tearing.
Plastic
Some plastics can be knurled, but they behave differently from metal. Heat, cracking, and distortion are common concerns.
Use low speed and light, controlled pressure. Confirm that the plastic grade can handle the deformation before attempting a production part.

Common Hand Knurling Problems and Fixes
Even when you understand how to use a hand knurling tool, small setup errors can affect the pattern. Most problems have a clear cause.
Double-tracked pattern
A double-tracked pattern looks like two sets of teeth fighting for the same space. It often happens when the wheels do not engage decisively at the start.
Possible fixes include:
- Increase initial engagement pressure
- Check that the wheel pitch suits the workpiece diameter
- Keep the tool square to the part
- Use a more rigid tool setup
- Start on a clean, round surface
- Avoid backing out and re-engaging at a different position
Shallow or incomplete knurl
A faint pattern may result from low pressure, a flexible setup, dull wheels, or an unsuitable material.
Check that the workpiece is well supported. Confirm that the wheels turn freely and that the tool reaches the centerline. Add pressure in a controlled way rather than using sudden force.
Tapered knurl
A pattern that is deeper at one end often means the workpiece or tool is flexing. It can also result from uneven wheel contact.
Reduce the unsupported length, support the workpiece with a center, and check the lathe carriage. A rigid setup is usually more important than higher pressure.
Torn or rough surface
Tearing can occur when the wheel is dull, the material is too brittle, or the speed and lubrication are unsuitable.
Clean the wheel, apply the correct lubricant, and test a different wheel pitch. If the metal is brittle, knurling may not be the right process.
Workpiece diameter is too large
Knurling commonly displaces material outward. If the final diameter must be precise, turn the starting diameter according to the wheel manufacturer’s guidance or confirm it with test pieces.
Do not assume the original diameter will remain unchanged. Measure the actual result because material and pitch produce different amounts of growth.

Safety Tips for Hand Knurling
A hand knurling tool creates strong radial force. Safe operation requires more than wearing eye protection.
Follow these practices:
- Keep the chuck key out of the chuck before starting the lathe
- Secure the workpiece and confirm that the chuck jaws have full contact
- Remove loose clothing, jewelry, and long hair
- Use eye protection and consider a face shield
- Keep hands away from the rotating workpiece
- Apply oil with a brush or automatic system, not with your fingers
- Stop the machine before measuring or clearing chips
- Use a brush for chips instead of your hands
- Check the tool and wheels for cracks before use
- Do not exceed the tool’s rated capacity
- Keep bystanders away from the rotating work area
Follow the safety instructions for your specific lathe and tool. Workplace rules may also require guarding, training, lockout procedures, or additional protective equipment.
My most useful shop lesson was simple: never rush the inspection step. A pattern that looks acceptable at a glance may hide a loose wheel, a developing crack, or a part that has shifted in the chuck.

Practical Tips for Better Results
These tips make how to use a hand knurling tool more predictable:
- Practice on scrap stock made from the same material as the final part
- Start with a short knurled section before attempting a long handle
- Keep the tool as close to the tool post as possible
- Use a sharp, clean wheel
- Mark the knurl boundaries clearly
- Use a steady carriage feed when available
- Stop and inspect rather than guessing
- Measure diameter changes after each test
- Use lubricant that matches the material
- Replace wheels that have worn or damaged teeth
A knurl is not just a texture. It is a formed feature with size, depth, pitch, and visual alignment. If the part must match other components, record the wheel type, starting diameter, speed, feed, and pressure used during a successful test.
For production work, a scissor-style or clamp-style knurling tool may reduce radial load on the lathe. A bump-style tool can work well on rigid machines, but it may place more force on the cross-slide and workpiece.
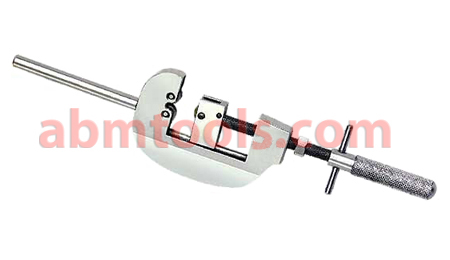
Hand Knurling Tool Limitations
A hand knurling tool is useful, but it is not ideal for every task. It may struggle with very small diameters, thin walls, hard materials, long unsupported parts, or tight dimensional requirements.
Knurling also changes the surface shape. It can raise the diameter, create burrs, and introduce stress into the outer layer. If you need a highly controlled tooth form, a forming tool may not provide the required accuracy.
For thin tubes or hollow parts, internal support may be necessary. Without support, the tube can collapse instead of forming a pattern.
A hand knurling tool also depends on operator skill. Two users may produce different results with the same equipment. For repeatable production, use a rigid tool, documented settings, test pieces, and regular inspection.
Frequently Asked Questions About How to Use a Hand Knurling Tool
Can you use a hand knurling tool without a lathe?
Some small hand knurling tools can mark soft material by hand, but results are usually less even. A lathe provides controlled rotation and steady movement, so it is the preferred setup for accurate metal knurling.
How much pressure should you use with a hand knurling tool?
Use firm pressure that fully engages the wheel teeth without flexing the tool or workpiece. Too little pressure causes slipping and double tracking, while too much pressure can damage the wheels or distort the part.
What speed is best for hand knurling?
Use a slow spindle speed compared with normal turning, then adjust for the material and workpiece diameter. The correct speed depends on the tool, wheel pitch, machine rigidity, and lubricant, so testing on scrap is wise.
Why does my knurling pattern look doubled?
A doubled pattern usually means the wheels slipped or did not engage firmly at the start. Check wheel alignment, tool rigidity, workpiece diameter, and initial pressure before trying again.
Do you need cutting oil when knurling?
Lubrication often reduces friction, heat, and wheel clogging. Use a lubricant suitable for the material, and apply it safely with a brush while keeping your hands away from the rotating workpiece.
Does knurling increase the workpiece diameter?
Usually, yes. Knurling displaces material outward, so the finished diameter can grow. The amount varies with the material, wheel pitch, starting diameter, and applied pressure.
Which metals are easiest to knurl?
Ductile metals such as mild steel, aluminum, brass, and some stainless steels are common choices. Brittle or very hard materials may crack, resist forming, or produce a poor pattern.
Conclusion
Knowing how to use a hand knurling tool comes down to four essentials: choose the right wheel, support the workpiece, engage the tool firmly, and feed it smoothly. Start with a test piece, use a slow speed, apply suitable lubrication, and inspect the pattern before committing to a finished part.
Good knurling is controlled metal forming. It rewards patience and punishes rushed setup. Try these steps on scrap material, record what works, and build your confidence with each part. Explore more machining guides or share your knurling experience in the comments.
