

To sharpen hand tools well, use the right abrasive, hold the correct angle, and remove the burr.
Learning how to sharpen hand tools can make a big difference in your workshop. A sharp chisel cuts cleanly, a plane iron leaves a smooth surface, and a saw or knife feels safer because it needs less force.
I have sharpened many common tools over the years, and the biggest lesson is simple: good results come from control, not speed. This guide explains how to sharpen hand tools with stones, files, guides, strops, and grinders while helping you avoid the mistakes that ruin edges.
Why Sharp Hand Tools Matter
Sharp tools do more than save time. They improve control, reduce waste, and help you make cleaner cuts. A dull edge often slips, tears wood, or forces you to push harder than you should.
When learning how to sharpen hand tools, think of the edge as a small wedge. A thin, even wedge cuts easily. A damaged or rounded wedge needs more force and may leave a rough surface.
Sharp tools also improve safety in many tasks. A dull chisel can bounce, and a dull knife can slip when you apply extra pressure. However, even a sharp tool can cause injury if you use poor technique, so safe handling still matters.
Common benefits include:
• Cleaner cuts and smoother surfaces
• Better control over the tool
• Less effort during work
• Longer tool life
• Fewer damaged workpieces
• More enjoyable and accurate projects
A sharp edge does not need to look like a mirror to work well. It needs a consistent bevel, a clean cutting edge, and no wire burr that can fold over during use.
Tools and Materials You Need
You do not need an expensive sharpening system to learn how to sharpen hand tools. A basic setup can produce excellent results if you use it with care.
Start with these items:
• Sharpening stones: Water stones, oil stones, or diamond plates
• Honing guide: Useful for chisels and plane irons
• Flattening plate: Needed to keep water stones flat
• Honing oil or clean water: Use the lubricant recommended for your stone
• Leather strop: Helpful for removing the final burr
• Abrasive compound: Optional, but useful for polishing
• File: Best for saw teeth, axes, and rough outdoor tools
• Safety glasses: Important when using files or power grinders
• Clean cloth: Helps remove metal dust and slurry
A diamond plate cuts fast and stays flat, but quality varies. Water stones cut quickly and give a refined edge, but they need regular flattening. Oil stones are durable and easy to store, though they often cut more slowly.
For most home workshops, a medium stone around 800 to 1,200 grit and a fine stone around 3,000 to 8,000 grit are enough for chisels, plane irons, and many knives. Very high grits can polish an edge, but polishing alone cannot fix a poor bevel.
Understanding Grit and Abrasives
Grit describes the size of the abrasive particles on a sharpening surface. Low grit removes metal quickly. High grit refines and polishes the edge.
A useful progression looks like this:
• Coarse grit, about 100 to 400: Repairs chips, damage, and badly rounded edges
• Medium grit, about 600 to 1,200: Creates the main bevel and removes coarse scratches
• Fine grit, about 2,000 to 4,000: Refines the edge for general work
• Extra fine grit, about 6,000 to 10,000 or more: Polishes the edge for fine woodworking
Do not use every grit in every session. If your tool is already sharp, begin with a medium or fine abrasive. Starting too coarse removes metal that you do not need to remove.
The abrasive must also stay clean and flat. A clogged stone cuts poorly. A hollow stone can create a curved edge, especially on a wide plane iron. I learned this the hard way after polishing a plane blade for several minutes and finding that only the edges had touched the stone.
How to Sharpen Hand Tools Step by Step
The basic process is similar for many tools. You inspect the edge, repair damage, establish a bevel, refine the edge, remove the burr, and test the result.
1. Inspect and Clean the Tool
Remove dirt, rust, resin, and old oil before sharpening. A dirty edge can hide chips or make it hard to see your progress.
Check for:
• Chips or missing sections
• A rounded or uneven bevel
• Rust near the cutting edge
• A bent tip
• Cracks or loose parts
Do not sharpen a damaged tool without first deciding whether it is safe to use. A cracked blade or loose handle may need replacement or repair.
2. Choose the Correct Bevel Angle
The right angle depends on the tool and the work it performs.
Typical starting points include:
• Wood chisels: About 25 degrees for the primary bevel
• Plane irons: About 25 degrees, often with a small 30-degree microbevel
• Kitchen and utility knives: About 15 to 20 degrees per side
• Carving tools: Often 15 to 25 degrees, depending on the profile
• Axes: Commonly about 20 to 30 degrees per side
These are working ranges, not strict laws. A lower angle cuts more easily but may be weaker. A higher angle gives more support but can require more force.
3. Establish the Primary Bevel
Place the tool on the abrasive and move it with steady pressure. Keep the bevel flat against the stone if the tool has a flat bevel.
Use the full length of the stone. This helps prevent grooves and keeps the abrasive surface useful. Use slower strokes near the end of the pass so the edge does not dig into the stone.
For a chisel or plane iron, continue until you can feel a small burr along the entire back edge. That burr shows that you have reached the cutting edge.
4. Refine the Edge
Move to a finer abrasive when the first bevel is even and the coarse scratches are consistent. Use lighter pressure as you progress.
Many beginners press too hard during the fine stage. Heavy pressure can flex a thin blade, round the edge, and create deep scratches. Let the abrasive do the work.
A honing guide can help you hold a steady angle. Freehand sharpening is faster once you gain experience, but a guide is often the best choice for a beginner or for a wide plane blade.
5. Remove the Burr
The burr is a thin strip of metal that folds over the edge during sharpening. It must be removed before the tool is ready.
Lay the flat back of a chisel or plane iron on a fine stone and make a few light strokes. Then return to the bevel side for one or two light strokes. Repeat this process with less pressure.
A leather strop can remove the last trace of the burr. Pull the tool away from the cutting edge when stropping. Pushing into the leather can round the edge.
6. Test the Edge
Use a safe and simple test. For a chisel or plane iron, try shaving a thin curl from soft wood. For a knife, slice paper carefully or cut a soft food item with controlled pressure.
Do not test sharpness by running your finger across the edge. That test is unsafe and tells you little about how the tool will cut.
A good edge should start cutting without heavy force. If it tears, skips, or feels rough, return to the fine abrasive and check the bevel.
How to Sharpen Chisels and Plane Irons
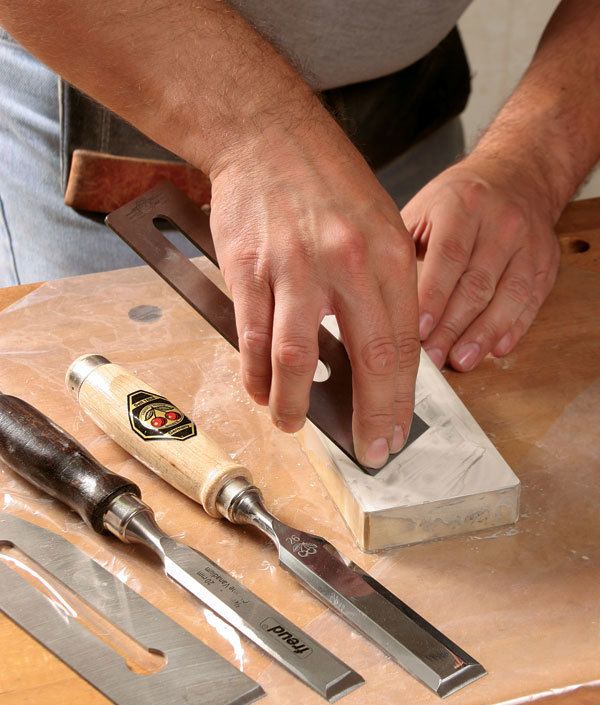
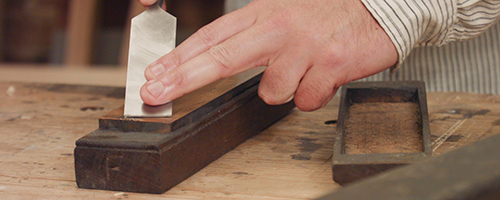
Chisels and plane irons are among the easiest hand tools to sharpen because they have a flat back and a simple bevel.
Begin by flattening the back near the cutting edge. You do not need to polish the entire back. The first inch or two matters most because it meets the bevel to form the cutting edge.
Place the back flat on a medium stone. Move it back and forth until you see an even scratch pattern. Then use a fine stone to polish the area near the edge.
For the bevel, use a honing guide or hold the tool by hand. Many woodworkers use a 25-degree primary bevel and add a small 30-degree microbevel. The microbevel saves time because you only polish a narrow strip during future sharpening sessions.
A practical sequence is:
Flatten the back near the edge.
Sharpen the primary bevel at about 25 degrees.
Add a small microbevel at about 30 degrees.
Remove the burr from the back.
Strop both surfaces lightly.
The back of the tool should remain flat. Rocking it during sharpening creates a rounded surface and makes later sharpening harder.
How to Sharpen Knives and Utility Blades
When learning how to sharpen hand tools such as knives, consistency matters more than a perfect angle. Choose an angle that suits the blade and hold it throughout each stroke.
Mark the bevel with a permanent marker before you begin. Make a few passes on the stone, then inspect the mark. If the marker disappears near the edge, your angle is close. If it disappears only at the shoulder, you are holding the blade too low.
Sharpen one side until you raise a burr. Then sharpen the other side until the burr moves back. Finish with alternating light strokes and remove the burr on a fine stone or strop.
Keep your fingers behind the cutting edge. Secure loose stones on a stable surface, and always move the blade in a controlled direction. Never rush because a slipping knife can cause a serious cut.
Serrated knives need a different method. Use a tapered diamond file or a sharpening rod that matches the serration size. Sharpen only the beveled side unless the manufacturer gives different instructions.
How to Sharpen Axes and Other Heavy Tools
Axes, hatchets, and garden tools often need a file before they need a stone. A file removes damage quickly and gives you control over a large edge.
Secure the tool in a vise. Wear eye protection, and file from the shoulder toward the edge with smooth strokes. Keep the bevel even on both sides unless the tool has a special one-sided design.
After filing, use a coarse stone to remove file marks. Then use a finer stone to refine the edge. Outdoor tools do not always need a mirror polish, but they do need a clean, even edge.
Check the edge often. An axe that becomes too thin may chip or roll when it strikes hard wood. The best edge balances sharpness with strength.
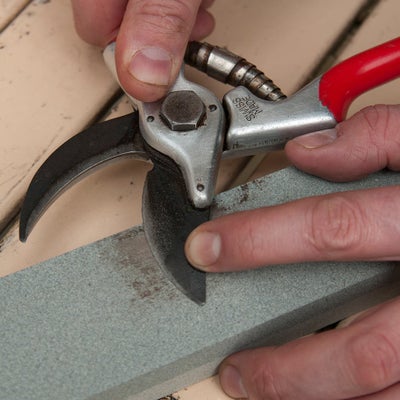
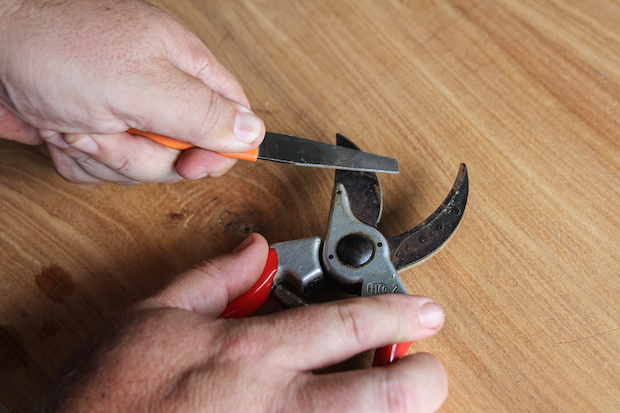
For garden shears and pruners, sharpen the beveled side only. Keep the flat side flat and remove the burr with a few gentle strokes. Also clean and oil the pivot so the tool closes smoothly.
How to Sharpen Hand Saws
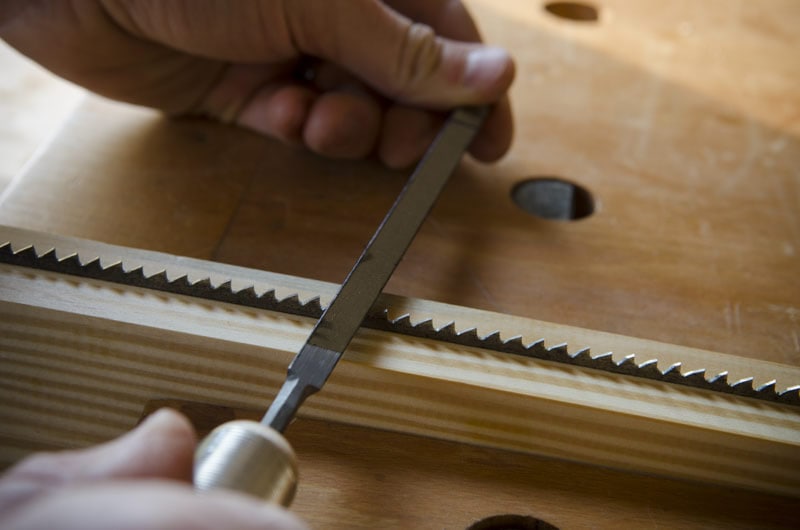
Saw sharpening uses a file rather than a flat stone. Each tooth has a shape, a point, and a set, which is the slight side-to-side spacing that creates the cut.
First, secure the saw in a saw vise or another stable clamp. Clean the teeth and inspect their size and shape.
You may need to:
• Joint the teeth to make their tips even
• File each tooth to restore its point
• Set the teeth with a saw set
• Remove burrs with a light finishing pass
Use a file that matches the tooth size. Keep the file level for crosscut teeth or use the proper angle for the saw design. Make the same number of strokes on each tooth when possible.
Saw sharpening takes practice. If the tooth pattern is badly damaged, a professional saw sharpener may produce a better result than trying to correct it by guesswork.

Using a Honing Guide or Sharpening Jig
A honing guide holds a blade at a repeatable angle. This is useful for chisels, plane irons, and some carving tools.
To use one:
Clean the blade and guide.
Set the blade projection for the desired angle.
Tighten the guide firmly.
Place the bevel on the stone.
Use smooth strokes across the abrasive.
Check for a burr and an even scratch pattern.
A guide does not solve every problem. If the stone is hollow, the guide may rock. If the blade is mounted crooked, the edge may become uneven. Check the setup before you start removing metal.
Freehand sharpening can be more flexible for knives, axes, and curved tools. The goal is not to use one method for every tool. The goal is to keep the bevel stable enough to create a clean edge.
Using a Bench Grinder Safely
A bench grinder can repair damaged edges quickly, but it can also overheat a tool in seconds. Excess heat may reduce the hardness of heat-treated steel.
Use a coarse or medium wheel designed for tool work. Keep the tool moving, and dip it in water often. If the edge changes color to blue or purple, it may have overheated.
Important safety rules include:
• Wear safety glasses or a face shield
• Keep the tool rest close to the wheel
• Do not wear loose clothing
• Stand to the side when starting the grinder
• Inspect wheels for cracks
• Never grind on the side of a wheel unless it is designed for that use
For many fine woodworking tools, a slow-speed grinder with a suitable wheel is safer and easier to control. Even then, finish the edge on a stone.
Common Sharpening Mistakes to Avoid
The most common mistake is changing the angle during each stroke. This creates a rounded bevel and makes the tool harder to sharpen.
Other problems include:
• Using too much pressure: Heavy pressure can damage the edge and wear the stone.
• Skipping grits: A fine stone cannot quickly remove deep scratches from a coarse stone.
• Ignoring the burr: A remaining burr makes a tool feel sharp for a moment but fail during use.
• Failing to flatten stones: A hollow stone creates uneven bevels.
• Overheating the steel: Heat can weaken the edge.
• Stropping too aggressively: Excess pressure rounds the cutting edge.
• Sharpening dirty tools: Dirt and rust can clog abrasives.
• Removing too much metal: Sharpen only as much as needed.
One lesson I often share is to stop chasing a perfect shine. A polished bevel can look impressive, but the edge still needs the right shape. A dull-looking edge with a clean, even bevel can cut better than a bright edge with a rounded tip.
How to Maintain a Sharp Edge
Regular honing is easier than full sharpening. Honing removes a small amount of metal and restores the edge before it becomes badly damaged.
For woodworking tools, hone when the tool starts to leave rough fibers or needs more pressure. For kitchen knives, hone or sharpen when the blade no longer slices food cleanly.
Good maintenance habits include:
• Wipe tools clean after use.
• Store blades so they do not hit other metal.
• Keep carbon steel dry and lightly oiled.
• Flatten water stones on a regular schedule.
• Replace worn abrasive surfaces.
• Avoid cutting hard materials with tools made for soft materials.
• Inspect edges before starting work.
A tool that is touched up often may need only a few minutes on a fine stone. A neglected tool may need coarse grinding and careful repair.
Safety Tips for Sharpening Hand Tools
Sharpening creates sharp edges, metal dust, and sometimes sparks. Set up your work area before you begin.
Use a stable bench with good lighting. Keep water, oil, and electrical equipment separated. If you use a grinder, clear flammable items from the area.
Protect your eyes from filings and fragments. Use gloves when handling rough tools, but avoid loose gloves near rotating machinery. Keep your hands behind the cutting edge and never test sharpness with your skin.
Children and pets should stay away from the sharpening area. Clean up metal filings and abrasive grit when you finish, especially if you work near food preparation areas.
Always follow the tool and equipment maker’s safety instructions. Different steels, stones, and grinders have different limits.
A Simple Sharpening Routine for Beginners
If you are new to how to sharpen hand tools, start with one chisel or kitchen knife. A small project teaches more than buying a large collection of sharpening gear.
Try this routine:
Clean the tool.
Inspect the bevel and edge.
Mark the bevel with a marker.
Select a medium stone.
Hold the angle and use light, even strokes.
Raise a burr along the full edge.
Move to a fine stone.
Remove the burr from both sides.
Strop lightly if needed.
Test the tool on a safe material.
Keep notes about the angle, abrasive, and results. This simple record helps you repeat what works. With practice, your hands will learn the correct angle much like they learn to write or play an instrument.
Frequently Asked Questions About How to Sharpen Hand Tools
What is the best way to sharpen hand tools?
The best method depends on the tool, its steel, and the damage. For chisels and plane irons, use a flat stone with a honing guide; for saws and axes, use a properly sized file before refining the edge with a stone.
How often should I sharpen hand tools?
Sharpen tools whenever they need extra force, leave rough cuts, or stop cutting cleanly. Light honing after regular use is better than waiting until the edge is badly damaged.
Can I sharpen hand tools without a grinder?
Yes. Stones, diamond plates, files, and strops can sharpen most hand tools. Manual methods are slower for major repairs but give you excellent control and avoid heat damage.
What angle should I use when sharpening a chisel?
A primary bevel of about 25 degrees works well for many woodworking chisels. A small microbevel near 30 degrees can make routine honing faster and support the cutting edge.
Why does my sharpened tool still feel dull?
The bevel may be uneven, the angle may be changing, or a burr may still be attached. Check the edge under good light, return to a fine abrasive, and use lighter strokes to remove the burr.
Is a honing guide necessary?
No, but it helps beginners create a steady angle. Experienced users may sharpen freehand, especially when working with knives, axes, and curved tools.
Can sharpening damage a tool?
Yes. Excessive grinding can remove too much metal, and high heat can weaken heat-treated steel. Use light pressure, keep the tool moving, and cool the edge often when using a grinder.
Conclusion
Learning how to sharpen hand tools is a practical skill that improves almost every workshop task. Use the right abrasive, keep the bevel steady, work through suitable grits, remove the burr, and test the edge safely.
Start with one tool and practice slowly. You do not need a costly system or a perfect mirror finish. You need a repeatable process and enough patience to let the abrasive shape the edge.
Sharpen one neglected tool today, then use it on a real project. Explore more tool-care guides, build a simple sharpening station, and share your results or questions in the comments.
