

You can cut stone with hand tools by scoring, splitting, and shaping it with patience and control.
If you have ever watched a rough block turn into a clean paver, step stone, or trim edge, you already know this work is part skill and part feel. Cutting stone with hand tools is not fast, but it is accurate, quiet, and deeply satisfying when done right. In this guide, I’ll walk you through the tools, methods, safety steps, and practical techniques you need to cut stone with hand tools the right way.
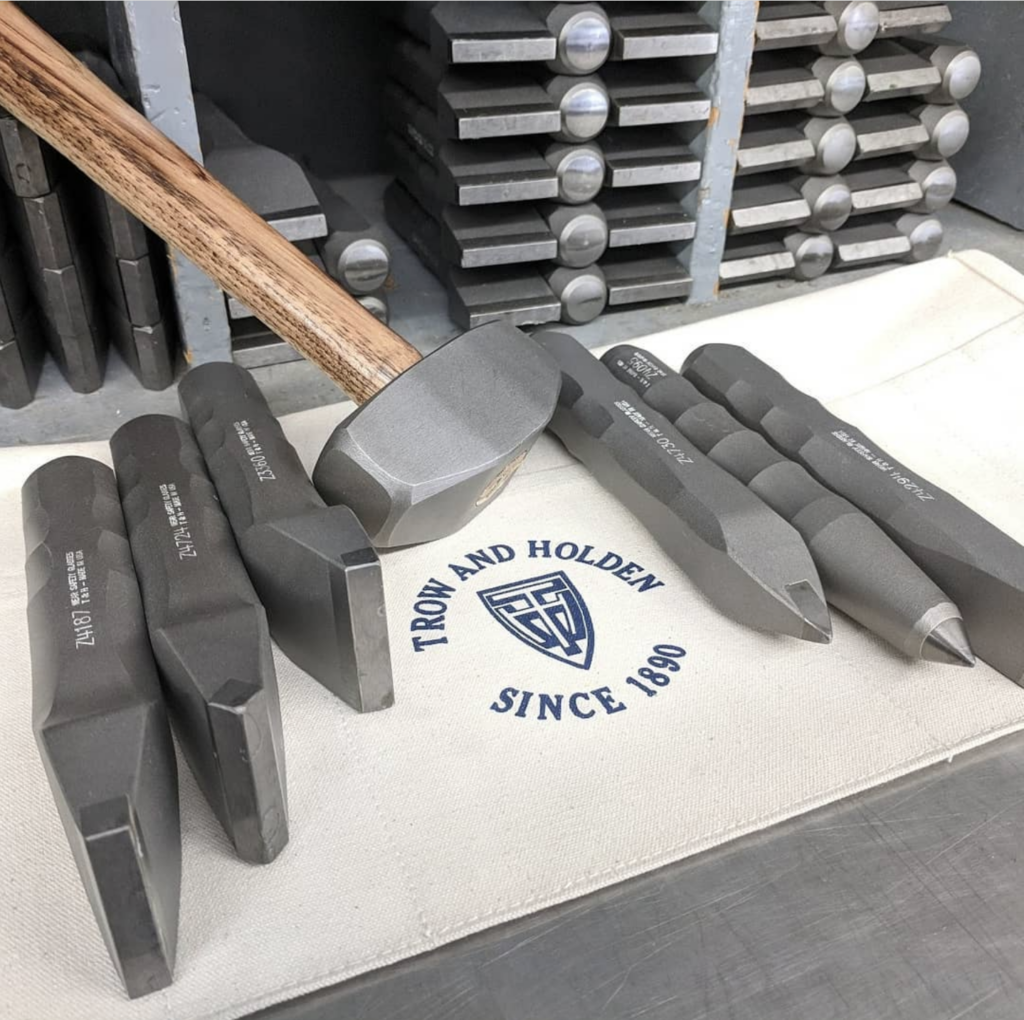
What it means to cut stone with hand tools
Cutting stone with hand tools means using manual tools to score, break, split, chip, and shape stone without powered saws or grinders. The goal is not always to slice through stone like wood. More often, the goal is to guide a clean fracture or remove small amounts of material until the shape looks right.
In my experience, this method works best when you respect the stone instead of forcing it. Stone has grain, layers, flaws, and natural weak points. If you learn how to read those lines, cutting stone with hand tools becomes much easier and much cleaner.
The process is common in masonry, landscaping, restoration work, and small stone projects at home. It is also useful when power is unavailable or when you want more control and less dust. That is why many masons still keep hand tools close, even in a shop full of machines.
Tools you need before you start
Before you cut stone with hand tools, gather the right tools for the job. The exact set depends on the stone type and the cut you want, but the basics are usually the same.
Useful hand tools include:
- Cold chisel: for splitting and trimming stone
- Mason’s hammer or club hammer: for striking chisels
- Hand point or pitching tool: for rough shaping and edge control
- Brick set or cape chisel: for more guided cuts on softer stone
- Mallet: for lighter, more controlled hits
- Straightedge and pencil or marker: for marking cut lines
- Square and measuring tape: for accurate layout
- Safety glasses: for eye protection
- Gloves: for grip and hand safety
- Dust mask or respirator: for dust control
- Clamps or a stable work surface: for keeping the stone steady
A lot of beginners try to cut stone with hand tools using the wrong hammer or a dull chisel. That usually leads to ugly breaks and wasted time. Sharp, solid tools make a bigger difference than most people expect.
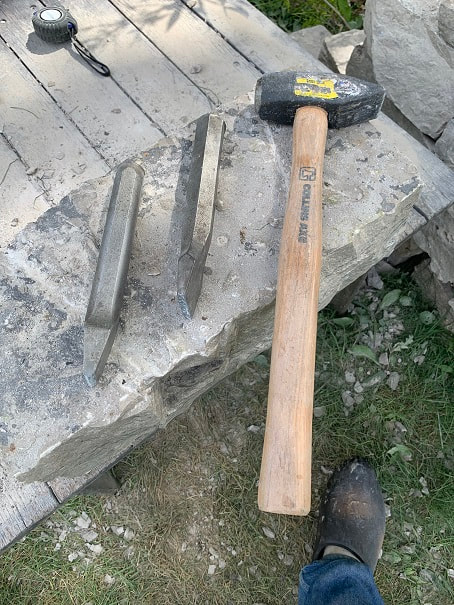
Choosing the right stone for hand cutting
Not every stone behaves the same. Some stones are soft and split cleanly. Others are dense and stubborn, and they punish sloppy work.
Good candidates for hand tool cutting include:
- Slate
- Limestone
- Sandstone
- Some types of soft fieldstone
- Masonry stone with visible layers or bedding planes
Harder stones like granite, quartzite, and very dense basalt are much harder to cut with hand tools. You can still chip and shape them, but it takes far more effort and time. In those cases, a powered cutter is often safer and more practical.
One thing I learned early: never assume two stones of the same type will cut the same way. Even within one pile, one piece may split beautifully while the next one fights you the whole way. Always test the stone first if you can.
How to prepare the stone for cutting
Preparation is half the job when you cut stone with hand tools. A clean layout line and stable setup reduce mistakes and make the cut much more predictable.
Follow these steps:
- Clean the surface so dust and grit do not hide your line.
- Mark the cut clearly with chalk, pencil, or a marker.
- Check both sides of the stone if the cut must go all the way through.
- Place the stone on a firm, stable surface.
- Support the stone so the cut line is easy to reach.
- Wear eye protection before you strike anything.
If the stone has a natural layer or grain, try to cut along it when possible. This is especially helpful with slate and sedimentary stones. Fighting the grain often leads to ragged breaks.
How to cut stone with hand tools step by step
There are a few common ways to cut stone with hand tools. The method you choose depends on whether you want a split, a trimmed edge, or a more finished shape.
1. Mark the cut line
Start by marking the line as clearly as possible. A straight edge helps a lot here. If the line is off, the final cut will be off too, because hand cutting follows your layout more than your muscle.
For long cuts, mark both the top and the sides. This helps you stay aligned as you work. When I was learning, I made the mistake of trusting only the top line. The cut drifted, and the stone told me about it in the final shape.
2. Score the surface
Use a cold chisel and hammer to score a shallow groove along the line. Do not try to go deep on the first pass. Light, controlled strikes are better than hard blows.
Work from one end to the other. A score line helps the stone break where you want it to. Think of it like giving the stone a map instead of a command.
3. Deepen the groove gradually
After the first score, go back over the line and deepen it a little more. Keep the chisel angle steady. Try to make the groove even.
If the stone is soft, the groove may be enough to split it cleanly. If the stone is harder, this step helps weaken the line before you try to break it. Patience matters here.
4. Split the stone along the line
Once the groove is deep enough, strike with a bit more force along the score line. For larger pieces, you may be able to support the stone on each side of the cut and let pressure help the break.
If the stone does not split immediately, do not panic and hammer wildly. Reset, inspect the line, and keep the strikes controlled. I have seen more bad cuts from impatience than from bad tools.
5. Trim and shape the edge
After the split, the edge will often be rough. Use the chisel and hammer to remove high spots and shape the stone more neatly. This is where hand tools shine, because you can fine-tune the edge a little at a time.
For a cleaner finish, chip small bits off the edge instead of taking big bites. Think of it like carving, not chopping. Small corrections are easier to control.
6. Dress the face if needed
If the project needs a flatter or more refined surface, continue dressing the stone with repeated light strikes. This is slower work, but it gives you better control over the final look.
For some projects, a rough finish is perfect. For others, such as visible edging or restoration work, the finish matters a lot. Match the amount of refinement to the job.

Best hand tools for different stone cutting jobs
Different jobs call for different tools. If you match the tool to the task, you will save energy and get better results.
Here is a simple guide:
- Cold chisel: Best for general splitting and trimming
- Brick set: Best for softer masonry stone and guided cuts
- Mason’s hammer: Best for striking chisels with control
- Club hammer: Best for heavier strikes on thicker stone
- Pitching tool: Best for rough shaping edges
- Hand point: Best for breaking down uneven areas
- Tooth chisel: Best for dressing and smoothing in stages
For most home projects, a cold chisel and hammer are enough to start. If you plan to cut stone with hand tools often, it is worth investing in higher quality chisels. A cheap chisel can mushroom, dull quickly, or skid off the surface.
Safety rules you should not skip
Stone work looks simple until a chip flies into your face or a tool slips. Safety is not optional when you cut stone with hand tools.
Keep these rules in mind:
- Wear eye protection at all times
- Wear gloves for grip and hand protection
- Use a dust mask when dry chips and dust are present
- Keep your feet stable and your stance balanced
- Hold chisels firmly but never put your hand near the strike zone
- Inspect tools before use for cracks or damage
- Never strike a damaged chisel or hammer
- Keep bystanders away from the work area
Stone chips can be sharp like broken glass. Even small pieces can cause injuries. A little caution saves a lot of trouble.
Common mistakes when cutting stone by hand
Most mistakes happen because people rush or guess. The good news is that these errors are easy to avoid once you know what to look for.
Common mistakes include:
- Using a dull chisel
- Starting with heavy strikes instead of light scoring
- Ignoring the stone’s natural grain or bedding
- Cutting without securing the stone
- Marking a line too lightly to follow
- Trying to force hard stone with hand tools alone
- Wearing no eye protection
- Chipping too much at once
One lesson I learned the hard way: if the cut is not going your way, stop early. A small correction is easy. A bad break is permanent.
How to get cleaner cuts
Cleaner cuts come from rhythm, not brute force. A steady method almost always beats a hard swing.
Use these tips:
- Keep your chisel angle consistent
- Make several light passes before striking hard
- Follow natural lines in the stone when possible
- Support the stone so vibration helps the split
- Trim from both sides if the edge is chipping out
- Use sharp tools only
- Take breaks when your hands get tired
If you want the cleanest result possible, think in layers. First, mark. Then score. Then deepen. Then split. Then trim. That sequence keeps the work under control.
When hand tools are the right choice
Cutting stone with hand tools is not always the fastest option, but it can be the smartest one.
Hand tools make sense when:
- The project is small
- You need quiet work
- You want low dust
- The stone is softer or naturally layered
- You need fine control near a finished surface
- You are working in a place without power
- The budget is limited
Hand tools also work well for repair jobs where a power saw would be too aggressive. In old masonry, gentle methods often protect the surrounding material better than fast ones.
When to use powered tools instead
There are times when hand tools are not the best answer. Being honest about that is part of doing the job well.
Consider powered tools if:
- The stone is very hard
- You need many identical cuts
- The material is thick and dense
- Speed matters more than finish
- You are cutting structural stone that demands exactness
I respect hand work, but I also respect efficiency. If the stone fights every step, a powered cutter may be the safer choice. Good craftsmanship includes knowing when to switch methods.
Real-world example from the field
I once had to trim a stack of limestone pieces for a garden border, and there was no point dragging out a saw. The stone was soft enough that a cold chisel and hammer gave me clean enough breaks with very little cleanup. I scored each line twice, then made short controlled strikes until the stone followed the mark.
The biggest surprise was how much better the edges looked when I slowed down. On the first piece, I hit too hard and lost a corner. On the next ones, I eased into the cut and got a much cleaner line. That day reminded me that stone rewards patience like almost nothing else.
Benefits and limitations of hand cutting stone
Like any method, cutting stone with hand tools has strengths and limits. Knowing both helps you choose well.
Benefits include:
- Low cost
- Better control
- Less noise
- Less dust
- No power source needed
- Useful for small or delicate jobs
Limitations include:
- Slower work
- More physical effort
- Harder on dense stone
- Less precise on some cuts
- Greater learning curve for clean results
The key is to match the method to the job. Hand tools are excellent, but they are not magic. They work best when used with patience and the right stone.
Maintenance tips for hand tools
Sharp, well-kept tools make every cut easier. Dull tools waste energy and damage stone.
Keep your tools in good shape by:
- Sharpening chisels when edges dull
- Removing mushroomed metal from striking ends
- Storing tools dry to prevent rust
- Checking hammer heads for looseness
- Replacing cracked or bent tools
- Cleaning stone dust off after each job
This is one of those small habits that pays off over time. A well-maintained chisel feels like an extension of your hand. A neglected one feels like a fight.
Frequently Asked Questions of how to cut stone with hand tools
Can all types of stone be cut with hand tools?
No, not all stone is a good fit for hand cutting. Softer and layered stones are much easier, while dense stones like granite can be very difficult and slow to shape by hand.
What is the best tool to cut stone by hand?
For most jobs, a cold chisel and mason’s hammer are the best starting point. They give you enough control for scoring, splitting, and trimming without needing a large tool set.
How do you keep stone from cracking in the wrong place?
Score the cut line first, work in small steps, and support the stone well. Cracks usually go off course when the stone is hit too hard too soon or when the natural grain is ignored.
Is it safe to cut stone with hand tools indoors?
It can be done, but dust control is very important. Use ventilation, wear a dust mask, and clean the area carefully because stone dust can spread fast and settle on everything.
How do you get a straight edge when cutting stone?
Use a clear layout line, a straightedge, and steady chisel control. Straight edges come from careful scoring and repeated small corrections, not from one heavy blow.
Conclusion
Cutting stone with hand tools is a skill built on patience, good layout, and steady hands. When you choose the right tools, respect the stone’s natural lines, and work in small steps, you can get clean, useful results without relying on power equipment.
The more you practice, the more the stone starts to make sense. Start with a soft stone, keep your cuts simple, and build your confidence one piece at a time. If this guide helped, try the method on a small project, read more on stonework, or leave a comment with your own experience.
