

You can make a knife with hand tools by shaping steel, heat-treating it, and finishing a safe handle.
Learning how to make a knife with hand tools is one of those old-school skills that feels simple on the surface, but rewards patience, care, and good judgment. If you want a handmade blade that works well and lasts, the real secret is not force. It is control, steady technique, and knowing what each step is supposed to do. I have found that the best hand-built knives usually come from taking your time, checking your work often, and resisting the urge to rush the steel.

What you need before you start
Before you make a knife with hand tools, it helps to plan the entire process from the start. A knife is more than a sharpened piece of steel. It needs the right shape, the right hardness, and a handle that feels secure in your hand.
You do not need a full shop, but you do need a few basics:
- Steel suitable for knives, such as carbon steel
- A hacksaw or metal-cutting saw
- Files for shaping and refining
- A hand drill or brace and bit
- Sandpaper in several grits
- A clamp or vise
- A marker, ruler, and center punch
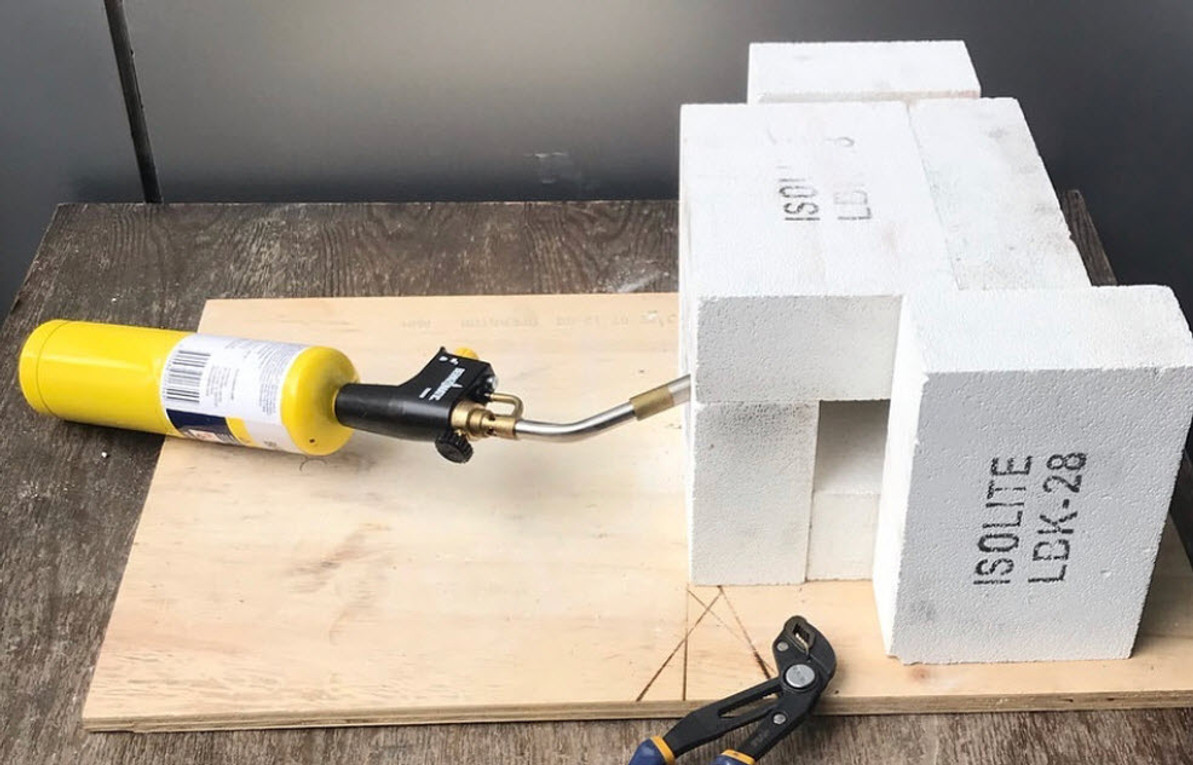
- Heat source for hardening and tempering
- Quench oil or another appropriate quench medium
- Handle material such as hardwood, micarta, or G10
- Epoxy and pins for handle assembly
If you are new to this, I strongly recommend starting with a simple fixed-blade design. Complex shapes make it easier to slip, overheat the steel, or ruin symmetry. A clean drop-point or small utility knife is a much better first project.
Choosing the right steel
Steel choice matters a lot when you make a knife with hand tools. For beginners, carbon steels are usually easier to work with because they respond well to filing, grinding, and heat treatment. Common choices include 1084, 1095, and 1075.
Each steel has trade-offs:
- 1084 is popular because it is forgiving and heat treats well
- 1095 can take a very sharp edge, but heat control matters more
- 1075 is slightly easier for beginners and still makes a useful blade
- Stainless steel is harder to process by hand and is usually not the best first choice
One mistake I see often is people trying to use random scrap steel. That can work only if you know exactly what the metal is. If you do not know the composition, you may end up with a blade that will not harden correctly or will chip too easily.
Designing the knife shape
A good knife starts with a good outline. Draw your design on paper first, then transfer it to the steel. Keep the shape practical and balanced.
Think about these parts:
- Blade length
- Handle length
- Tang type
- Point style
- Edge geometry
- Grip comfort
For a first knife, simple works best. A full tang design is easier because the handle scales attach directly to the steel. That makes the build more stable and much easier to assemble with hand tools.
A practical pattern usually includes:
- A blade between 3 and 5 inches
- A handle long enough for a full grip
- A spine thick enough to stay strong
- A point shape that is not too delicate
If the design looks nice but feels awkward on paper, it will feel worse in your hand. I always tell beginners to hold a cardboard mockup before cutting steel. That tiny step can save hours of rework.

Cutting out the rough shape
Once your pattern is ready, trace it onto the steel and cut out the blank. A hacksaw works fine if you are patient. Slow, straight cuts help more than fast, uneven ones.
Helpful tips:
- Clamp the steel tightly before cutting
- Cut slightly outside your line
- Save time by drilling holes before cutting tight curves
- Use short, steady strokes with the saw
- Let the tool do the work
When I first started making knives with hand tools, I tried to force every cut. That just wore me out and bent my line work. A relaxed grip and steady rhythm give better results and fewer mistakes.
Shaping the blade with files
Filing is where the knife starts to look real. This step takes time, but it gives you control that power tools often hide. A good file can shape the blade, define the bevels, and clean up rough edges.
Use files to:
- Smooth the profile
- Refine the point
- Shape the bevels
- Even out the tang
- Remove saw marks
Work in one direction and keep checking both sides for symmetry. If one bevel gets deeper than the other, the knife will cut unevenly and may look crooked. This is where patience pays off.
A simple method is to mark the bevel line with a marker before filing. Then remove metal slowly until the line is gone. That gives you a clear visual guide and keeps the blade consistent.
Drilling the handle holes
If you are making a full tang knife, drill the handle pin holes before heat treatment. Hardened steel is much harder to drill by hand. A hand drill or brace can do the job, but it takes a firm grip and patience.
Best practices:
- Mark hole locations carefully
- Use a center punch so the bit does not wander
- Start with a small pilot hole
- Increase bit size gradually
- Keep the steel clamped securely
Take your time with alignment. If the holes are uneven, the handle scales can shift and look messy. I have seen builders rush this part and spend twice as long fixing a crooked handle later.
Refining the edge before heat treatment
Before hardening, bring the blade close to its final shape, but leave a little extra thickness at the edge. A blade that is too thin before heat treatment can warp or overheat too quickly.
What to aim for:
- Clean bevels
- Even thickness along the edge
- Smooth transitions at the spine and tang
- No deep file marks or sharp stress points
You do not need a razor edge yet. In fact, leaving the edge slightly thick helps protect it during heat treatment. Think of it like roughing in a wall before the final coat of paint.
Hardening the blade
Heat treatment is where the steel changes from soft and workable to hard and usable. This step is one of the most important parts of how to make a knife with hand tools.
The basic hardening process usually follows these steps:
- Heat the blade evenly until it reaches the proper non-magnetic stage or the temperature recommended for the steel you are using.
- Hold the temperature long enough for even heating.
- Quench the blade in the proper medium, often oil for many carbon steels.
- Allow it to cool fully before moving to the next step.
Important cautions:
- Do not overheat the blade
- Do not quench in the wrong medium
- Keep your hands and face protected
- Follow safe handling practices around hot metal and oil
I have learned that uneven heating is one of the most common reasons a blade warps. Rotate the blade gently in the heat so all areas warm evenly. This is a lot like warming bread in a pan: if one side cooks too fast, the whole result suffers.
Tempering the blade
A freshly hardened blade is usually too brittle. Tempering reduces that brittleness and brings the steel into a useful balance of hardness and toughness. Skipping this step is one of the biggest mistakes a beginner can make.
General tempering process:
- Clean the blade after quenching
- Place it in a controlled heat source
- Hold it at the proper tempering temperature for the steel type
- Let it cool fully
- Repeat if needed, depending on the steel and method
The exact temperature depends on the steel, so accuracy matters. Reliable heat treatment guides from steel manufacturers and metallurgical references are worth following closely. A blade that is too hard may chip. A blade that is too soft will dull fast.
Sanding and finishing the blade
After heat treatment, refine the blade surface. This is where you remove scale, scratches, and small flaws from the earlier steps. Hand sanding takes time, but it gives the knife a clean, honest finish.
A good sanding sequence might look like this:
- Start with a lower grit to remove rough marks
- Move step by step to finer grits
- Sand evenly along the blade
- Keep the scratch pattern consistent
- Wipe the blade often so you can inspect progress
If you want a satin finish, stop at a mid-range grit and keep the strokes even. If you want a more polished look, keep going with finer grits. Either way, clean sanding makes the knife feel intentional instead of unfinished.
Making and attaching the handle
A knife handle should feel secure, comfortable, and balanced. The handle is where the tool meets your hand, so this part deserves real attention. I have handled beautiful blades that were ruined by sloppy handles, and plain blades that felt excellent because the grip was right.
For a full tang handle, the basic process is:
- Cut two handle scales to shape
- Drill matching holes for pins
- Roughen the mating surfaces for better epoxy grip
- Apply epoxy
- Clamp the scales to the tang
- Insert pins and let the handle cure
- Shape the handle after curing
Good handle materials include:
- Hardwood
- Micarta
- G10
- Stabilized wood
Shape the handle so it fills the hand without sharp edges. Slight rounding in the right places improves comfort and control. A handle should feel like a handshake, not a brick.
Shaping and smoothing the handle
Once the handle is attached, shape it carefully with files and sandpaper. This is your chance to make the knife feel alive in the hand. A well-shaped handle can make a simple blade feel much better.
Focus on:
- Removing hard corners
- Adding finger comfort without deep grooves
- Balancing the front and rear of the handle
- Smoothing pin heads and transitions
Do not make the handle too slick. A little texture helps with grip, especially if your hands are wet or sweaty. At the same time, avoid rough spots that can cause blisters during long use.
Sharpening the blade
Once the knife is fully finished, sharpen it carefully. A hand-sharpened blade should come to a consistent edge with no waviness. The goal is not just sharpness. The goal is control.
Simple sharpening advice:
- Start with a coarse stone if the edge is dull
- Maintain a steady angle
- Use even strokes on both sides
- Move to finer stones or abrasives for refinement
- Test carefully, not recklessly
A good edge should cut cleanly without feeling fragile. The first time you use a handmade knife that slices smoothly, the whole process suddenly makes sense. It is one of the most satisfying parts of making a knife with hand tools.
Safety tips you should not skip
Knife making involves sharp edges, hot metal, and hand tools that can cause injury if you rush. Safety is not optional. It is part of the craft.
Keep these rules in mind:
- Wear eye protection
- Clamp the work securely
- Keep fingers away from saw and file paths
- Use heat-resistant gloves around hot steel
- Work in a well-ventilated space
- Keep flammables away from the quench area
- Store finished knives safely
I also recommend taking breaks. Fatigue causes bad cuts, crooked lines, and burned hands. Most accidents happen when people try to “just finish one more step” while tired.
Common mistakes when making a knife with hand tools
Every beginner makes mistakes, but the good news is that most of them are avoidable. The trick is knowing where problems usually start.
Common issues include:
- Rushing the layout
- Using the wrong steel
- Cutting too close to the line too early
- Making uneven bevels
- Overheating the blade
- Skipping tempering
- Attaching a handle before planning the final shape
- Sharpening too aggressively
One of my biggest early mistakes was sanding too soon and too hard. I kept trying to “save time,” but I only created more work. That lesson stuck with me: slow work often becomes fast work in the end.
Benefits and limitations of hand tool knife making
Making a knife with hand tools has real benefits. It builds skill, improves patience, and gives you more control over the final result. It is also more accessible if you do not have power tools or a full workshop.
Benefits include:
- Lower equipment cost
- Better understanding of blade geometry
- More control over shaping
- Less noise and fewer moving parts
- Strong sense of craftsmanship
Limitations include:
- More physical effort
- Longer build time
- Harder steel shaping
- Less precision if you rush
- Greater need for patience and planning
That trade-off is part of the charm. Hand tools slow you down just enough to make you pay attention, and that attention usually shows in the finished knife.
Practical example of a simple first knife
If you want a realistic first project, try a small full-tang utility knife. Keep the shape simple, the handle straight, and the blade modest in size. This makes the process manageable while still teaching you the full workflow.
A good beginner build might include:
- 3.5-inch blade
- Full tang
- Drop-point profile
- Wooden or micarta handle scales
- Straight, simple bevels
This kind of knife teaches the core skills without overwhelming you. It is like learning to cook with a good basic recipe before trying a five-course meal.
Frequently Asked Questions
FAQ on how to make a knife with hand tools
What is the easiest knife to make with hand tools?
A simple full-tang utility knife is usually the easiest to make. It has a straightforward shape, simple assembly, and fewer weak points than more complex designs.
Do I need a forge to make a knife with hand tools?
A forge helps, but some beginners use other heat sources for heat treatment if they already understand the steel and process. The most important thing is reaching the correct temperature safely and consistently.
What steel is best for a beginner?
1084 is often recommended because it is forgiving and heat treats well. It is a practical choice for learning how to make a knife with hand tools without adding too much complexity.
Can I make a knife without power tools?
Yes, you can make a knife with hand tools alone. It takes more time and effort, but files, a hacksaw, a drill, sandpaper, and good patience are enough for a simple blade.
How do I know if the knife is heat treated correctly?
A properly heat-treated blade should be hard enough to hold an edge but not so brittle that it chips easily. Trusted steel heat-treating charts and careful tempering are the best way to get consistent results.
Conclusion
Making a knife with hand tools is part craft, part discipline, and part problem-solving. If you choose the right steel, plan your shape, file carefully, heat treat well, and finish the handle with care, you can build a knife that feels personal and performs reliably. The process teaches patience in a way few projects do.
If you are ready to try it, start small and keep your first design simple. Learn from each step, note what worked, and improve the next build. If this guide helped, explore more knife-making resources, keep practicing your technique, and leave a comment with your own experience or questions.
