

You can cut a clean groove in wood with hand tools using a marking gauge, chisel, saw, and careful layout.
Cutting a groove in wood with hand tools is one of those skills that looks simple until you try it yourself. The good news is that it is very manageable once you understand the process. With the right layout, sharp tools, and a steady hand, you can cut grooves for shelves, joinery, panels, trim, and more with excellent control and a very clean result.
What a Groove in Wood Actually Is
A groove is a long, narrow channel cut into the face or edge of a board. Woodworkers use grooves to hold panels, guide parts, or create joinery like tongue and groove joints. In simple terms, it is a straight cut that removes a strip of wood so another piece can fit into it.
When people search for how to cut a groove in wood with hand tools, they usually want a method that is accurate, quiet, and does not require a powered router. Hand tools can do this beautifully. In fact, a well-cut groove often looks cleaner by hand because you control every part of the cut.
Tools and Materials You Will Need
You do not need a big tool kit to cut a groove well. A few sharp hand tools are enough if you use them correctly.
• Marking gauge or knife: for laying out the groove edges
• Rule and square: for accurate measurements and straight lines
• Saw: a backsaw, tenon saw, or rip saw works well
• Chisel: the width should match or slightly undercut the groove width
• Mallet: useful for controlled chisel strikes
• Bench vise or clamps: to hold the board steady
• Pencil and tape measure: for rough layout
• Scrap wood: for practice and test cuts
Sharpness matters more than brand names here. A dull chisel can crush fibers instead of slicing them, which makes the groove rough and harder to control. I have learned the hard way that a sharp edge saves time and reduces mistakes almost every single time. 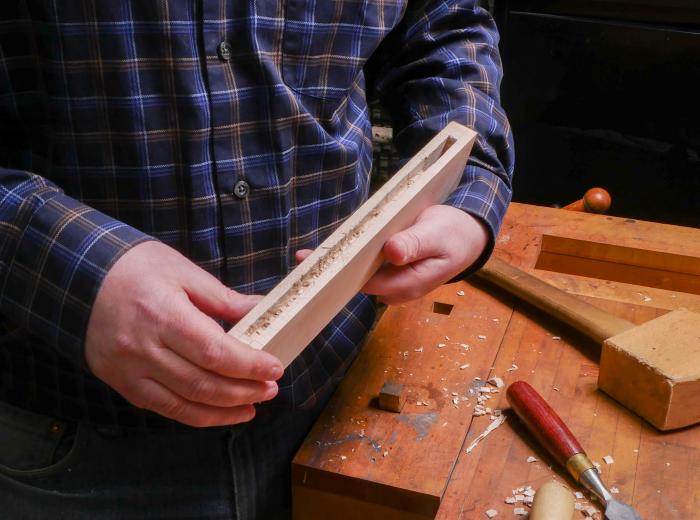
How to Cut a Groove in Wood with Hand Tools Step by Step
The safest and cleanest way to cut a groove in wood with hand tools is to mark it well, cut the edges first, remove the waste in small sections, and then flatten the bottom.
1. Mark the Groove Carefully
Start with exact measurements. Mark both edges of the groove using a rule and marking gauge. A knife line is better than a pencil line because it gives your saw and chisel a true edge to follow.
If the groove needs to be centered, measure from both sides of the board. If it needs to be parallel to an edge, use a marking gauge set to the right offset. Good layout is the foundation of the whole job.
2. Secure the Workpiece
Clamp the board firmly to a bench or place it in a vise. A moving board makes clean groove cuts much harder. You want both hands free when sawing and chiseling.
Try to position the work so the groove is at a comfortable height. If you are straining your wrist or shoulder, your cut will wander. Comfort is not a luxury here. It is part of accuracy.
3. Score the Groove Lines
Use a marking knife or chisel to deepen the layout lines. This scoring step helps prevent tear-out and gives the saw teeth a crisp starting point. It also makes the final walls cleaner.
I often re-score the lines after checking the layout one last time. That small pause has saved me from cutting the wrong face more than once. Rushing this stage is one of the most common beginner mistakes.
4. Saw Down the Groove Edges
If the groove is narrow enough, you can saw along both marked edges first. Set the saw carefully into the knife line and keep the blade vertical. Use slow, even strokes until you reach the required depth.
Do not force the saw. Let the teeth do the work. If the groove runs across the grain, go even slower to reduce splintering. If you are cutting with the grain, the saw usually tracks more easily.
5. Remove the Waste with a Chisel
Once the edges are sawn, use a chisel to remove the waste in the middle. Chop straight down in small increments. Work from both ends toward the center if the groove is long.
Do not try to remove too much at once. Thin layers are safer and give you more control. If the groove is deep, make a few shallow passes instead of one heavy cut.
6. Flatten and Clean the Bottom
After most of the waste is out, pare the bottom smooth with a sharp chisel. Keep the bevel up or down depending on the cut you need, but always work slowly. A flat bottom is important if the groove will hold another piece of wood.
A smooth groove bottom also helps with fit and alignment. In my own work, I check the bottom with a small straightedge or the chisel blade itself. If I see high spots, I take them down one pass at a time. 
Best Hand Tool Methods for Cutting a Groove
There is more than one way to cut a groove in wood with hand tools. The best method depends on the width, depth, and location of the groove.
Saw and Chisel Method
This is the most common method for beginners and experienced woodworkers alike. You saw the edges first, then remove the waste with a chisel. It is accurate and works for most groove sizes.
This method is ideal when you want crisp sides and a flat bottom. It also gives you better control than trying to chop the whole groove with only a chisel.
Chisel-Only Method
A chisel-only approach works for short grooves or shallow cuts. You score the lines, then make repeated controlled chops to remove material. This method takes more patience but can be very effective.
I use this approach when I need a quick groove for a small shop project and do not want to set up a saw cut. The key is to stop often and check depth. It is easy to go too far if you get comfortable and lose focus.
Plow Plane Method
A plow plane is one of the best traditional tools for cutting grooves by hand. Once set, it cuts a consistent groove along the grain with very little cleanup. It is especially useful for cabinet work and joinery.
If you plan to cut grooves often, a plow plane is worth learning. It gives very straight results and can save a lot of time on repeat work. Still, the saw and chisel method remains the most flexible for most homes and shops.
How to Get a Clean, Accurate Groove
Accuracy comes from habits, not luck. The cleanest grooves usually come from a few simple rules.
• Mark from a known reference edge every time
• Keep tools sharp
• Cut shallow at first, then deepen gradually
• Check depth often with a ruler or gauge
• Use scrap wood for practice before the real cut
• Support the board so it does not flex
A common problem is cutting slightly outside the line on the first pass. That seems small, but it can throw off the fit. The trick is to stay just inside the lines until the groove is fully formed, then fine-tune the walls.
Wood grain also matters. Dense hardwoods like oak and maple need more patience than softwoods like pine. I have found that softer woods cut faster but can bruise more easily, so the hand pressure needs to stay light and clean. 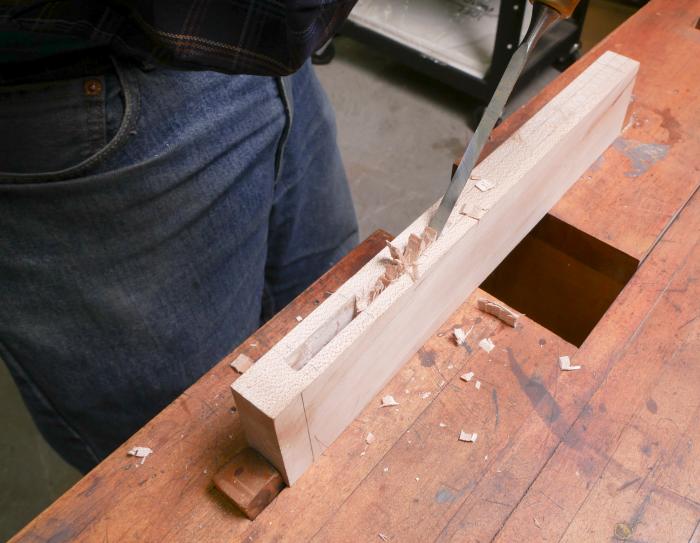
Common Mistakes to Avoid
Even a simple groove can go wrong if the setup is sloppy. These are the errors I see most often.
• Using a dull chisel or saw
• Measuring only once instead of checking twice
• Cutting too deeply on the first pass
• Chiseling with the grain too aggressively
• Not securing the workpiece well enough
• Leaving the groove walls ragged
• Forgetting to match the groove width to the part that fits into it
The biggest mistake is usually impatience. People want to clear the waste quickly, but hand tools reward control. Think of it like carving a path through ice. If you rush, you slip. If you take small, sure cuts, the result is much better.
Choosing the Right Groove Width and Depth
The groove size depends on what it needs to hold. For shelf panels, the groove must fit the panel thickness with a little room for movement. For joinery, the fit may need to be tighter and more precise.
A good rule is to measure the mating part first, then cut the groove to match. If wood movement matters, allow a little extra space so seasonal expansion does not cause cracking or binding. Industry woodworking references consistently emphasize that wood changes size with humidity, especially across the grain.
If you are unsure, test on scrap. That small test piece can tell you more than guessing ever will. It also helps you adjust your chisel angle and saw start before touching the final board.
Safety Tips for Hand Tool Groove Cutting
Hand tools are safer than many power tools, but they still demand respect. A chisel can slip. A saw can jump. A board can move at the worst time.
• Keep your hands behind the cutting edge whenever possible
• Clamp the work securely
• Cut away from your body
• Wear eye protection if chips are flying
• Store sharp tools safely when not in use
• Work in good light so you can see your lines clearly
I always slow down when my hands are tired. That is when mistakes happen. If the cut starts to feel awkward, stop and reset the work rather than forcing it through.
When Hand Tools Are the Better Choice
Many people assume a router is always the fastest way to cut a groove. That can be true in some shops, but hand tools have real advantages.
• Less noise
• Better control in small spaces
• No power cord or battery needed
• Lower cost for beginners
• Stronger sense of craftsmanship
• Great for repairs and one-off projects
For example, if I am working on a small bookcase shelf or a repair on an older piece of furniture, I often prefer hand tools. They are quieter, easier to set up, and less likely to remove too much material. For delicate work, that matters a lot.
Practical Projects That Use Grooves
Once you learn how to cut a groove in wood with hand tools, a lot of projects open up.
• Cabinet backs
• Drawer bottoms
• Shelf supports
• Frame and panel joinery
• Tongue and groove boards
• Decorative edge details
• Wooden jigs and shop fixtures
Grooves are one of those hidden woodworking skills that show up everywhere. You may not notice them at first, but they help hold furniture together and make designs more stable.
Frequently Asked Questions of how to cut a groove in wood with hand tools
What is the easiest hand tool for cutting a groove in wood?
A saw and chisel combo is the easiest for most people. It gives you good control, and you do not need a specialized plane to get started.
Can I cut a groove without a router?
Yes, you can cut a groove in wood with hand tools very effectively. A marking gauge, saw, and chisel are enough for most basic woodworking tasks.
How do I keep the groove straight?
Use a sharp knife line, clamp the board firmly, and start the saw slowly in the marked line. Checking your depth and angle often helps keep the cut true.
What if the groove bottom is uneven?
Use a sharp chisel to pare down the high spots in thin passes. A small straightedge can help you find uneven areas before you fit the mating piece.
Should the groove be tight or loose?
It should usually be a light, controlled fit, not forced tight. If the groove holds another board, leave a little room for wood movement so the joint does not bind later.
Conclusion
Learning how to cut a groove in wood with hand tools gives you more control, better fit, and a stronger feel for woodworking as a craft. Once you master the layout, edge cuts, waste removal, and cleanup, the process becomes much easier than it first looks.
Start with a scrap board, keep your tools sharp, and work in small, careful passes. That approach will teach you faster than trying to rush the cut. If you want, keep practicing on simple shop projects and leave a comment with the groove-cutting method you use most.
