

You can cut a clean dado with hand tools using careful marking, a sharp saw, chisels, and steady patience.
A dado is one of those joints that looks simple when it’s done right and frustrating when it’s not. I’ve cut plenty of them by hand, and the truth is this: if you can mark accurately and stay patient, you can make a crisp, professional groove without power tools. In this guide, I’ll walk you through how to cut a dado with hand tools in a way that is practical, precise, and realistic for real shop work.

What a dado is and why it matters
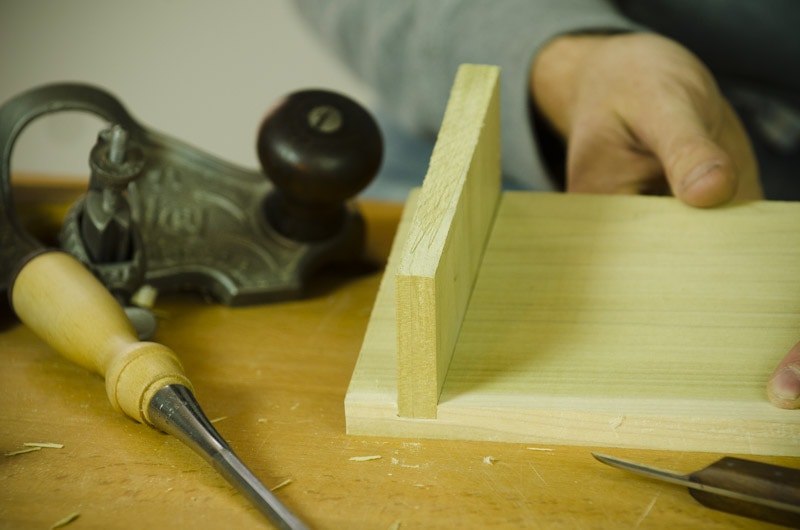
A dado is a flat-bottomed groove cut across the grain of wood. It is often used to hold shelves, cabinet sides, dividers, and other parts that need a strong mechanical fit. When you learn how to cut a dado with hand tools, you gain more control over fit, depth, and surface quality.
Compared with a simple butt joint, a dado adds more glue surface and helps parts stay aligned. That is why cabinetmakers, furniture builders, and woodworkers still use it often. It is a small detail that can make a big difference in strength and accuracy.
A good dado should be:
- Straight from end to end
- Even in depth
- Clean on the walls
- Flat on the bottom
If any of those are off, the joint can feel loose, proud, or out of square. That is why the process matters as much as the cut itself.
Tools you need to cut a dado by hand
You do not need a crowded bench full of tools. You only need a few reliable ones, and sharpness matters more than brand names. When I first started cutting dadoes by hand, I learned fast that a dull chisel wastes time and makes the work feel twice as hard.
Here is the basic tool list:
- Marking gauge or marking knife
- Try square
- Sharp pencil for rough layout
- Back saw or dovetail saw
- Chisels in a few widths
- Mallet
- Straightedge or ruler
- Clamps
- Scrap wood for test cuts
Helpful extras:
- Router plane for flattening the bottom
- Shoulder plane for refining walls
- Low-angle block plane for cleanup
- Blue tape or painter’s tape for layout support
The most important rule is simple: use sharp tools. A sharp chisel slices fibers cleanly. A dull one tears the wood and makes the dado look ragged.
How to mark out a dado accurately
Accurate layout is the heart of the job. If the marking is off, the cut will be off no matter how careful you are. I always say the dado begins long before the first saw stroke.
Follow these steps:
Mark the location
- Use a ruler, marking gauge, or story stick to place the dado.
- Measure from the same reference edge every time.
Mark the width
- Scribe both sides of the dado with a marking knife for best accuracy.
- If you use a pencil, keep the lines thin and clear.
Mark the depth
- Set your marking gauge to the desired depth.
- Scribe the depth line across both edges of the board.
Check square
- Use a try square to confirm the lines are square to the edge.
- A crooked layout creates a crooked joint.
A marking knife is better than a pencil for fine work because it gives your saw and chisel a small groove to register against. That tiny detail can save you from drifting off line.
The best way to cut a dado with hand tools
The cleanest method is usually a saw and chisel approach. You score and define the edges first, then remove the waste in stages. This keeps the walls crisp and reduces tear-out.
Here is the full process for how to cut a dado with hand tools:
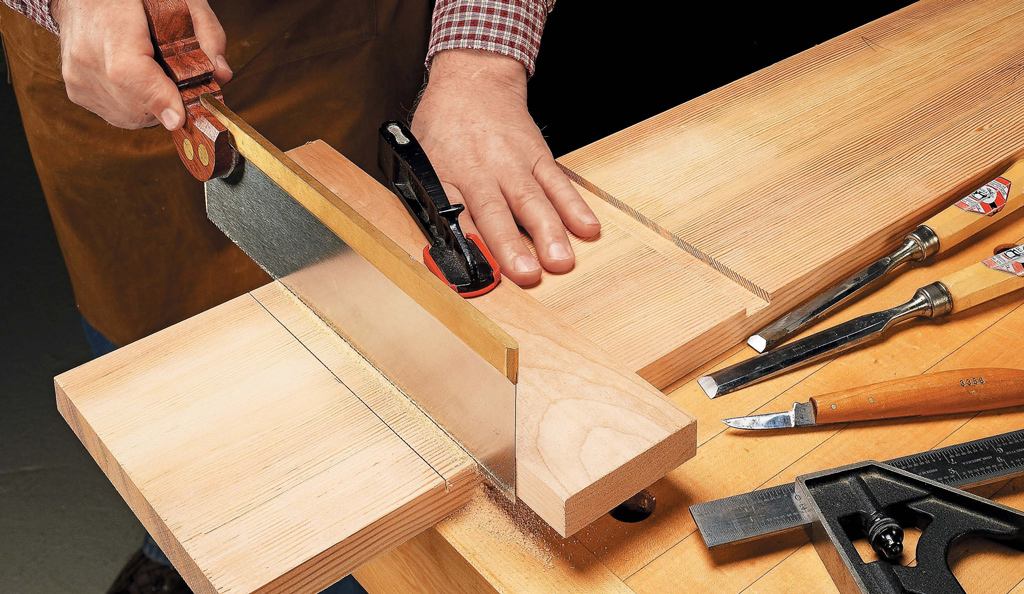
Cut the shoulders first
- Use a backsaw or dovetail saw.
- Saw down carefully on both layout lines to the depth line.
- Stay just on the waste side of the line.
Chop the waste in the middle
- Place a chisel inside the dado area.
- Strike lightly with a mallet to remove small sections.
- Work in shallow layers instead of trying to remove everything at once.
Clean up the bottom
- Pare the bottom flat with a chisel.
- Work with the grain when possible.
- Use a router plane if you want a flatter, more uniform result.
Refine the walls
- Pare the side walls carefully with a sharp chisel.
- Test fit your mating part often.
- Stop as soon as the fit is snug.
I have found that trying to rush the waste removal is the fastest way to blow out the edges. Light, controlled cuts always beat force. Think of it like carving a groove in soft clay rather than chopping a trench in dirt.
Step-by-step method for cutting a dado by hand
If you want a repeatable process, this is the one I recommend.
1. Secure the workpiece
Clamp the board firmly to your bench. If the board moves, the saw and chisel will wander. A stable workpiece makes everything safer and more accurate.
2. Deepen the layout lines
Use a marking knife or sharp chisel to deepen the dado edges. This creates a physical boundary that helps prevent tear-out. It also gives your saw teeth a place to start.
3. Saw the dado walls
Cut down carefully along each layout line. Keep the saw vertical and let the teeth do the work. If the dado is wide, you may need to make a few interior relief cuts as well.
4. Chop out the middle
After the side cuts are in place, use a chisel to break up the center waste. Start in the middle and work toward the ends. This reduces pressure on the edges.
5. Level the bottom
Use the flat side of a chisel to shave down the remaining high spots. A router plane is even better if you have one. Flatness matters, especially when the dado will hold a shelf or panel.
6. Test fit and adjust
Slide the mating board into the dado. If it binds, mark the tight spots and remove just a little material. A good fit should be snug but not forced.
That is the core process for how to cut a dado with hand tools. Once you do it a few times, the steps start to feel natural.
How to avoid tear-out and rough edges
Tear-out happens when wood fibers lift instead of cut cleanly. It is common, especially in softwood or brittle hardwood. The good news is that it is easy to reduce once you know where it starts.
Here is what helps most:
- Score the layout lines deeply
- Use a sharp saw and chisel
- Cut from both edges toward the center when possible
- Remove waste in thin layers
- Support the wood fibers with a sacrificial backer board
- Work with the grain when cleaning the bottom
One mistake I made early on was chopping too aggressively near the edges. The chisel would bruise the shoulder before I even noticed it. Now I take smaller bites, and the cut looks much cleaner.
Choosing the right chisel and saw
Your results depend heavily on the tools in your hand. For how to cut a dado with hand tools, a fine-toothed saw and a sharp bench chisel are the most useful pair.
A good saw should:
- Cut cleanly without wandering
- Be comfortable to control
- Have fine teeth for accurate work
A good chisel should:
- Be sharp across the full edge
- Match the dado width when possible for cleanup
- Hold up well under mallet work
Useful chisel widths include:
- 1/4 inch
- 1/2 inch
- 3/4 inch
- 1 inch
You do not need every size right away. You only need enough width options to remove waste efficiently and clean corners well.
How to get the right fit
The perfect dado is not always the tightest one. The goal is a joint that slides in with light hand pressure and stays aligned. If it is too tight, you risk splitting or bowing the workpiece. If it is too loose, the joint loses strength and looks sloppy.
A solid fit should feel:
- Snug
- Flat
- Square
- Consistent along the full length
If the part stops halfway in, check for:
- Raised fibers
- Uneven depth
- Slightly tapered walls
- Saw marks left in the bottom
Small corrections are normal. I often sneak up on the fit by removing a few thin shavings, then testing again. That habit saves more boards than any fancy tool ever did.
Common mistakes when cutting a dado by hand
Even experienced woodworkers make a few predictable mistakes. Knowing them ahead of time can save you time and material.
Common errors include:
- Cutting without a clear layout
- Using a dull chisel
- Removing too much waste at once
- Ignoring the depth line
- Failing to test fit often
- Letting the saw drift off the line
- Forgetting to clamp the board securely
The biggest mistake is usually impatience. Hand-tool work rewards steady hands and calm thinking. If you slow down, your cuts improve fast.
Benefits and limitations of hand-cut dadoes
Cutting a dado with hand tools has real advantages. It also has a few limits, and it is better to know both before you start.
Benefits:
- Excellent control
- Quiet and low-cost
- No electricity needed
- Great for small shops or field work
- Strong, clean joints
Limitations:
- Slower than power-tool methods
- Requires practice
- Depends on sharp tools
- Takes patience for wide dadoes
For one-off projects, prototypes, or traditional furniture work, hand cutting can be a great fit. For large cabinet runs, machine methods are usually faster. Still, learning how to cut a dado with hand tools builds skill that carries into every other part of woodworking.
Practical examples from real shop use
I’ve used hand-cut dadoes for bookcases, cabinet backs, and small wall units. In one project, a shelf needed a dead-straight groove in maple, and the router setup just felt like overkill. I cut the dado by hand, checked the fit often, and ended up with a cleaner result than I expected.
Another time, I rushed a pine dado and chopped too hard near the edge. The edge split, and I had to patch the damage before moving on. That mistake taught me to treat each dado like a series of small, careful cuts instead of one big task.
Those are the lessons that stick:
- Accuracy first
- Sharp tools second
- Speed last
Best woods for hand-cut dadoes
Some woods are friendlier than others. Softwoods like pine cut quickly, but they can tear if you are careless. Hardwoods like oak or maple stay crisp but demand sharper tools and more effort.
Easier woods for practice:
- Pine
- Poplar
- Cedar
- Basswood
More demanding woods:
- Oak
- Maple
- Cherry
- Walnut
If you are learning how to cut a dado with hand tools, start with a forgiving board. You will learn the feel of the saw and chisel faster when the wood does not fight back as much.
Frequently Asked Questions
What is the easiest way to cut a dado with hand tools?
The easiest method is to score the layout, saw the sides, and chop out the waste in small sections. A sharp chisel and careful test fitting make the process much easier.
Can I cut a dado without a router plane?
Yes, you can. A flat bench chisel works well for cleanup, though a router plane makes leveling the bottom faster and more consistent.
How deep should a dado be?
A common depth is about one-third the thickness of the board, but the exact depth depends on the project. Thicker stock or heavier load-bearing joints may call for different dimensions.
How do I keep the dado square?
Use a try square during layout and keep the saw vertical as you cut. Also, clean the walls carefully with a sharp chisel and check the fit often.
Is cutting a dado by hand strong enough for furniture?
Yes, a well-cut dado is very strong and widely used in furniture and cabinet work. The strength comes from the large glue surface and the mechanical support of the groove.
Conclusion
Learning how to cut a dado with hand tools is one of those woodworking skills that pays you back again and again. Once you understand layout, sawing, chopping, and cleanup, the process becomes steady and predictable. More important, you gain confidence in your ability to make accurate joinery without relying on machines.
Start with a simple board, use sharp tools, and take your time. The more you practice, the cleaner your dadoes will become, and the more control you will have over every project. If this guide helped, keep exploring hand-tool joinery and share your own tips or questions in the comments.
