

You can cut a clean hole in wood with hand tools using the right layout, saw, and patient technique.
Cutting a hole in wood with hand tools is one of those jobs that looks simple until you actually start. The good news is that you do not need a power drill or jigsaw to get a precise result. With a sharp chisel, coping saw, keyhole saw, hand saw, or auger, you can make clean openings for locks, cords, vents, or decorative projects with surprising accuracy.
I’ve done this kind of work on everything from pine shelves to hardwood panels, and the biggest lesson is this: the tool matters, but layout matters more. If you understand how to mark, start, and finish the cut, how to cut a hole in wood with hand tools becomes a steady, controlled process instead of a guessing game. 
What You Need Before You Start
Before you cut anything, gather the right tools and check the wood. The cleaner your setup, the easier the cut will be.
A basic hand-tool setup usually includes:
- Pencil or marking knife for layout
- Ruler or measuring tape
- Try square or speed square
- Drill with brace and bit, or an awl for starter holes if you have one
- Coping saw, keyhole saw, or compass saw
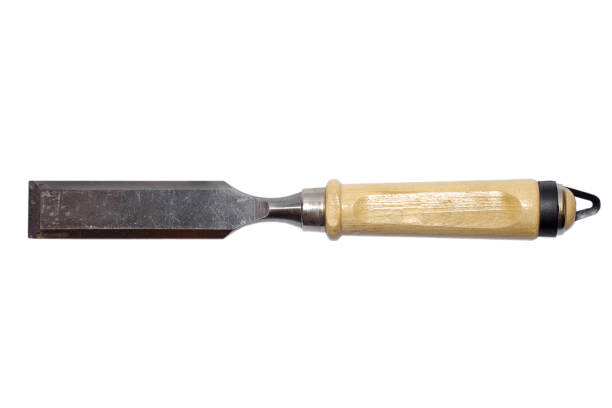
- Chisel and mallet
- Sandpaper or a small file
- Clamp or bench vise
- Scrap wood for backing
Wood type also matters. Softwoods like pine are easier to cut. Hardwoods like oak or maple need more time and a sharper blade. If the wood is thin, tear-out becomes more likely, so a backing board helps a lot.
When people ask how to cut a hole in wood with hand tools, they often focus on the saw first. I usually start with the marking step instead. A straight, well-planned line saves more time than any fancy tool. 
Choose the Right Hand Tool for the Hole
Different holes need different tools. The shape, size, and location of the opening will decide what works best.
For small round holes
Use an auger bit, brace bit, or hand drill if you have one. These are best for bolt holes, cable pass-throughs, and starter holes for other cuts.
For larger round or curved holes
Use a coping saw or keyhole saw after drilling a starter hole. These saws handle arcs and circles better than a standard handsaw.
For square or rectangular holes
Use a drill for corner starter holes, then connect the lines with a coping saw or finish with a chisel. This is common for mortises, vents, and hardware recesses.
For rough openings
A keyhole saw works well when the cut does not need to be perfect right away. You can clean it up with a chisel after.
From experience, the wrong saw can turn a simple job into a fight. If I need a neat circle in a thin panel, I reach for a coping saw. If I need a square cutout, I think in corners first, not curves.
How to Cut a Hole in Wood with Hand Tools Step by Step
This is the most reliable way to do it by hand. The sequence matters because each step sets up the next one.
1. Mark the hole clearly
Measure twice and mark the hole on both sides if possible. Use a pencil for rough work and a marking knife for precision.
Tips for marking:
- Use a square for straight edges
- Draw the full shape, not just part of it
- Mark waste areas so you know what to remove
- Double-check measurements before cutting
If the hole must fit hardware, trace the part itself when possible. That makes the fit more accurate than guessing dimensions.
2. Clamp the wood securely
Secure the board to a bench or work surface. If the wood moves, your cut will wander.
Helpful setup tips:
- Put scrap wood under the piece to reduce splintering
- Clamp near the cut, but leave room for the saw
- Make sure the board does not rock
I learned this the hard way on an early project. A board that shifts even a little can throw off the whole opening, and with hand tools, you pay for every mistake in extra sanding and correction.
3. Make a starter hole
If you are cutting inside a shape, you need a way to begin. Drill a starter hole with a brace and bit if available. If not, use an awl to punch a starting point and begin carefully with a keyhole saw.
Starter holes help when:
- Cutting inside a panel
- Making curved openings
- Starting a square cutout from within the outline
Try to place the starter hole just inside the waste area. That gives you room to clean up the final edge later.
4. Begin the cut slowly
Start with light strokes. Let the teeth do the work. Pushing too hard can split the wood or bend your line.
A few useful habits:
- Keep the saw aligned with your mark
- Use long, smooth strokes
- Watch the blade angle
- Stop if the cut drifts and correct early
On softwood, the saw may cut faster than expected. On hardwood, the cut feels slower but more controlled. Either way, patience keeps the edge cleaner.
5. Stay outside the line
Cut just outside the marked line, especially if you plan to clean up the hole with a chisel or file. It is much easier to remove a little more wood than to put it back.
This is one of the best lessons in hand tool work. Precision comes from leaving yourself a finishing margin. Think of it like trimming a haircut slowly instead of cutting too much at once.
6. Clean the edges with a chisel
Once the main cut is done, use a sharp chisel to square corners or smooth rough spots. Work with the grain when possible.
Chisel tips:
- Keep the bevel facing the waste side for control
- Take thin cuts, not deep gouges
- Tap lightly with a mallet if needed
- Check the fit often
If the hole needs to be exact, use the chisel like a finishing tool, not a digging tool. That mindset makes a big difference in the final result.
7. Sand or file the final opening
Finish the edge with sandpaper or a fine file. This removes fuzz, marks, and tiny splinters.
For a clean finish:
- Use 120 grit for rough cleanup
- Move to 180 grit for smoother edges
- Wrap sandpaper around a dowel for curved holes
- Test fit your part before calling it done
A little smoothing is not just about looks. It also helps prevent splintering later and makes the opening safer to handle.
Best Techniques for Different Hole Shapes
The shape of the opening changes your approach. That is why how to cut a hole in wood with hand tools is really a set of methods, not just one method.
Round holes
For small round holes, start with a brace and bit or hand drill. For larger round openings, drill a starter hole and use a coping saw to follow the curve.
Good uses include:
- Pipe pass-throughs
- Cable holes
- Decorative openings
- Knob or latch clearances
Square holes
Square holes need corner control. Drill small holes in the corners if possible, then use a saw to connect them and a chisel to flatten the sides.
This works well for:
- Mortises
- Electrical box openings
- Joinery cutouts
- Hardware recesses
Oval or irregular holes
Draw the full shape carefully and remove the wood in stages. First make rough cuts, then refine with a saw and chisel.
For irregular shapes, break the job into smaller curves and flats. That keeps the hole from looking lopsided.
Common Mistakes to Avoid
A lot of problems come from rushing. When people struggle with how to cut a hole in wood with hand tools, it is usually not because the tools are bad. It is because the setup or pacing is off.
Watch out for these mistakes:
- Marking only one side of the wood
- Cutting without clamping the board
- Using a dull saw blade
- Starting too far inside the line
- Forcing the saw through the cut
- Ignoring grain direction
- Skipping the cleanup step
The biggest one, in my opinion, is dull tools. A sharp saw and chisel make the whole process easier, safer, and cleaner. Dull tools slip, wander, and tire your hands fast.
How to Get a Cleaner Finish
A neat hole is mostly about control and patience. A few small habits can make the edge look professional.
Try these finish-improving tips:
- Score the line first with a knife
- Cut from the visible side when possible
- Use backing wood to reduce tear-out
- Test your fit before final sanding
- Work in small passes instead of one deep cut
If the wood is prone to splintering, scoring the line with a knife helps a lot. It gives the blade a crisp boundary to follow, almost like cutting along a fence.
Safety Tips for Hand Tool Cutting
Hand tools may be quieter than power tools, but they still demand respect. Safe habits protect your hands, eyes, and finish work.
Basic safety rules:
- Keep fingers away from the blade path
- Clamp the work securely
- Wear eye protection
- Use sharp tools only
- Cut away from your body when practical
- Store chisels and saws safely when not in use
A calm pace is safer than a fast one. If you feel tired or frustrated, stop for a minute. That short pause can prevent a long repair.
When Hand Tools Are the Better Choice
You do not always need power tools. In some cases, hand tools are actually the better option.
Hand tools make sense when:
- You need quiet work
- The space is tight
- The cut is small or detailed
- You want more control
- You do not have electricity nearby
- You are working on a delicate or historic piece
There is also a satisfaction to hand-cut work that power tools cannot match. The cut feels earned. It is a bit like writing with a pen instead of typing fast. Slower, yes, but often more personal and precise.
Practical Examples from Real Projects
Over the years, I have used hand tools for all kinds of openings. Each project taught me something useful.
For a bookshelf cable hole, I used a brace bit to make a starter opening, then cleaned the edge with a round file. The key was keeping the bit centered so the hole looked intentional, not accidental.
For a small lock recess in pine, I scored the outline first, drilled the corners, and finished with a chisel. That saved me from splitting the edge and gave the hardware a snug fit.
For a decorative oval cutout, I first drilled inside the waste area, then used a coping saw to follow the curve. It looked rough at first, but after a careful chisel pass and sanding, it came out clean enough to look factory made.
These jobs all reminded me of the same thing: how to cut a hole in wood with hand tools is less about speed and more about control.
Frequently Asked Questions
What is the easiest hand tool for cutting a hole in wood?
For most small to medium holes, a coping saw or keyhole saw is the easiest choice. If you need a starter opening, a brace and bit or awl helps you begin cleanly.
Can I cut a hole in wood without a drill?
Yes, but it is harder for inside cuts. You can use an awl to start a keyhole saw, or make an edge cut and finish with a chisel if the shape allows it.
How do I keep the wood from splintering?
Score the cut line with a knife, clamp a scrap board under the piece, and use a sharp blade. Cutting slowly and staying just outside the line also helps reduce tear-out.
What is the best way to make a square hole by hand?
Drill or punch starter holes at the corners, then connect the lines with a small saw and clean the sides with a chisel. This gives you better corner control and a cleaner finish.
How do I know when the hole is the right size?
Test-fit the part often as you work. Stop cutting as soon as the fit is snug, because you can always remove a little more wood, but you cannot add it back.
Conclusion
Cutting a hole in wood with hand tools is a skill built on layout, sharp tools, and steady hands. Once you learn how to mark the shape, start the cut, and clean the edges, the process becomes much easier and far more predictable. The best results usually come from patience, not force.
If you are tackling your first cutout, start simple and work slowly. Practice on scrap wood, trust the line, and let the tool do the job. If you found this guide helpful, keep exploring hand tool techniques and share your own project tips in the comments.
