

Use a grout removal hand tool by scoring the joint, applying steady pressure, and clearing grout without damaging tile edges.
Learning how to use a grout removal hand tool can save money, reduce mess, and improve the look of an old tile surface. I have used these tools on bathroom walls, kitchen backsplashes, and floor repairs, and the same rule always applies: work slowly, control the tool, and treat the tile edges as fragile. This guide explains the full process, from choosing the right blade to cleaning and regrouting the joint.
What Is a Grout Removal Hand Tool?
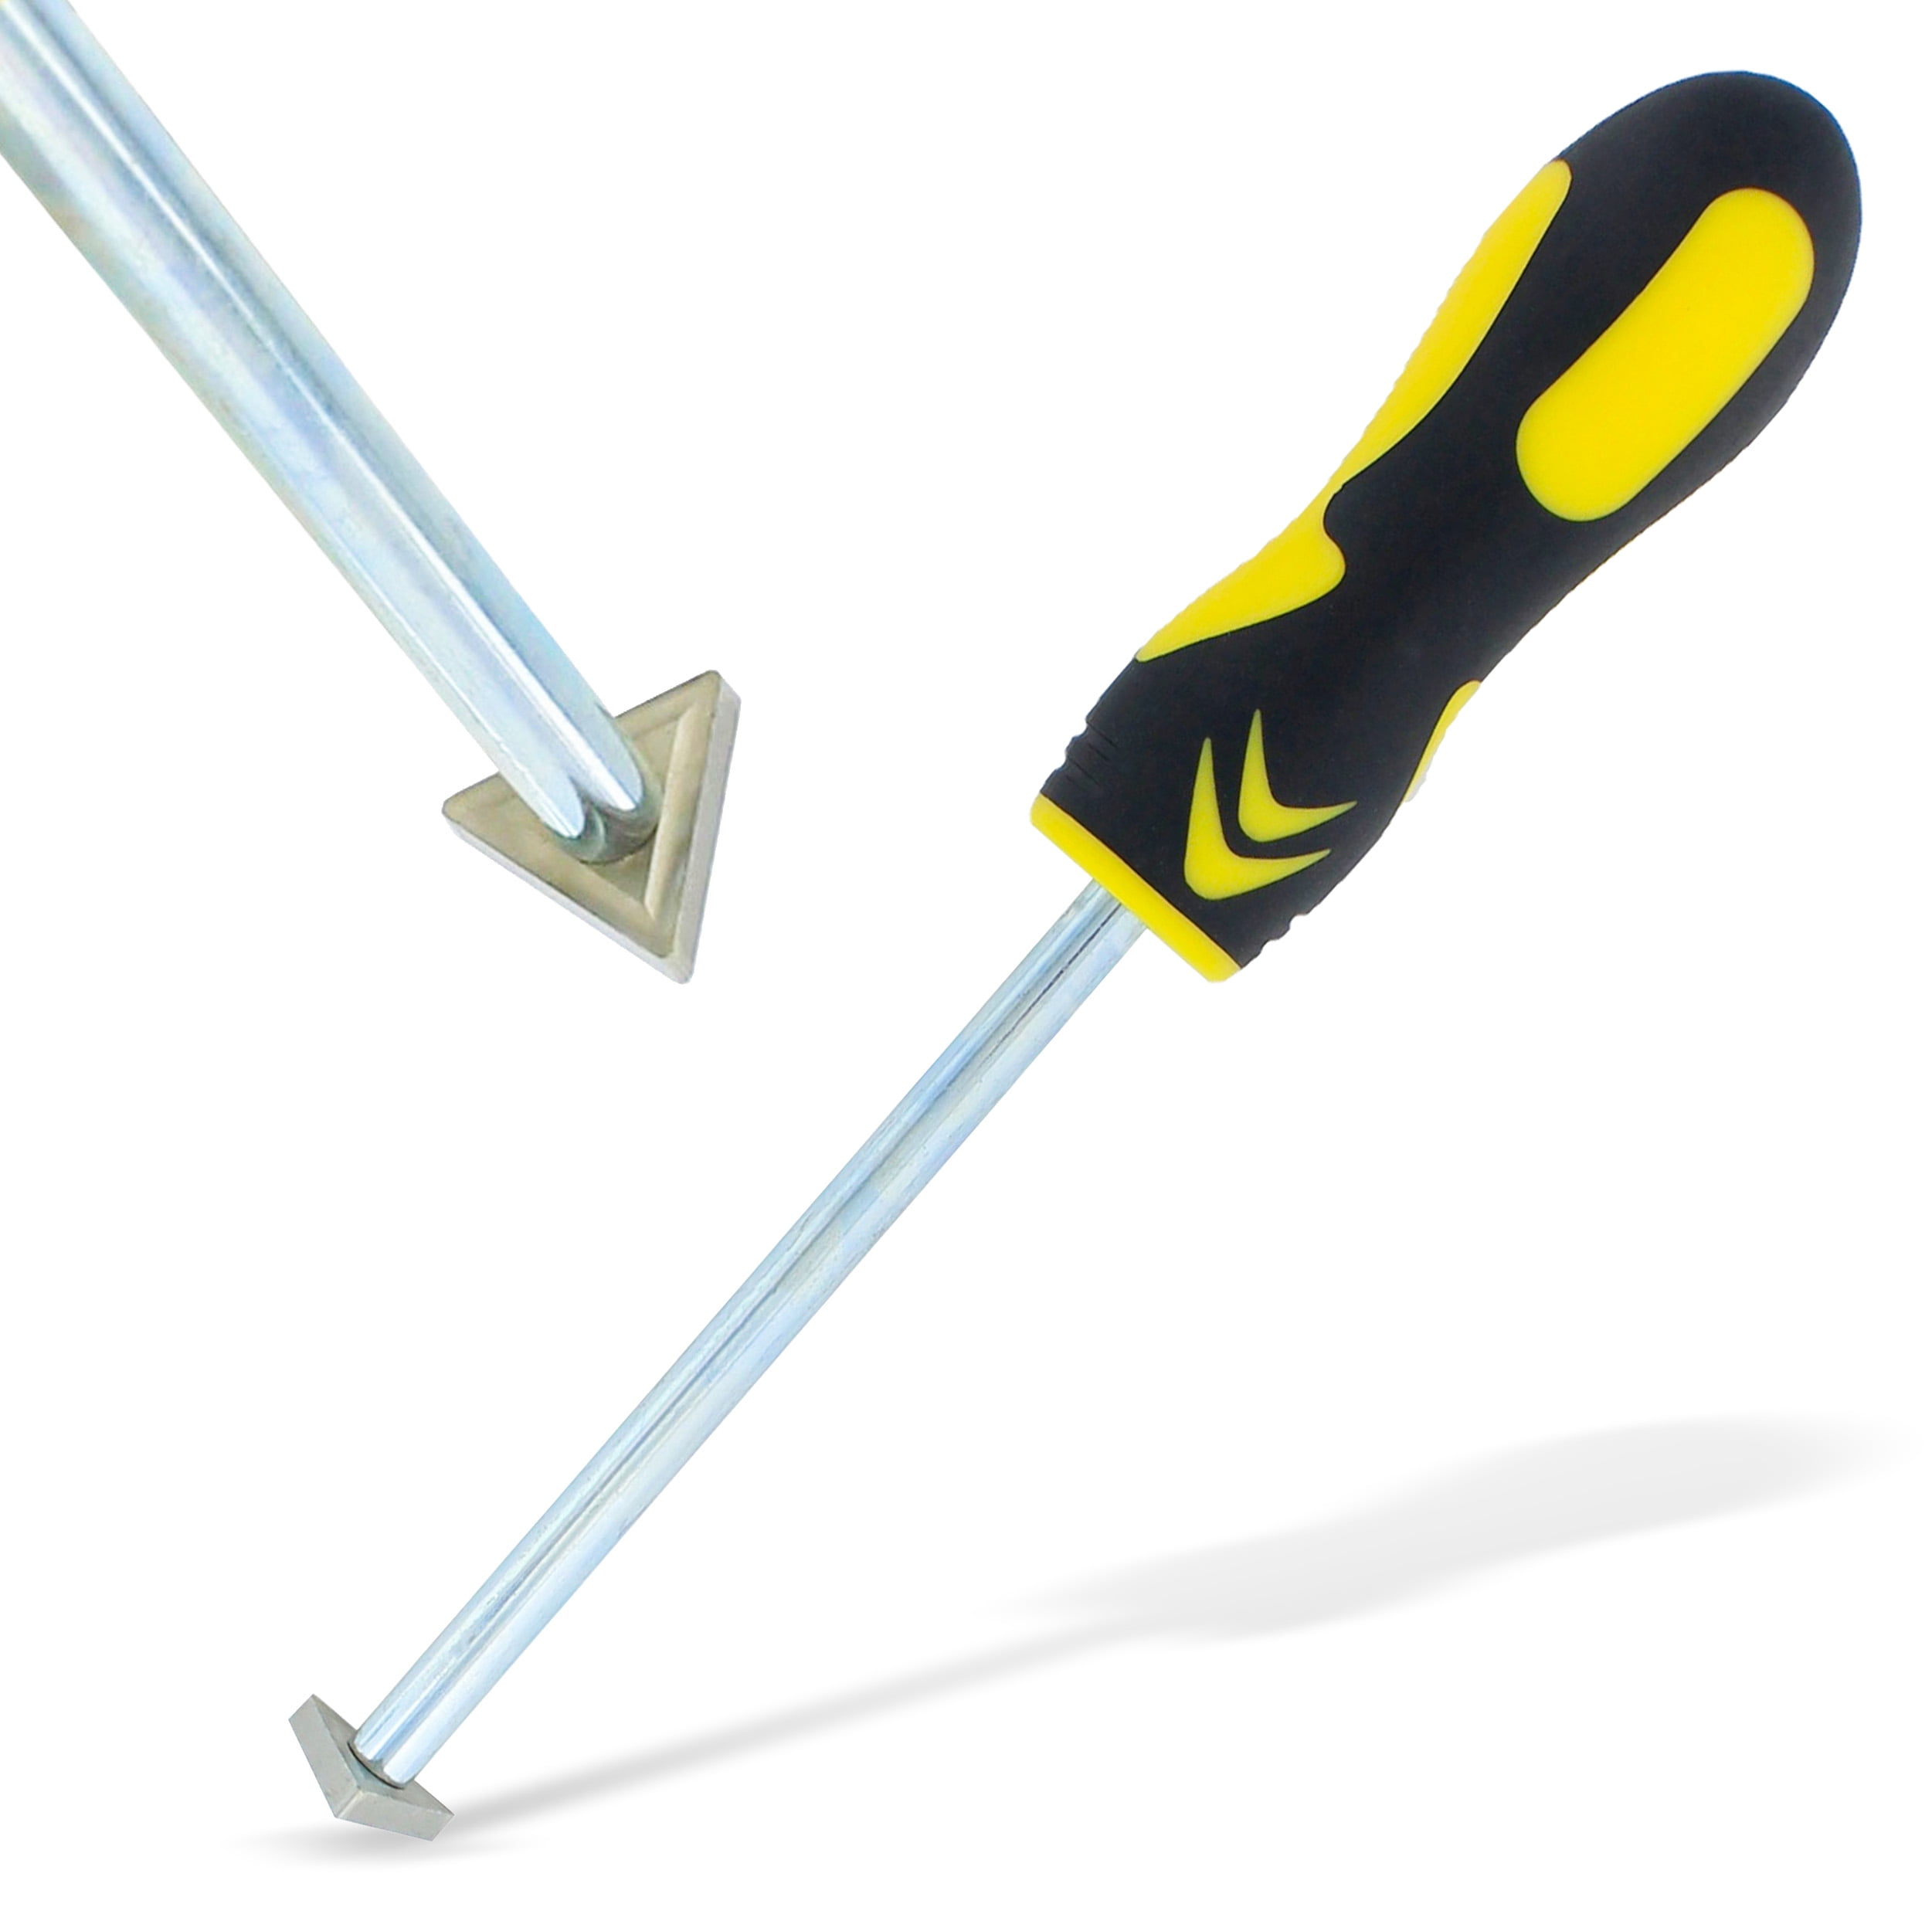
A grout removal hand tool is a small manual tool designed to cut and scrape grout from the joints between tiles. Most models have a handle and a hardened blade, carbide grit edge, or interchangeable tip.
Unlike an electric grout removal tool, a hand tool does not use a motor. It relies on your hand pressure and repeated strokes. This makes it quieter and easier to control, especially near delicate ceramic, porcelain, or glass tiles.
Manual grout removal works best for:
• Small repair areas
• Loose, cracked, or crumbling grout
• Shower corners and backsplash joints
• Thin grout lines
• Jobs where dust and noise must stay low
A hand tool has limits. It takes more time than a power tool, and it may not be ideal for removing grout from a large floor. Still, its control is a major benefit. You can feel the tool cutting through the joint instead of relying only on sight.

Choose the Right Grout Removal Hand Tool
Before learning how to use a grout removal hand tool, inspect the grout and tile. The right tool depends on the joint width, grout hardness, and tile type.
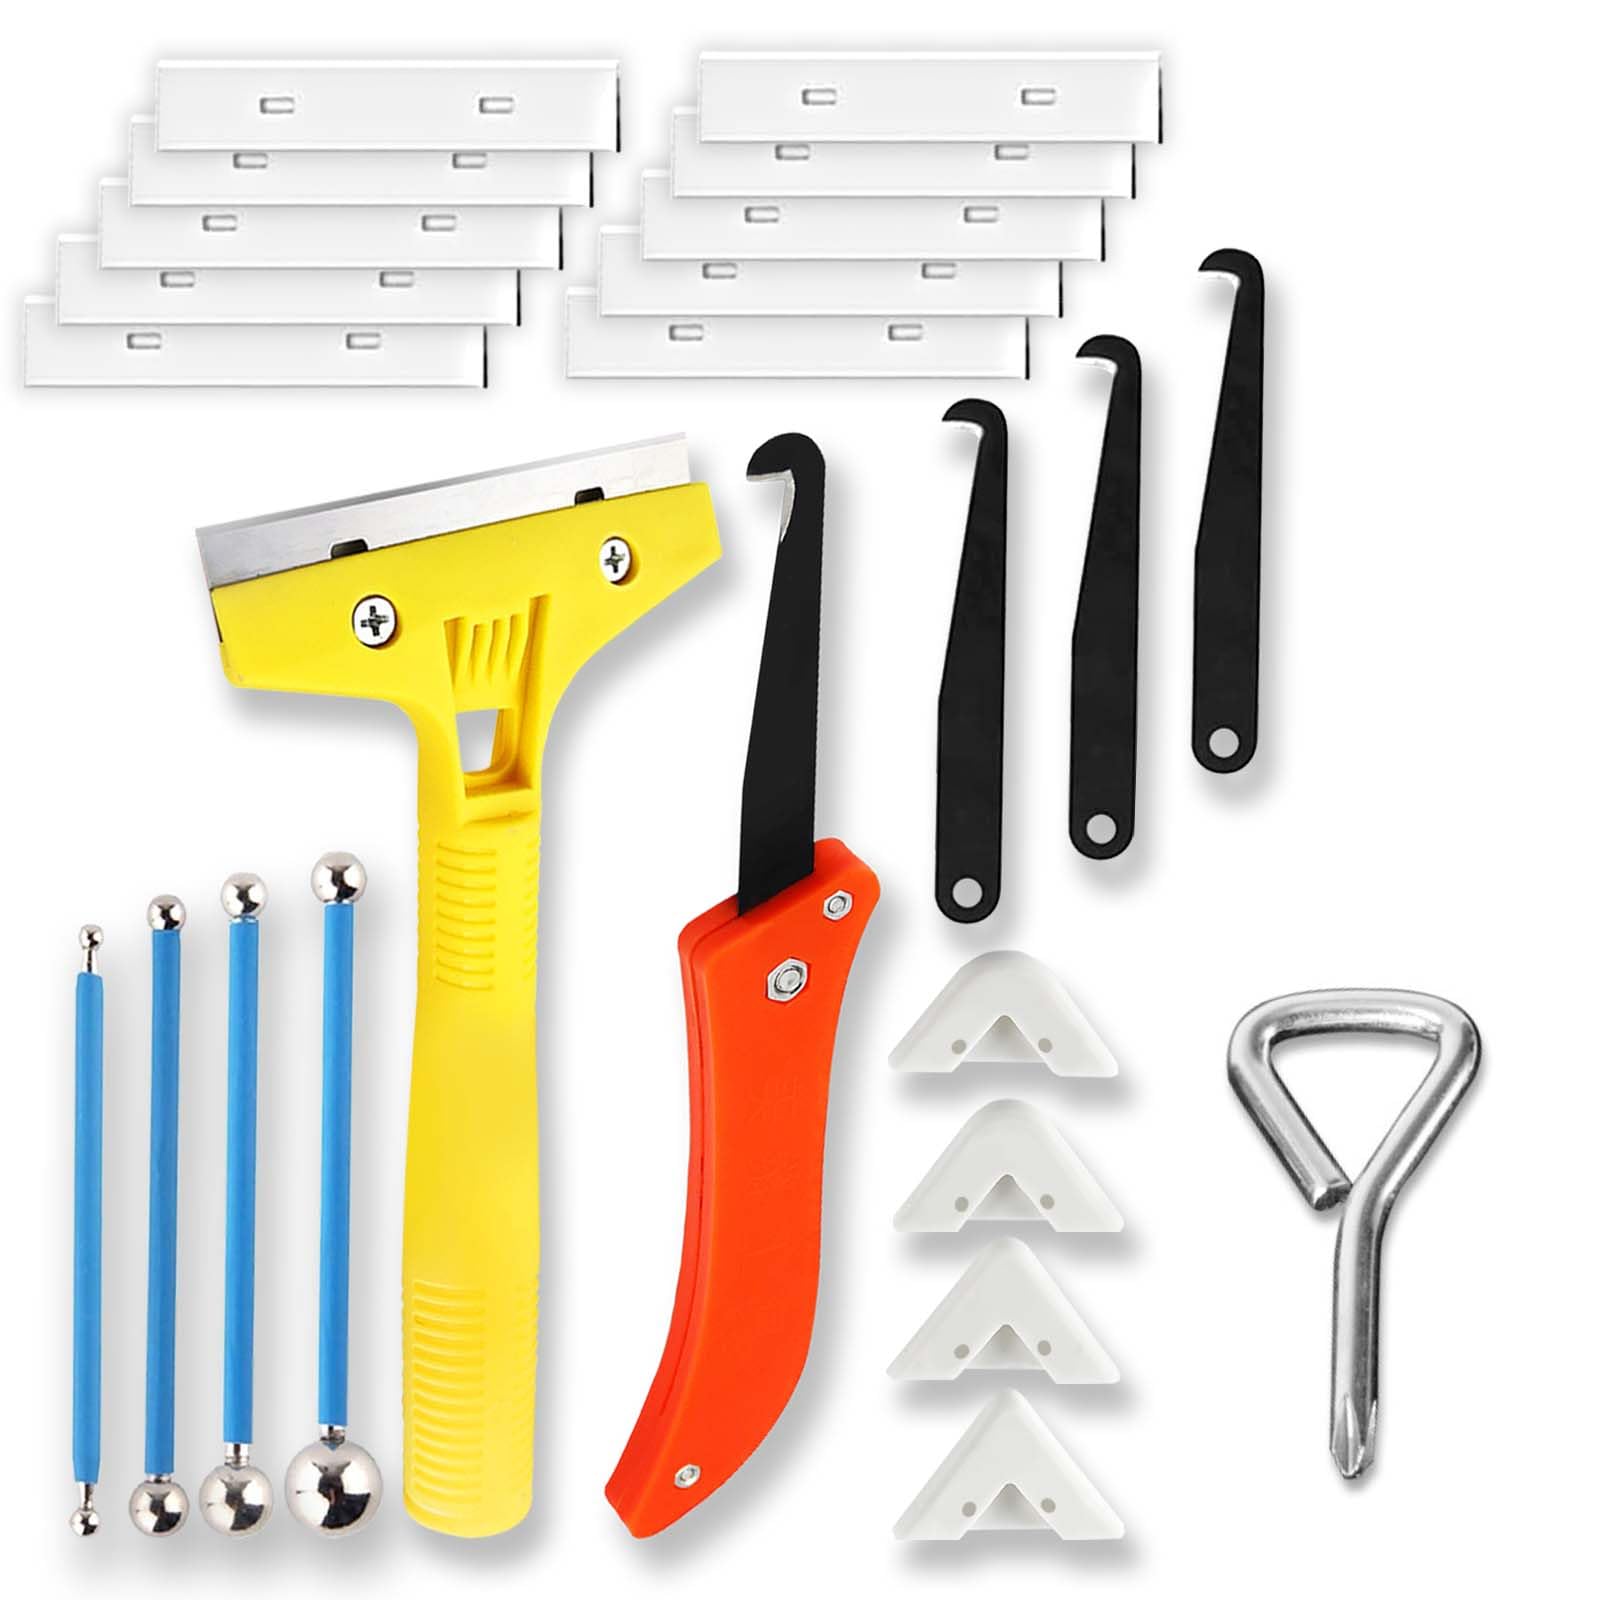
Common tool styles include:
Carbide grout saw
A carbide grout saw has a rough edge that cuts through cement-based grout. Many models include a pointed end for starting a cut and a wider edge for removing more material.
This is a good choice for standard grout joints on ceramic or porcelain tile. It may struggle with epoxy grout, which is harder and more resistant.
Grout scraper
A grout scraper usually has a narrow blade. It works well for soft, loose, or partially damaged grout. It also helps remove leftover material after a grout saw has opened the joint.
Tungsten carbide grout rake
A tungsten carbide rake has a strong abrasive edge. It can remove hard grout, but it needs careful handling. Excess force can chip a tile corner or scratch a glazed surface.
Interchangeable-blade hand tool
Some tools accept different blades. A narrow blade can start the joint, while a wider blade can remove more grout. This design is useful when working across tile sizes and joint widths.
When selecting a tool, look for a comfortable grip, a secure blade, and a tip that fits inside the grout line. Avoid a blade that is wider than the joint. It can rub against the tile and cause damage.

Prepare the Work Area
Good preparation makes how to use a grout removal hand tool safer and more efficient. Remove soap, dirt, and loose material from the tile surface. A clean joint is easier to see and easier to follow.
Gather these supplies:
• Grout removal hand tool
• Safety glasses
• Cut-resistant work gloves
• Dust mask or respirator suitable for fine dust
• Painter’s tape
• Vacuum with a fine-particle filter
• Small brush
• Utility knife
• Damp sponge
• Replacement grout
• Grout float and grout sponge for the next stage
Open a window or run an exhaust fan. Cement grout can create fine dust when scraped. Do not dry-sweep the dust, since sweeping can send small particles back into the air. Vacuum it instead.
Cover nearby fixtures and surfaces. Painter’s tape can protect painted walls and tile edges, but it is not a substitute for careful tool control. If you are working in a shower, make sure the area is dry before you begin.

How to Use a Grout Removal Hand Tool Step by Step
The best way to understand how to use a grout removal hand tool is to treat the job as controlled cutting, not forceful digging. Your goal is to remove the grout while leaving the tile, backer board, and waterproofing behind it intact.
1. Inspect the grout joint
Look for cracks, gaps, stains, mold, and soft areas. Press the grout lightly with a screwdriver or the tool tip. If it crumbles easily, you may only need to remove the damaged section.
Check whether the problem is truly the grout. A moving tile, leaking pipe, or damaged shower seal may require a larger repair. New grout will not fix movement or moisture behind the tile.
2. Mark the area
Use painter’s tape to mark the joints you plan to remove. If you are replacing only part of a joint, mark clean stopping points.
For a full regrout, plan to remove grout from all sides of the tile. For a small repair, remove enough material to create a clean, stable cavity for new grout.
3. Start in the center of the joint
Place the pointed end or narrow blade in the middle of the grout line. Do not start against the tile edge. Starting in the center gives the blade room to move and lowers the chance of chipping the tile.
Use short strokes of about 1 to 2 inches. Pull the tool toward you with light pressure. Keep the blade aligned with the joint.
4. Deepen the first groove
Make several light passes over the same path. Do not try to remove the full depth in one stroke.
Once a shallow groove forms, the tool will track more easily. Increase pressure only when the blade is stable. Think of the groove as a set of train tracks that keeps the tool away from the tile edges.
5. Remove the rest of the grout
After opening the center of the joint, widen the groove with controlled strokes. Work from the center toward each tile edge, but stop before the blade touches the tile.
For most cement-based grout repairs, remove at least half the joint depth. If the old grout is loose or damaged through its full depth, remove more. The new grout needs a clean cavity with solid sides.
6. Work in short sections
Remove grout from a small section before moving to the next one. A practical section may be 12 to 24 inches long.
This method lets you check your progress. It also reduces fatigue. When your hand becomes tired, your pressure becomes less accurate, and mistakes become more likely.
7. Clean the joint
Use a small brush or vacuum to remove loose crumbs. Wipe the tile with a slightly damp sponge.
The joint should be free of dust, loose grout, soap, and grease. Do not soak the area. Excess water can slow drying and may affect some grout products.
8. Inspect before regrouting
Run the tool tip lightly through the joint. It should move through the cavity without hitting loose material. Check both tile edges for chips or scratches.
If the joint is clean and deep enough, allow the area to dry as directed by the grout manufacturer. This final check is an important part of how to use a grout removal hand tool correctly.
How Much Grout Should You Remove?
The right depth depends on the type of repair and the replacement grout. As a general rule, remove all loose grout and create enough depth for the new grout to bond well.
For a partial repair, remove grout until the remaining material feels firm. Do not leave powdery or cracked grout at the bottom of the joint.
For a complete regrout, many professionals remove most of the existing grout depth. However, avoid cutting into the tile substrate, cement board, or waterproof membrane. In a shower, this matters greatly because damage behind the tile can lead to water intrusion.
Always follow the instructions on the new grout package. Some products require a specific joint depth. Epoxy grout and premixed grout may have different preparation rules than traditional cement grout.

Tips for Avoiding Tile Damage
Tile damage is the most common concern when learning how to use a grout removal hand tool. The blade should cut grout, not scrape the tile.
Use these precautions:
• Keep the tool centered in the grout joint.
• Use several light strokes instead of one hard stroke.
• Pull the tool in a straight line.
• Stop if the blade begins to climb onto the tile.
• Protect nearby tile with painter’s tape.
• Use a narrow blade for narrow joints.
• Replace a worn blade instead of forcing it.
• Keep your free hand away from the path of the blade.
• Work with good lighting.
• Take breaks before your grip becomes weak.
One mistake I made early on was pressing harder when the blade became dull. The tool slipped sideways and left a small mark on a glazed tile. Replacing the blade would have been faster and safer than trying to make a worn edge work.
Do not use a screwdriver as a regular substitute for a grout removal tool. Its wide, smooth tip can slip, and its shape may transfer too much force to the tile edge.

Removing Grout From Different Tile Types
Tile material affects how cautious you need to be. Ceramic and porcelain tiles are fairly durable, but their edges can still chip.
Ceramic and porcelain tile
These tiles usually work well with a carbide grout saw. Keep the tool centered and use moderate pressure. Porcelain is dense, but a sharp edge can still damage its finish.
Glass tile
Glass tile needs extra care. Use very light pressure and avoid contact with the tile edge. If the grout is strongly bonded, a professional may be the safer choice.
Natural stone
Marble, travertine, slate, and limestone can scratch or chip. Avoid dragging a metal blade across the stone. Test your technique in a hidden area first.
Natural stone may also have an uneven edge. This makes it harder to keep the tool in the joint. Take smaller strokes and consider professional help for expensive stone installations.
Mosaic tile
Mosaic sheets have many short joints and small tile pieces. A hand tool offers useful control, but it is easy to catch an edge. Work slowly and inspect each section as you go.
How to Remove Moldy or Stained Grout
Stains do not always mean grout must be removed. Surface stains may respond to a suitable tile and grout cleaner. Mold that keeps returning may signal trapped moisture, poor ventilation, or a failed seal.
If the grout is moldy, soft, cracked, or breaking apart, remove it with the hand tool. Wear gloves and eye protection. Avoid brushing moldy material aggressively, since this can spread particles.
Bag the waste and clean the area according to the cleaner’s label. Never mix bleach with ammonia, acids, or other cleaning products. After the joint dries, repair the moisture problem before installing new grout.
In my experience, repeated mold at a shower corner often points to failed caulk rather than bad grout alone. Remove the old caulk separately, inspect the corner, and use a suitable bathroom sealant after the grout work is complete.
Hand Tool Versus Power Grout Removal Tool
A grout removal hand tool is best when control matters more than speed. It is affordable, quiet, and easy to use in small spaces.
A power tool may be better for a large floor or a full-room regrout. It removes material faster, but it creates more dust and can damage tile quickly if it jumps out of the joint.
Choose a hand tool when:
• You need to repair a small area.
• The tile is delicate or expensive.
• You are new to grout removal.
• You need a low-noise method.
• You want to avoid power-tool vibration.
Choose a power tool when:
• You have a large area to complete.
• The grout is very hard.
• You have experience with rotary or oscillating tools.
• You can control dust and protect nearby surfaces.
Some projects benefit from both. A power tool can remove long, open sections, while a hand tool can clean corners and tight areas. Never rush simply because a power tool is available.
Common Mistakes to Avoid
Knowing what not to do is a key part of how to use a grout removal hand tool. Most problems come from speed, poor alignment, or inadequate cleaning.
Avoid these mistakes:
• Cutting directly against the tile edge at the start
• Removing grout with excessive force
• Using a blade that does not fit the joint
• Ignoring loose grout below the surface
• Regrouting over dusty material
• Working on a wet surface
• Skipping eye protection
• Using a damaged or loose blade
• Removing grout without checking for waterproofing risks
• Treating recurring mold as a simple cosmetic issue
Do not remove every joint automatically. If the grout is firm, clean, and intact, replacement may not be necessary. Repair only the damaged sections when that provides a durable result.
What to Do After Grout Removal
Once you understand how to use a grout removal hand tool, the next step is preparing the joint for new grout. Vacuum all loose dust, then wipe the tile with a clean, damp sponge.
Let the area dry based on the product instructions. Mix cement grout to the correct consistency. Grout that is too wet may shrink, crack, or weaken as it cures.
Press the new grout firmly into the joint with a grout float. Hold the float at an angle and make several passes across the joint. Remove excess grout from the tile surface before it hardens.
After the grout firms up, wipe the tile with a damp sponge. Use clean water and rinse the sponge often. A light haze may remain after drying, but it can usually be removed with a dry microfiber cloth or a product approved for that grout.
Use caulk, not grout, at changes of plane such as wall-to-wall and wall-to-floor corners. These areas move slightly, and flexible sealant is better suited to them.
Safety and Maintenance Tips
Wear safety glasses whenever you scrape or chip grout. Small pieces can break loose without warning. Gloves protect your fingers from sharp tile edges and tool slips.
Use ventilation and suitable respiratory protection when dust is present. People with asthma, lung disease, or strong dust sensitivity should consider having someone else perform the work.
Inspect the tool before each use. A cracked handle or loose blade can cause a sudden slip. Store the tool dry and replace worn parts as needed.
After the new grout cures, clean it with a pH-neutral tile cleaner. Avoid harsh acids unless the product is specifically safe for your tile and grout. Seal cement-based grout when recommended, but remember that sealer does not make grout waterproof or repair structural problems.
Frequently Asked Questions About How to Use a Grout Removal Hand Tool
How deep should I remove grout with a hand tool?
Remove all loose and damaged grout, then create enough depth for the replacement grout to bond. For many repairs, removing at least half the joint depth is a useful guide, but always follow the new grout manufacturer’s instructions.
Can a grout removal hand tool scratch tile?
Yes, it can scratch or chip tile if the blade slips or is pressed against the edge. Keep the tool centered, use light strokes, and choose a blade that fits the joint.
Is a grout saw better than a utility knife?
A grout saw is usually better for hard cement grout because its abrasive edge cuts the material. A utility knife may help with soft caulk or loose debris, but its blade can slip and should not replace a proper grout tool.
Can I use a grout removal hand tool on epoxy grout?
Some hand tools can cut epoxy grout, but the job is harder and slower. Check the tool and grout instructions, and consider a professional if the epoxy is thick or covers a large area.
Should I remove grout before or after cleaning the tile?
Clean loose dirt and surface grime before removal so you can see the joint clearly. After removal, vacuum and wipe away all dust before applying new grout.
Can I repair only one section of grout?
Yes, if the remaining grout is firm and clean. Remove the damaged section fully, square up the stopping points, and use replacement grout that matches the existing color and type.
How do I remove grout without damaging waterproofing?
Use shallow, controlled strokes and never dig beyond the grout cavity. In a shower, stop if you see backer board, membrane, or substrate, and seek professional advice if waterproofing may be damaged.
Conclusion
Learning how to use a grout removal hand tool is mainly about control, patience, and proper preparation. Choose a blade that fits the joint, start in the center, make short strokes, remove loose material, and keep the tool away from tile edges.
A hand tool may work slowly, but it gives you excellent control for small repairs and delicate surfaces. Protect your eyes and hands, manage dust, and fix moisture problems before installing new grout. Try these steps on a small area first, then share your results or explore more tile repair guides for your next project.
