

To use a grommet hand tool, mark the material, punch a clean hole, set the grommet, and crimp it firmly.
Learning how to use a grommet hand tool is simple once you understand how the punch, grommet, washer, and setting die work together. I have seen many small projects fail because the hole was too large, the grommet was placed backward, or the tool was struck at an angle. This guide explains the full process in clear steps, with practical tips for fabric, leather, canvas, vinyl, tarps, and craft projects.
What Is a Grommet Hand Tool?
A grommet hand tool is a small device used to install grommets in soft or flexible materials. A grommet is a metal, plastic, or rubber ring that protects a hole from wear. It also gives a cord, rope, hook, or fastener a clean path through the material.
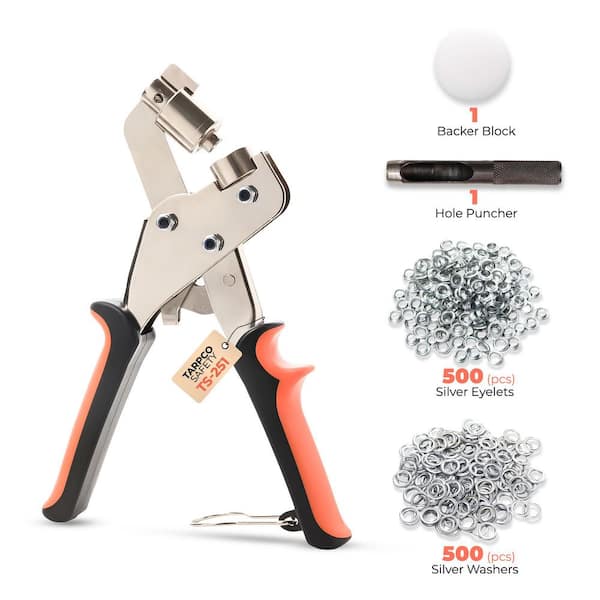
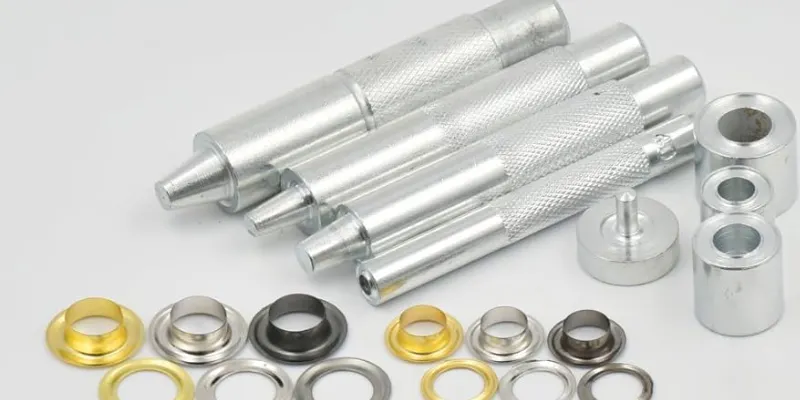
Most manual grommet kits include these parts:
• A hole punch for cutting the opening
• A setting die or setter for shaping the grommet
• An anvil or base that supports the grommet
• Grommets, often paired with washers
• A hammer or mallet, if the tool requires striking
Some tools combine the punch and setter in one body. Others use separate parts for each stage. Always check the tool design before starting because the correct order can vary by brand.
Grommets are useful in many everyday projects. They can reinforce holes in curtains, banners, shower curtains, bags, outdoor covers, leather goods, and canvas tarps. They spread force around the opening, much like a metal rim around a doorway.
What You Need Before You Start
Before learning how to use a grommet hand tool, gather the right materials and prepare a safe work area. Good preparation prevents crooked holes and damaged grommets.
You will need:
• A grommet hand tool
• Matching grommets and washers
• The fabric or material you want to repair or modify
• A cutting mat or sturdy wood block
• A ruler or measuring tape
• A fabric marker, pencil, or awl
• Safety glasses
• A hammer or mallet, if required
Choose grommets that match the thickness of the material. A grommet that is too small may not grip the layers. A grommet that is too large may leave a loose hole and can pull out under strain.
Check the size in two ways:
• Measure the inside diameter of the grommet.
• Compare the grommet barrel length with the material thickness.
The barrel should pass through the material and extend slightly beyond it. If the barrel barely reaches through, it may not fold or flare correctly. If it extends too far, it may bend unevenly.
Set the material on a stable surface. Avoid soft carpet, glass, thin plastic, or a valuable table. A firm wood block or cutting board works well. Use safety glasses when striking a punch, as small metal pieces can break away.
How to Use a Grommet Hand Tool
The best way to understand how to use a grommet hand tool is to follow the same order every time. Measure first, punch second, place the grommet third, and set it last.
1. Mark the Grommet Location
Use a ruler to mark the center of each grommet. For a row of grommets, mark all locations before making any holes.
Keep the holes an equal distance from the edge. As a general guide, leave at least one to two grommet diameters between the hole center and the material edge. Heavy canvas may need more space if the hole will carry a strong load.
For example, if the grommet opening is one-half inch wide, do not place its center right beside the edge. A larger border gives the material more support and reduces tearing.
Check your marks twice. A grommet hole cannot be moved after it is cut.
2. Add Support Behind the Material
Place the material on a hard, flat surface. A cutting mat can protect the work surface, but some punches work best on a solid wood block.
If the material is thin or soft, add a small reinforcing patch behind the marked area. You can use:
• A second layer of fabric
• Canvas tape
• Fusible interfacing
• Leather reinforcement
• A fabric adhesive patch
This step is especially helpful for thin fabric, vinyl, and materials that may stretch. The grommet should reinforce the hole, not act as the only support for a weak edge.
3. Punch the Hole
Place the cutting punch directly over the mark. Keep it vertical. If the punch leans, it can make an angled hole or a ragged cut.
Hold the material still, then strike the punch with a controlled blow. One firm strike is often better than many light taps. However, thick leather or layered canvas may need several careful strikes.
Lift the punch and inspect the hole. The edges should be clean and round. Remove loose threads or material scraps before installing the grommet.
Do not force a grommet into a hole that is too small. It can distort the material and may bend the grommet. At the same time, avoid enlarging the hole too much because a loose opening gives the grommet little material to grip.
4. Place the Grommet
Separate the grommet and washer if your kit includes both. Push the barrel of the grommet through the hole from the front or finished side of the material.
The wide flange should remain on the visible side. The narrow barrel should pass through the hole and extend out the back.
Place the washer over the barrel on the reverse side. The washer helps spread pressure and gives the barrel a surface to fold against. Some grommet styles do not use washers, so follow the instructions supplied with your kit.
Before setting it, check three things:
• The grommet is centered in the hole.
• The finished flange faces outward.
• The washer sits flat against the material.
5. Position the Tool and Anvil
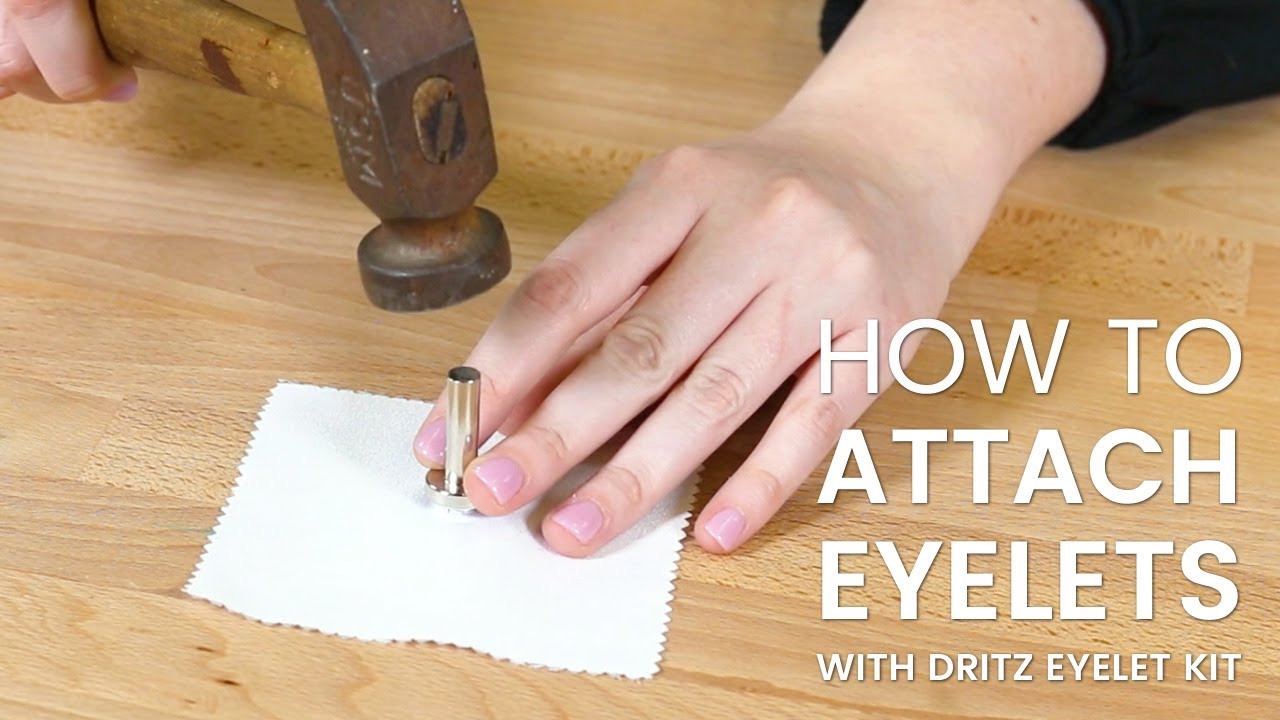
Place the grommet on the tool’s anvil or base. The front flange should sit in the matching recess. The setter should line up with the barrel or inner opening.
Keep the tool straight up and down. Alignment matters more than force. A strong strike with poor alignment can crush the flange, split the washer, or create a sharp edge.
If your tool has separate parts, the lower die supports the flange while the upper setter spreads or rolls the barrel. Read the markings on the tool if they are present. Some dies are made for one specific grommet size.
6. Set the Grommet
Strike the setter with a hammer or mallet using controlled force. Start with a moderate strike, then inspect the result.
A properly set grommet should:
• Hold the material tightly
• Sit flat against the surface
• Have no sharp metal points
• Keep a clear, round opening
• Resist turning when you twist it by hand
Do not keep striking after the grommet is already secure. Too much force can flatten the opening or cut into the material. The goal is to curl or flare the barrel, not crush the entire grommet.
7. Test the Finished Hole
Run a cord, hook, or rope through the opening. Turn the grommet gently with your fingers. It should not wobble, pull away, or cut the material.
For a project that will face tension, test a spare piece first. Pull the material in the same direction the finished item will be used. A grommet in a banner may face wind, while one in a drawstring bag may face repeated rubbing.
This simple test often reveals problems before the project is put into service.

How to Use a Grommet Hand Tool on Different Materials
The basic process stays the same, but each material needs a slightly different approach. Knowing how to use a grommet hand tool on the right material helps you avoid tearing, cracking, and poor alignment.
Fabric and Cotton
Fabric can stretch during punching. Place a firm backing under the marked area. For thin cotton, add interfacing or a second fabric layer.
Avoid pulling the fabric tight while marking. Stretching it can cause the grommet to shift after the material relaxes.
Canvas and Tarps
Canvas and tarps often need a clean punch and strong support. If the material is thick, use a tool designed for the grommet size and material thickness.
For outdoor covers, choose rust-resistant brass, stainless steel, or coated grommets. Keep the hole away from the edge, since wind and repeated movement can enlarge a weak opening.
Leather
Leather requires a sharp punch. A dull punch compresses the leather instead of cutting it cleanly.
Place leather grain side up when possible. Use a firm wood or nylon cutting surface. Do not use excessive force, as a crushed leather edge may prevent the grommet from sitting flat.
Vinyl
Vinyl can crack if it is cold or stretched. Work at room temperature and support the area with a patch if the vinyl is thin.
Make sure the grommet has a smooth edge. A rough metal edge can slowly cut vinyl during movement.
Paper and Cardstock
Small craft grommets work well for tags, planners, folders, and paper decorations. Use light pressure and a small backing block.
Paper does not provide much strength. For a hole that must carry weight, add reinforcement before installing the grommet.

Common Mistakes to Avoid
Many problems happen because the tool is used with too much force or without checking the fit. These mistakes are easy to prevent.
• Using the wrong grommet size: The tool, punch, grommet, and washer must match.
• Cutting the hole too close to the edge: The material may tear under load.
• Making the hole too large: The grommet may spin or pull out.
• Placing the washer on the wrong side: The barrel may not flare as intended.
• Striking at an angle: The grommet can set unevenly.
• Using a soft work surface: The punch may not cut cleanly.
• Skipping a test piece: A small test can prevent damage to the final project.
• Overworking the metal: Repeated hard blows may flatten the grommet.
• Ignoring sharp edges: A rough edge can damage skin, cords, or fabric.
A practical lesson from repeated repair work is to slow down at the measuring stage. The actual setting takes seconds, but a misplaced mark can ruin an otherwise careful project.

Safety Tips for Using a Grommet Hand Tool
A grommet hand tool is simple, but it still involves sharp metal and striking force. Use basic workshop safety practices every time.
• Wear safety glasses when punching or setting grommets.
• Keep your fingers away from the punch and setter.
• Use a stable, non-slip work surface.
• Inspect the tool for cracks, loose parts, or mushroomed metal ends.
• Use the hammer size recommended by the tool maker.
• Do not hold the material in your hand while striking.
• Keep children and pets away from the work area.
• File or replace damaged tools rather than continuing to use them.
Workplace safety guidance commonly recommends eye protection for tasks that can create flying particles. That advice applies to manual grommet work, especially when punching leather, canvas, or metal-backed materials.
If a grommet develops a sharp edge, remove it and install a new one. Do not rely on sanding alone if the grommet is loose or badly crushed.
How to Choose the Right Grommet Hand Tool
The best tool depends on the size, material, and number of grommets you plan to install.
For Occasional Craft Projects
A basic hand kit is usually enough for paper, light fabric, and small repairs. Look for clear size markings and a punch that matches the included grommets.
For Leather and Canvas
Choose a heavier tool with a strong setter and a sharp punch. A solid anvil gives better control than a thin stamped base.
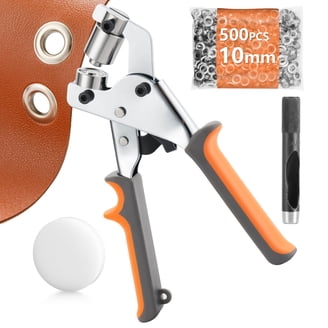
For Frequent Repairs
Consider a plier-style grommet tool or a bench-mounted press. These tools reduce hammering and may provide more consistent pressure.
For Outdoor Projects
Use corrosion-resistant grommets and a tool that can handle thick material. Brass and stainless steel are common choices for outdoor use, but the right option depends on exposure, cost, and design.
Before buying, check:
• Grommet size range
• Compatible material thickness
• Replacement punch availability
• Handle comfort
• Anvil quality
• Manufacturer instructions
A cheap kit can work well for light projects, but poor dies often create uneven results. Tool quality matters most when you need repeatable holes.
Troubleshooting Grommet Problems
If the result is poor, examine the hole, tool alignment, and grommet fit. The problem usually comes from one of those three areas.
The Grommet Is Loose
The hole may be too large, or the grommet may not match the material thickness. Use a smaller punch or add a reinforcement patch on the next attempt.
The Grommet Is Crushed
The setter may be the wrong size, or you may have used too much force. Replace the damaged grommet and confirm that the tool fits the inner barrel.
The Material Tears
The hole may be too close to the edge, or the material may need reinforcement. Move the next grommet farther inward and add backing.
The Grommet Is Crooked
The punch or setter was likely held at an angle. Keep the tool vertical and use a firm, flat work surface.
The Hole Is Ragged
The punch may be dull, or the backing may be too soft. Sharpen or replace the punch if the manufacturer allows it. Otherwise, use a new punch.
The Washer Splits
The washer may be facing the wrong way, or the grommet and washer may not be a matched set. Use the washer supplied for that grommet size.

Tips for Strong, Professional Results
Once you know how to use a grommet hand tool, small habits can make your work look much cleaner.
Measure from a fixed edge rather than guessing each location. For a row of grommets, make a paper template first. This is useful for banners, curtains, and fabric panels.
Test the complete setup on scrap material. Use the same number of layers and the same backing as the final project. A grommet that works on one layer may fail on three layers.
Keep the tool clean and dry. Wipe away metal dust and store punches so their cutting edges do not strike other tools. Lightly protect steel parts from rust if the kit will sit unused for a long time.
Use a calm rhythm:
Mark the center.
Check the edge distance.
Punch straight down.
Place the grommet and washer.
Align the setter.
Strike with controlled force.
Inspect and test.
That routine makes how to use a grommet hand tool feel almost automatic. It also limits errors because every step has a clear purpose.

Frequently Asked Questions About How to Use a Grommet Hand Tool
Can I use a grommet hand tool without a washer?
Some grommets are designed to work without washers, but many two-piece grommets need one for proper support. Use the washer supplied with the kit unless the manufacturer gives different instructions.
How do I know which side of the grommet faces up?
The wide, finished flange normally faces the visible side of the material. The narrow barrel passes through the hole and is flared against the washer on the back.
Can I install grommets in thick leather?
Yes, if the punch and setter are designed for the leather thickness and grommet size. Use a sharp punch, a hard backing block, and test on scrap leather first.
Why does my grommet keep pulling out?
The hole may be too large, too close to the edge, or unsupported. The grommet may also be too small for the material or poorly flared during setting.
Can I use a regular hammer with a grommet hand tool?
Many manual kits are made for use with a regular hammer, but follow the tool instructions. Use controlled strikes and wear safety glasses to protect your eyes.
How many times should I hit the setter?
There is no single number because material thickness and tool design differ. Start with one firm strike, inspect the grommet, and add light strikes only if the barrel is not fully set.
Conclusion
Learning how to use a grommet hand tool comes down to proper sizing, careful marking, a clean hole, correct washer placement, and straight, controlled strikes. Support thin materials, keep holes away from edges, and test the finished grommet before putting it under stress.
Start with a scrap piece before working on your final project. With a little practice, you can make strong, neat grommet holes in fabric, leather, canvas, vinyl, and paper. Try these steps on your next repair, and share your project or questions in the comments.
