

You can build a beautiful chess board with hand tools by measuring well, cutting carefully, and sanding for a smooth fit.
Making a chess board with hand tools is one of those projects that looks simple from far away, then rewards patience at every step. I’ve found that the best boards come from careful layout, clean cuts, and a calm pace, not fancy machines. If you want a handmade board with real character, this guide will walk you through the whole process in a way that feels practical, doable, and worth your time.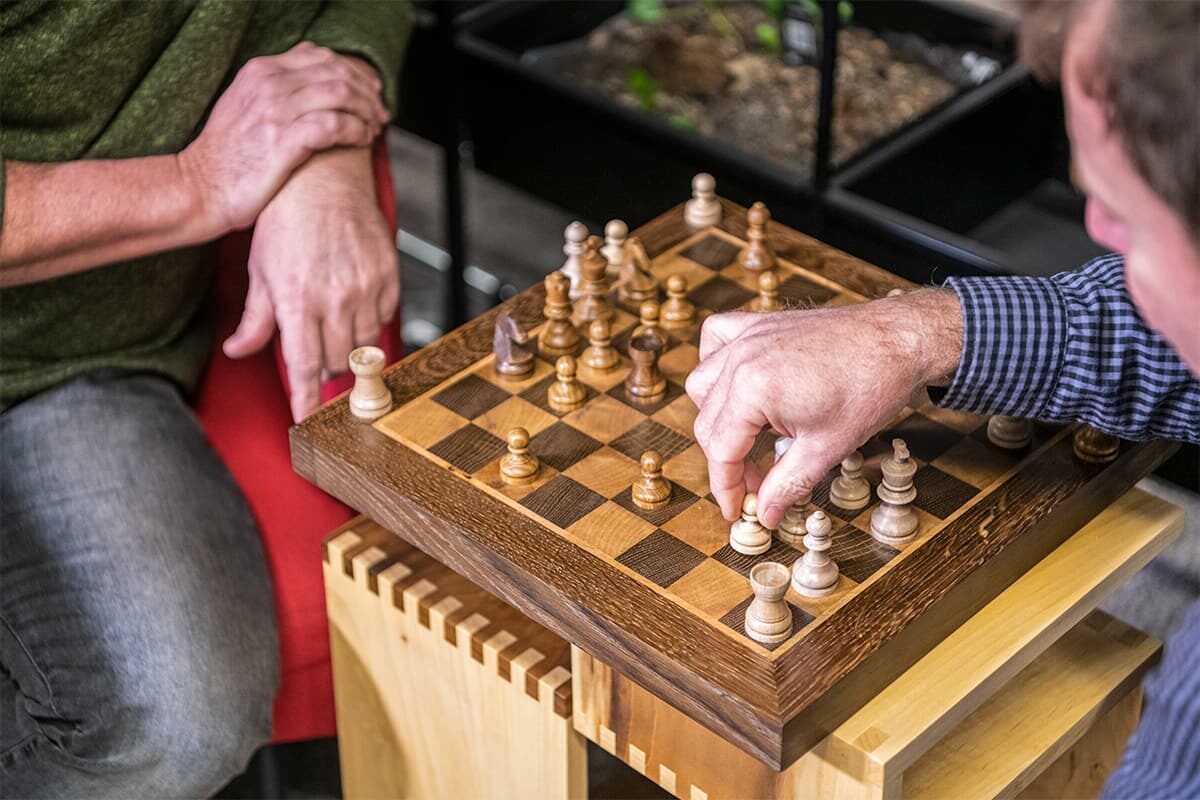
Why make a chess board with hand tools?
A hand tool chess board has a charm that machine-made pieces often miss. The wood grain feels warmer, the edges feel more personal, and small marks from the process tell a story. For many woodworkers, this is also a great way to practice core skills like measuring, marking, sawing, planing, and sanding.
There’s another benefit too: hand tools make the project more accessible. You do not need a table saw or a router table to make a clean, attractive board. With a good saw, a plane, a sharp chisel, a marking gauge, and patience, you can build something that looks refined and plays well.
Tools and materials you’ll need
Before you start, gather everything in one place. That saves time and helps you work in a smoother rhythm.
Essential hand tools
• Hand saw or backsaw: useful for cutting strips and trimming squares
• Marking knife or pencil: helps you make accurate lines
• Try square: keeps your layout square
• Rule or tape measure: for consistent sizing
• Hand plane: for flattening and smoothing stock
• Chisels: for small corrections and cleaning edges
• Clamps: to hold glued pieces tight
• Sandpaper or sanding block: for finishing the surface
• Cutting gauge or marking gauge: helps repeat exact widths
Wood and supplies
• Hardwood boards such as maple, walnut, cherry, or oak
• Wood glue
• Optional border wood for a frame
• Finish such as oil, shellac, or wipe-on polyurethane
• Scrap wood for test cuts
I usually recommend starting with two contrasting woods. Light maple and dark walnut are classic because they make the squares easy to see. The contrast matters more than the species name, as long as the woods are stable and easy to work.
Planning your chess board size and layout
A standard chess board has 8 by 8 squares, for 64 total spaces. Each square should be equal in size, and the board should feel balanced in the hand and on the table. A common finished size is around 16 inches by 16 inches if each square is 2 inches wide.
That said, you can choose any size that fits your needs. Smaller boards work well for travel, while larger boards feel more display-worthy. Just keep the proportions consistent so each square stays square.
A smart way to avoid mistakes is to decide your final square size first, then build the board around that number. For example:
• 1.5 inch squares create a compact board
• 2 inch squares create a classic board
• 2.25 inch squares make a larger, easier-to-read board
I’ve seen many first-time builders rush this step, only to discover that one square is slightly off and the whole grid starts to drift. That tiny error may not sound like much, but on a chess board it stands out fast.
How to make a chess board with hand tools step by step
This is the heart of the project. The key is not speed. The key is repeatable accuracy.
1. Mill and flatten the wood
Start with boards that are as flat as possible. If the faces are cupped or twisted, your squares will not sit right. Use a hand plane to flatten the boards and make the edges straight enough for clean glue joints.
If your lumber is rough, let it acclimate to your room for a few days first. Wood moves with humidity, and that movement can throw off your layout. I learned this the hard way on an early project when a board looked perfect one day and slightly bowed the next.
2. Rip the strips for the checker pattern
Cut your light and dark woods into strips of equal width. If your target square size is 2 inches, cut the strips slightly wider at first, then plane or trim them to final size.
Use a marking gauge and try square so every strip matches. Consistency here makes the later steps much easier. Even a small width difference can ripple across the whole board.
3. Glue the strips into alternating pattern
Arrange the strips in light-dark-light-dark order. Make sure the grain direction looks pleasing before gluing. Apply glue evenly, clamp the strips together, and check that the edges stay aligned.
After the glue dries, you will have a panel with stripes. This is the base for your checkerboard pattern.
4. Square and trim the striped panel
Once the panel is dry, trim one edge straight and square. Then cut the panel into strips again, using the same width as your square size. This step creates the checker pattern when the strips are turned and re-glued.
Be careful here. If your cuts wander, the squares will no longer line up. I like to mark each strip before turning it so I do not lose track of orientation.
5. Flip every other strip
Turn every other strip so the colors alternate in both directions. This is the moment when the board pattern appears. Lay the strips out before gluing to check the pattern and make sure the corners line up.
It helps to dry-fit the whole layout first. If one strip is reversed by mistake, the pattern will break immediately. That is easy to fix before glue, but much harder after.
6. Glue the checkerboard panel
Glue the flipped strips together and clamp them tightly. Use cauls or scrap wood to help keep the panel flat. Wipe away excess glue before it hardens.
Once dry, remove the clamps and inspect the board. If the panel is a little uneven, use a hand plane to level it. Then sand it smooth with progressively finer grits.
7. Add a border frame if you want one
A border frame is optional, but it can make the board look more finished. It also gives the board a nice visual edge. Cut four strips of contrasting or matching wood and fit them around the checker panel.
Use hand tools to make clean miter joints or simple butt joints. A frame is not required for play, but it does elevate the look. If you want a more traditional style, a border can make the board feel closer to a heirloom piece.
8. Cut the board to final size
After the panel is assembled, trim it to final dimensions. Make sure the outer edges are square. This is a good time to confirm that all 64 squares are even and that the board reads clearly from every side.
I suggest checking the board with a ruler and square before finishing. It takes only a minute, and it can save a lot of regret later.
9. Sand and finish the surface
Start sanding with medium grit and move to a finer grit. Do not rush this part. A smooth surface helps the finish absorb evenly and makes the board pleasant to touch.
Choose a finish that fits the look you want:
• Oil finish for a warm, natural feel
• Shellac for a classic hand-rubbed look
• Wipe-on polyurethane for more protection and easy cleanup
Apply thin coats and let each one dry fully. Light sanding between coats can improve the final feel.

Best wood choices for a handmade chess board
Wood choice affects both appearance and performance. The best woods are stable, easy to cut by hand, and visually distinct.
Good light woods
• Maple: clean, bright, and classic
• Birch: affordable and smooth
• Ash: visible grain and decent contrast
Good dark woods
• Walnut: rich color and a premium look
• Cherry: warm tone that deepens over time
• Mahogany: elegant, though it can be softer
For beginner projects, maple and walnut are often the easiest pair to work with. They give strong contrast without requiring special staining tricks. That matters because stain can sometimes blur grain or make the board look uneven.
Common mistakes to avoid
This project is simple in concept, but small errors add up quickly. The most common mistakes are all about measurement and patience.
• Cutting strips with inconsistent width: this throws off the entire pattern
• Skipping dry fits: you may not notice a flipped strip until it is too late
• Clamping too lightly: weak pressure can leave gaps
• Over-sanding edges: this can round the board and distort the squares
• Using wet or unstable wood: movement after assembly can warp the board
One lesson I keep coming back to is this: hand tool work rewards honesty. If something looks slightly off, it probably is. Stop and correct it early.
Tips for accurate hand-tool work
Accuracy is the whole game here. A few simple habits make a big difference.
• Sharpen your tools before you begin
• Mark from the same reference edge every time
• Use stop marks and layout lines
• Check square often, not just at the end
• Make test cuts on scrap first
• Work in bright light so you can see gaps clearly
I also like to keep a scrap piece next to the main project as a quick gauge. It helps me compare widths and catch drift before it becomes a problem. That little habit has saved more than one project.
Finishing options and how they affect the board
The finish changes both the look and the feel of your chess board. It also affects how easy the board is to clean and maintain.
Oil finish
Oil brings out grain and gives the board a soft sheen. It is easy to apply and forgiving for beginners. The downside is that it offers less surface protection than film finishes.
Shellac
Shellac gives a warm, traditional look. It dries fast and can be repaired easily. However, it may not handle moisture as well as polyurethane.
Polyurethane
Polyurethane provides stronger protection and a more durable surface. Wipe-on versions are easier for hand tool builders because they do not require spray equipment. The downside is that too much can make the board look plastic if applied heavily.
For most hand-built boards, I lean toward a thin oil or shellac finish. They keep the wood looking alive instead of sealed under a thick coat.
Making the board more playable and durable
A chess board should not just look nice. It should sit flat, resist wear, and stay easy to use.
Here are a few ways to improve durability:
• Keep the board flat by flattening after glue-up
• Use stable hardwoods with similar movement rates
• Avoid overly thick finish buildup
• Add felt pads underneath to protect tables
• Store the board away from heat and moisture
If you plan to use the board often, a simple protective finish and a solid frame are worth the extra time. A board that survives daily use is more satisfying than one that only looks good on day one.
Why hand tools are worth it for this project
Some people think hand tools are slower than power tools, and that is true. But slower is not always worse. Slower often means more control, and more control means better results when precision matters.
A hand tool chess board teaches you how to listen to the wood. You feel when a plane is cutting well. You notice when a joint closes properly. You learn to trust your eye and your hands together.
That is why this project is such a good fit for both beginners and experienced woodworkers. It builds skill while giving you something useful and attractive at the end.
Frequently Asked Questions of how to make a chess board with hand tools
What is the easiest way to make a chess board with hand tools?
The easiest method is to glue alternating wood strips into a panel, then cut and flip those strips to form the checker pattern. This keeps the layout simple and reduces the need for complex joinery.
What size should each square be?
A common size is 2 inches per square, which creates a board that works well for standard chess pieces. You can go smaller or larger, but keep all 64 squares equal for a clean look.
Can I make a chess board without a table saw?
Yes, you can make a chess board with hand tools only. A backsaw, hand plane, chisel, marking gauge, and clamps are enough if you work carefully and measure well.
What wood is best for a chess board?
Maple and walnut are a classic pair because they give strong contrast and are easy to recognize during play. Other stable hardwoods like cherry, birch, and ash can also work well.
How do I keep the board flat after glue-up?
Use well-dried wood, even clamping pressure, and a flat work surface. After the glue dries, check for twist or bow and correct it with a hand plane before sanding and finishing.
What finish should I use on a handmade chess board?
A thin oil, shellac, or wipe-on polyurethane finish all work well. The best choice depends on whether you want a natural feel, a classic look, or extra durability.
Conclusion
Making a chess board with hand tools is a rewarding project because it blends patience, skill, and simple materials into something lasting. If you measure carefully, keep your cuts consistent, and finish the board with care, you can create a piece that looks elegant and plays beautifully. The process is as satisfying as the result, especially when you see those clean squares come together for the first time.
If you are ready to try it, start with good wood, sharp tools, and a clear plan. Then take your time and let each step build on the last. For more woodworking guides like this, keep exploring, subscribe for future tips, or leave a comment with your own project ideas.
