

Use a sharp blade, secure the work, and push the mini hacksaw forward with slow, even strokes.
Learning how to use a mini hacksaw is simple, but good results depend on the right blade, firm control, and patience. This small hand tool can cut plastic, thin metal, pipe, wire, and small bolts when a full-size hacksaw is too large. In this guide, you’ll learn the safe method, useful techniques, common mistakes, and practical tips that make each cut cleaner.
What Is a Mini Hacksaw?
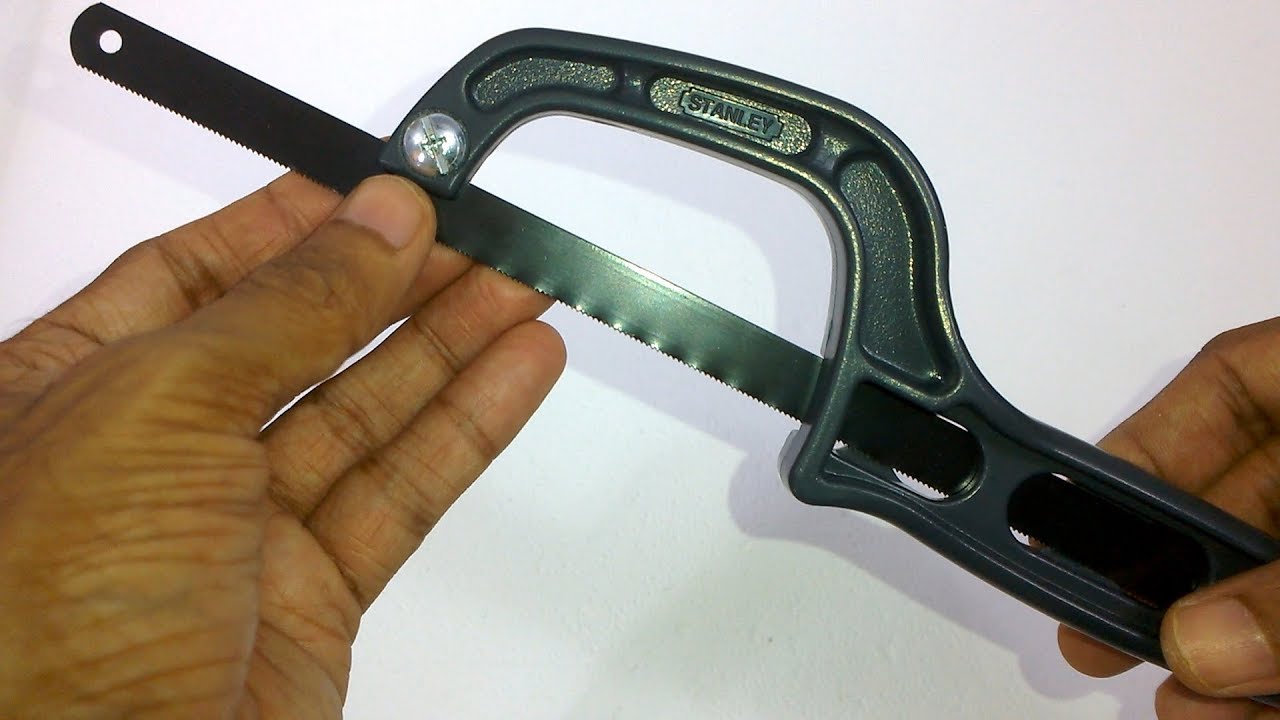
A mini hacksaw is a compact hand saw with a narrow, fine-tooth blade. Most models have a small metal frame, a handle, and a replaceable blade. Some use a short blade fixed at one end, while others have a frame that holds a standard 10- to 12-inch hacksaw blade.
The tool is useful for light cutting jobs in tight spaces. You might use it to cut PVC pipe, copper tubing, threaded rod, small bolts, plastic trim, or thin sheet metal.
A mini hacksaw is not a replacement for a reciprocating saw, angle grinder, or full-size hacksaw. It cuts more slowly, but it offers better control and creates less noise. That makes it useful for home repairs, crafts, plumbing work, model building, and small workshop tasks.
Parts of a Mini Hacksaw
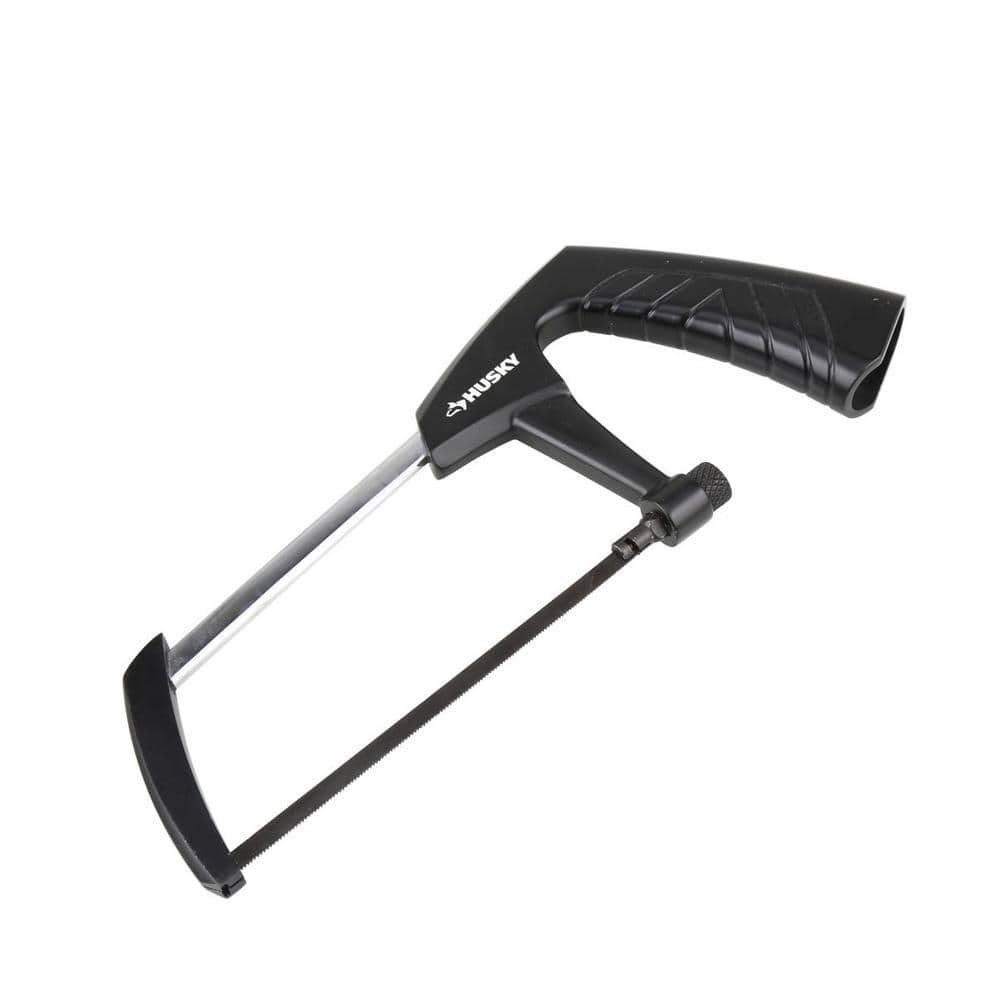
Before learning how to use a mini hacksaw, identify its main parts. Knowing the tool helps you hold it correctly and spot problems before they affect the cut.
• Handle: The handle gives you control and protects your hand from the blade.
• Frame: The frame supports the blade and keeps it straight during the cut.
• Blade: The blade has small teeth that remove material as you move it forward.
• Blade mounts: These points hold the blade in place. Some models allow the blade to face in different directions.
• Tensioning screw: Many mini hacksaws use a screw or lever to tighten the blade.
The teeth should usually point away from the handle. A hacksaw cuts on the forward stroke, so the teeth must face the direction in which you push.
A loose blade can bend, wander, or break. A blade that is too tight can also snap under pressure. Aim for firm tension without forcing the frame.

Choose the Right Blade
The blade affects the speed, smoothness, and safety of your cut. Hacksaw blades are commonly described by teeth per inch, or TPI.
• 14 to 18 TPI: Best for thicker metal and faster cutting.
• 24 TPI: A good general-purpose choice for thin metal and plastic.
• 32 TPI: Useful for thin sheet metal, small tubing, and fine cuts.
Use a coarse blade for thick material and a fine blade for thin material. A fine blade has more teeth in contact with the work, which helps prevent snagging on thin stock.
For plastic pipe, a medium or fine blade usually works well. For copper tubing, a fine-tooth blade can produce a clean cut. For steel bolts or threaded rod, use a sharp blade made for metal.
Check the blade before each job. Replace it if the teeth look dull, several teeth are missing, or the blade has a visible bend or crack.

Safety Precautions Before Cutting
Safe tool use starts before the first stroke. A mini hacksaw is small, but its blade can cause cuts, and the material can create sharp edges.
Wear safety glasses when cutting metal or brittle plastic. Small chips can travel upward, especially when the blade exits the material.
Secure the work with a vise, clamp, or strong workholding device. Never hold a small piece in your hand while sawing. Your hand may move toward the blade when the material shifts.
Keep your fingers behind the blade path. Leave enough space for the frame and your hand to move without striking nearby objects.
Use these basic safety steps:
Inspect the blade and frame for damage.
Make sure the blade is tight and points in the correct direction.
Mark the cut line clearly.
Secure the material so it cannot roll or slide.
Wear eye protection.
Keep the work area bright and clear.
Cut away from your body when possible.
Work gloves can protect against sharp material edges, but they do not make it safe to place your fingers near the blade. Avoid loose clothing, jewelry, and anything that could catch on the tool.
How to Use a Mini Hacksaw Step by Step
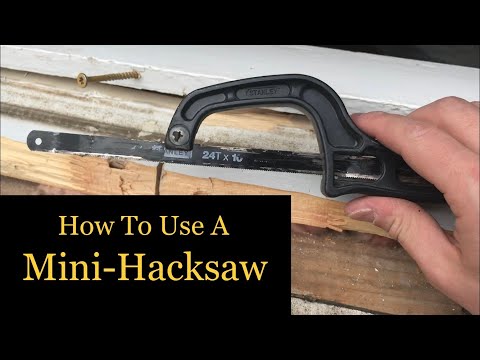
The best way to understand how to use a mini hacksaw is to follow a steady process. Each step supports the next one.
1. Measure and Mark the Cut
Measure the material with a ruler or tape measure. Mark the cut with a pencil, permanent marker, scribe, or painter’s tape.
For a straight cut, wrap tape around a pipe or tube. Use the edge of the tape as a guide. On a flat piece, draw a clear line across the surface.
Measure twice before cutting. A mini hacksaw removes material, so you cannot restore length after making a cut.
2. Secure the Material
Place the work in a vise if possible. Tighten it enough to hold the material without crushing it.
For pipe, support both sides of the cut. This reduces vibration and helps prevent the pipe from rolling. If you are cutting a small bolt, place it in a vise with the cut line just above the jaws.
Protect delicate surfaces with scrap wood, cardboard, or soft jaw covers.
3. Set the Blade on the Cut Line
Place the blade on the waste side of the mark. This leaves the finished piece at the correct size.
Hold the mini hacksaw at a comfortable angle. For most straight cuts, keep the blade close to 90 degrees to the material. A slight angle may help the blade start, but avoid twisting it.
4. Start With Short Strokes
Use light pressure and short forward strokes to create a shallow groove. This first groove is called a starting kerf.
Do not rush this step. A deep, straight groove acts like a track for the blade. If you begin with long or forceful strokes, the blade may slide off the mark.
5. Use Long, Controlled Strokes
Once the groove is established, use longer strokes that engage most of the blade. Push forward with moderate pressure, then release pressure as you pull back.
The forward stroke does the cutting. The backward stroke resets the blade. Do not press hard on the return stroke.
Keep the blade straight. Let the teeth do the work rather than forcing the tool through the material.
6. Slow Down Near the End
As the blade nears the bottom of the cut, reduce pressure. Thin material can bend or break suddenly when only a small section remains.
Support the waste piece so it does not fall and pull the material apart. Finish with short, gentle strokes for a cleaner edge.
7. Smooth the Edge
After cutting, inspect the edge for burrs or sharp points. Use a file, deburring tool, or fine sandpaper to smooth it.
For metal, a flat file works well. For plastic, light sanding can remove rough edges. Wear eye protection during this step because small burrs can break free.

How to Cut Different Materials
The method for how to use a mini hacksaw changes slightly with each material. The same basic rule applies: secure the work, use the correct blade, and avoid excess force.
Cutting Plastic Pipe
Use a fine or medium-tooth blade. Mark the pipe all the way around if you need a square cut.
Start slowly to avoid melting or chipping the plastic. Keep the blade straight and rotate the pipe only if it is securely supported.
After cutting, remove the inner and outer burrs. Burrs can restrict water flow or prevent a fitting from seating properly.
Cutting Copper Tubing
Copper is soft and cuts easily with a sharp fine-tooth blade. Clamp the tube gently because excessive pressure can flatten it.
Use short strokes at the start. Once the groove is stable, use smooth, even strokes. Clean the cut edge before joining the tube to a fitting.
Cutting Threaded Rod or Small Bolts
Place the rod in a vise and protect the threads near the cut. Leave the nut on the rod before cutting if possible.
After the cut, remove the nut slowly. As it passes over the cut end, it can help restore slightly damaged threads. A file may still be needed to create a small bevel.
Cutting Sheet Metal
Support the sheet near the cutting line. A fine-tooth blade usually gives better control than a coarse blade.
Sheet metal can flex and vibrate, so clamp it between two pieces of scrap wood if practical. Keep your free hand away from the cut edge, which can be extremely sharp.
Cutting Wood
A mini hacksaw is not the best tool for wood. Its fine metal-cutting teeth may clog with sawdust and create a slow, rough cut.
For wood, use a handsaw, backsaw, or coping saw. Use a mini hacksaw only for very thin plastic-based materials or special small jobs when no better tool is available.
Tips for Cleaner and Faster Cuts
Good technique matters more than strength. Think of the blade as a small team of teeth. They work best when each tooth gets a fair chance to cut.
• Keep the blade straight: Sideways pressure can bend or break the blade.
• Use steady rhythm: Smooth strokes usually cut faster than aggressive strokes.
• Use the full blade length: This spreads wear across more teeth.
• Let the blade cool: Pause during long cuts in hard metal.
• Use cutting oil on steel: A small amount can reduce friction and extend blade life. Keep oil away from materials that may be damaged by it.
• Clamp close to the cut: Less unsupported material means less vibration.
• Use a guide block: A scrap block with a matching groove can help keep early strokes straight.
One lesson I learned from small repair work is that pressing harder rarely saves time. It often makes the blade bind, bends the cut, and leaves a rough edge. A relaxed grip and steady pace usually produce a better result.

Common Mistakes to Avoid
Many poor cuts come from setup errors rather than a weak tool. Avoid these common problems when learning how to use a mini hacksaw.
Using a Dull Blade
A dull blade needs more pressure. It may rub instead of cut, which creates heat and makes the work uncomfortable.
Replace the blade as soon as cutting becomes slow or uneven. Blades are inexpensive compared with damaged material or an injured hand.
Holding the Work by Hand
Small parts can shift without warning. This is one of the most common causes of slips.
Use a vise, clamp, or a stable support. If the piece is too small for a regular vise, use locking pliers or a small bench vise.
Installing the Blade Backward
A backward blade may slide over the material or cut poorly. Check that the teeth face away from the handle before tightening the blade.
Using Too Much Force
Heavy pressure can bend the blade and cause it to jam. It also makes fatigue more likely.
Apply enough pressure to keep the teeth engaged. If the blade will not cut, check the blade type, sharpness, and tension before pushing harder.
Starting Without a Groove
A blade can wander across a smooth surface. Create a shallow starting groove with short strokes before using the full blade length.
Cutting Without Eye Protection
Metal and plastic chips are small but sharp. Safety glasses are a simple way to reduce a serious risk.

Mini Hacksaw Maintenance and Storage
A clean, well-maintained mini hacksaw is easier to control. Wipe metal dust and plastic particles from the frame after use.
Check the blade tension before storing the tool. If the blade will remain unused for a long time, follow the manufacturer’s instructions. Some users loosen the blade slightly to reduce frame stress, while others keep it tensioned. The correct choice depends on the tool design.
Store spare blades in a dry container. Moisture can cause rust, especially on carbon steel blades. A light protective coating may help, but avoid oily storage if the blade will be used on materials that must stay clean.
Replace damaged frames, loose handles, and cracked blade mounts. Do not try to repair a cracked frame with tape or glue. The frame holds tension, so a failure can release the blade suddenly.

When a Mini Hacksaw Is Not the Right Tool
A mini hacksaw is useful for small, controlled cuts, but it has limits. Choose another tool when the material is too thick, the cut must be highly precise, or the job requires many repeated cuts.
A full-size hacksaw may be better for thick steel or long cuts. A pipe cutter can make a cleaner cut on suitable tubing. An angle grinder can handle heavy metal, but it creates sparks and requires stronger safety controls.
Power tools also bring added risks. Follow the manufacturer’s instructions, use the right guard, and wear suitable protective equipment. Never use a mini hacksaw for live electrical wires or any material that may contain hidden energy.
If you are unsure about a material, stop and identify it first. Cutting coated, treated, pressurized, or unknown material can release harmful dust or create other hazards.
Frequently Asked Questions About How to Use a Mini Hacksaw
Which way should the mini hacksaw blade face?
The teeth should usually face away from the handle. A hacksaw cuts during the forward push, so the teeth need to point toward the direction of travel.
Can a mini hacksaw cut metal?
Yes, a mini hacksaw can cut thin metal, copper tubing, small bolts, threaded rod, and sheet metal. Choose a sharp blade with a suitable tooth count, and secure the material before cutting.
How do you keep a mini hacksaw cut straight?
Mark the cut clearly, secure the material, and begin with short strokes to create a guide groove. Keep the blade straight and avoid twisting or pushing sideways.
Why does my mini hacksaw blade keep breaking?
Blade breakage often results from excessive force, incorrect tension, sideways pressure, or a damaged blade. Check the blade direction and tension, then use slower strokes with lighter pressure.
Can a mini hacksaw cut PVC pipe?
Yes, it can cut PVC pipe effectively. Use a fine or medium-tooth blade, support the pipe well, and remove burrs from the cut edge before assembly.
Should you use oil with a mini hacksaw?
A small amount of cutting oil can help when cutting steel by reducing friction and heat. Do not use oil if it may damage the material or create a slipping hazard.
How do you cut a bolt with a mini hacksaw?
Mark the bolt, secure it in a vise, and cut with a sharp metal blade. Threading a nut onto the bolt before cutting can help protect or realign the threads after the cut.
Conclusion
A mini hacksaw is a small tool with a surprisingly wide range of uses. The key steps are simple: choose the right blade, mark the cut, secure the material, start with short strokes, and use steady forward pressure.
The safest and cleanest results come from patience, not force. Practice on scrap material first, inspect each cut, and replace dull or damaged blades before the next job. Use these steps on your next repair, and explore more hands-on tool guides to build your confidence.
