

Shape wood with hand tools by reading the grain, removing small amounts, and refining the surface with sharp, well-used tools.
Learning how to shape wood with hand tools gives you control that machines often cannot match. You can feel the grain, hear changes in the cut, and make small adjustments as a project takes form. This guide explains the tools, methods, safety steps, and practical lessons that help beginners work with confidence.
Why Shape Wood With Hand Tools?
Hand tools let you remove wood slowly and with purpose. That pace may seem less efficient at first, but it helps you avoid large mistakes. A hand plane can take off a thin shaving, while a chisel can clean a corner that a power tool might damage.
Many woodworkers also enjoy the quiet rhythm of handwork. You can work without dust clouds, loud motors, or complex setups. The process feels direct: your hands guide the tool, and the wood tells you what to do next.
The main benefits include:
- Better control over the final shape
- Less noise and lower energy use
- Cleaner work in small spaces
- Greater awareness of grain direction
- Easier correction of small errors
- A stronger connection with the material
Hand tools do have limits. They need sharp edges, proper technique, and patience. Dense wood, large stock, and repeated production work may call for power tools. Still, hand tools remain useful for shaping, fitting, smoothing, and final detail work.
Essential Hand Tools for Shaping Wood
You do not need a large tool collection to start shaping wood with hand tools. A few reliable tools can handle most basic tasks. Buy fewer tools at first, but choose tools that feel safe and comfortable in your hands.
Marking and Measuring Tools
Accurate marks guide every cut. Use a combination square to mark 90-degree and 45-degree lines. A marking gauge helps scribe a line parallel to an edge, while a pencil works well for rough layouts.
Keep a sharp pencil, ruler, tape measure, and marking knife nearby. A knife line gives more accuracy than a wide pencil mark when you need to cut a joint or trim an edge.
Saws
A backsaw, panel saw, or Japanese pull saw can remove large amounts of wood before you refine the shape. Choose the saw based on the cut.
- Use a crosscut saw across the grain.
- Use a rip saw with the grain.
- Use a backsaw for controlled joinery cuts.
- Use a coping saw for curves and inside openings.
- Use a Japanese pull saw for thin, clean cuts.
Chisels
Bench chisels are useful for chopping, paring, trimming, and cleaning corners. A set that includes 1/4-inch, 1/2-inch, 3/4-inch, and 1-inch sizes covers many common jobs.
Never use a fine paring chisel as a striking tool unless the maker designed it for that purpose. For heavy chopping, use a sturdy bench chisel and a wooden or soft-faced mallet.
Planes
Planes remove thin layers and create flat, smooth surfaces. A jack plane is a flexible choice for rough shaping. A smoothing plane leaves a fine finish, and a block plane works well on end grain and small parts.
A spokeshave is ideal for curved edges, chair parts, handles, and rounded forms. It may look simple, but it can remove wood quickly when the blade is sharp.
Files, Rasps, and Scrapers
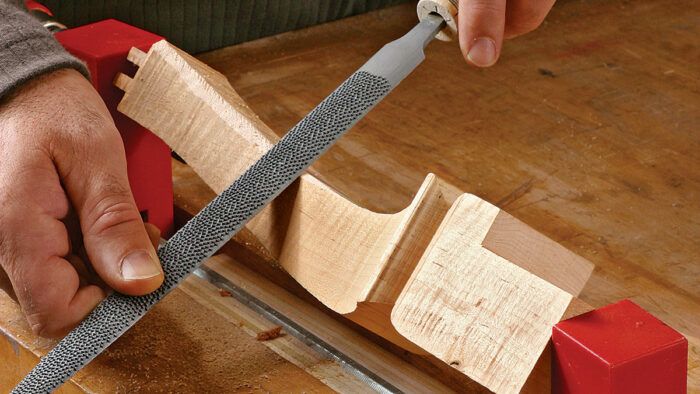
A rasp removes wood from curved or irregular shapes. Files refine the surface after the rasp. A card scraper can produce a clean surface with very little dust.
Rasps are excellent for shaping chair seats, tool handles, and sculpted parts. They work best when you use light pressure and let the teeth cut instead of forcing them.

Choose the Right Wood Before You Begin
The species, moisture level, and grain pattern affect how easily you can shape wood with hand tools. Softwoods such as pine and cedar cut easily, but they can crush or tear near knots. Hardwoods such as maple and oak hold crisp details, but they demand sharper tools and more controlled cuts.
Look closely at the board before marking it. Find the growth rings, knots, checks, and changes in grain. Plan your cuts so the tool moves with the grain whenever possible.
Wood grain acts like a group of tiny straws. A tool moving in the same direction as those straws usually makes a clean cut. A tool moving against them may lift fibers and create tear-out.
Before you start, check for:
- Loose knots
- Splits and end checks
- Twisted or cupped areas
- Nail, screw, or staple remains
- Sudden changes in grain direction
- Excess moisture or very dry wood
For indoor furniture, let the wood adjust to the room before final shaping. Wood changes size as its moisture content changes. A board that looks straight today may move after it enters a heated or air-conditioned home.

Prepare the Workpiece and Workbench
Good support makes shaping safer and more accurate. Clamp the workpiece so it cannot slide, rock, or vibrate. A bench hook helps with sawing, while a planing stop holds boards during hand-planing.
Keep the cutting area at a comfortable height. If the bench is too low, you may bend your back and press too hard. If it is too high, you may lose control of the tool.
Mark the waste side clearly. A simple X or shaded area can prevent a costly mistake. Check your layout twice before cutting, especially when the part must fit another piece.
A stable setup should provide:
- Firm support under the workpiece
- Clear space for the tool stroke
- Good light from the side
- A safe place for sharp tools
- Enough room for your hands and elbows
- A way to catch or control falling pieces
In my own shop, one of the most common early mistakes was beginning with a poor clamp setup. The board moved slightly, so each cut became harder to control. Once the workpiece was secure, the same tool felt far more precise.

How to Shape Wood With Hand Tools: A Step-by-Step Method
The safest way to shape wood with hand tools is to remove material in stages. Start with a rough shape, then move toward the final lines. Do not try to make one perfect cut at the beginning.
1. Study the Finished Shape
Look at the part from several angles. Decide which surfaces must be flat, which edges must stay square, and which areas will become curved.
Make a simple drawing or mark the shape directly on the wood. Add reference lines to show the high points and low points. These lines act like a map during the work.
2. Mark the Waste
Mark the section that must disappear. Leave a small amount of extra wood near the final line. This extra material gives you room to correct the shape during refinement.
For a curved part, mark the curve on both sides. You can also draw several cross-section lines along the length. These lines show whether the shape stays even from one end to the other.
3. Remove Large Waste Safely
Use a saw to remove corners or large sections first. Stop before the final layout line. If the waste is thick, make several shallow cuts rather than forcing one deep cut.
You can also use a chisel to split away small waste pieces. Work from the edge toward the center to reduce the chance of breaking out a large section.
4. Establish Flat Reference Surfaces
Create one flat face first when the project needs accurate sides. Mark that face as your reference surface. Use it to guide later measurements and cuts.
A hand plane works well here. Take light shavings and check the surface often with a straightedge or combination square.
5. Refine the Shape
Use a jack plane, block plane, spokeshave, rasp, or chisel based on the shape. Work slowly and change tools when the task changes.
A plane works best on broad surfaces. A spokeshave works well on convex curves. A rasp handles uneven curves and inside shapes. A sharp chisel cleans corners and small transitions.
6. Check the Shape From Every Side
Stop often and inspect the work. Look along the length, across the width, and at both ends. Your fingers can also detect bumps that your eyes may miss.
Use a straightedge for flat areas and a template for repeated curves. If you are making two matching parts, compare them often rather than waiting until the end.
7. Finish the Surface
Once the form is correct, remove tool marks with a fine plane, scraper, or sandpaper. Sanding should refine the surface, not fix a badly shaped part.
Start with a suitable grit and move through finer grits only as needed. Keep the surface clean so you can see scratches and remaining tool marks.

How to Use a Hand Plane
A hand plane works by sliding a sharp blade across the surface and lifting a thin shaving. The result depends on blade sharpness, mouth opening, cutting depth, and grain direction.
Set the blade for a light cut when you are learning. Place the front of the plane on the wood first, then push with steady pressure. As the plane reaches the end of the board, shift pressure toward the rear.
Keep the plane flat. Do not rock it from side to side. Let your arms guide the stroke while your body adds smooth forward movement.
When tear-out appears, try these adjustments:
- Plane in the opposite direction
- Reduce the blade depth
- Sharpen the blade
- Narrow the plane mouth
- Take a shorter cut
- Use a scraping action near difficult grain
I once spent too long trying to force a dull plane through figured maple. The wood tore out, and the work became tiring. After sharpening the blade and reducing the cut, the plane began producing thin, clean shavings almost at once.

How to Use Chisels for Accurate Shaping
Chisels remove wood through either chopping or paring. Chopping uses a mallet and removes deeper waste. Paring uses hand pressure and takes thin shavings.
Hold the chisel with both hands when making a fine paring cut. Keep the bevel flat against the surface when you want to trim a flat area. For a stopped cut, place the cutting edge on the line and tap gently.
Always cut away from your body. Keep your free hand behind the cutting edge, not in front of it. A sharp chisel needs less force, so it is often safer than a dull one.
For clean corners:
- Mark the corner with a knife.
- Make a shallow cut on the waste side.
- Remove waste in small layers.
- Pare to the line from the clean side.
- Check the corner with a square.
Do not twist a chisel while it is buried deep in the wood. Twisting can damage the edge or split the workpiece. Lift the tool, remove a smaller amount, and try again.
Shaping Curves and Rounded Parts
Curves require frequent checking. A curve that looks smooth from above may have a flat spot when viewed from the side. Use a flexible ruler, cardboard template, or tracing method to keep the shape consistent.
A spokeshave is a favorite tool for convex curves. Set the blade for a fine cut and begin with short strokes. As your control improves, lengthen the stroke.
For concave curves, use a round rasp, half-round file, or curved scraper. A narrow chisel can also remove waste from tight areas, but it requires extra care.
When shaping a handle, imagine a series of small sections rather than one large curve. Mark the centerline and several diameter points. Remove the high areas until each section blends into the next.
Useful methods include:
- Sawing close to a curve before using a rasp
- Making facets before rounding the surface
- Checking symmetry with calipers
- Using a template at both ends
- Rotating the workpiece often
- Removing less wood near the final line
Facets are not a failure. They are a useful halfway stage. A round handle often begins as a square section, then an octagon, then a smoother form.
Sharpening and Maintaining Hand Tools
Sharp tools are central to learning how to shape wood with hand tools. A dull edge needs extra force, slips more easily, and often leaves a rough surface.
Most edge tools can be sharpened with water stones, oil stones, diamond plates, or abrasive papers. The system matters less than consistency. Create a flat back, establish a primary bevel, and hone a small secondary bevel.
A practical sharpening routine is:
- Flatten the back near the cutting edge.
- Grind or hone the primary bevel.
- Polish the cutting edge with a finer abrasive.
- Remove the burr from the back.
- Test the edge on scrap wood.
You do not need to sharpen at the first sign of resistance. But if the tool crushes fibers, skips, or needs heavy pressure, stop and inspect the edge.
Protect tools from moisture. Wipe steel surfaces after use and store chisels and plane irons so their edges cannot strike other tools. A simple wooden rack or tool roll can prevent many damaged edges.
Safety Rules for Hand Tool Woodworking
Hand tools are quieter than power tools, but they can still cause serious injuries. Most accidents happen when a tool slips, the workpiece moves, or the user applies too much force.
Follow these basic rules:
- Secure the work before cutting.
- Keep both hands behind the cutting edge.
- Cut away from your body.
- Wear eye protection during chopping and sawing.
- Keep blades sharp and covered when stored.
- Do not hold small work in your hand while chiseling.
- Keep the floor clear of scraps and cords.
- Use a proper mallet for chisels.
- Stop when you feel tired or rushed.
- Inspect tools for loose handles and damaged blades.
Gloves require judgment. Loose gloves can catch on tools and reduce control. Many woodworkers prefer bare hands for fine work and use gloves only for handling rough stock. Eye protection remains important because chips can travel without warning.
Dust also matters. Hand tools create less dust than many machines, but sanding and rasping still release fine particles. Use ventilation and a suitable dust mask when the work creates visible dust.
Common Mistakes to Avoid
Beginners often remove too much wood too soon. Once material is gone, you cannot put it back. Leave a small margin and make the final cuts with a sharp tool.
Another common mistake is ignoring grain direction. The same plane can make a smooth cut in one direction and tear the surface in the other. Test the grain on a scrap area before committing to a long stroke.
Avoid these problems:
- Using a dull blade
- Skipping layout marks
- Taking cuts that are too deep
- Working without firm support
- Sanding before the shape is correct
- Checking only one face
- Forcing a tool through a knot
- Holding the workpiece too close to the cutting path
- Measuring without marking a reference edge
A useful rule is to stop when the cut begins to feel hard. Resistance may mean the tool is dull, the cut is too deep, or the grain direction has changed. Treat that resistance as information rather than a challenge.
Practical Projects for Learning
Small projects help you learn how to shape wood with hand tools without the pressure of a large build. Choose a project with simple forms and clear goals.
Wooden Wedge
A wedge teaches layout, crosscutting, and controlled chiseling. Mark both sides, saw close to the line, and refine the slope with a plane or rasp.
Tool Handle
A tool handle teaches symmetry and curved shaping. Start with a square blank, create an octagon, and then remove the remaining corners.
Small Tray
A tray combines flat surfaces, edge shaping, and light chisel work. Shape the outside first, then mark and remove the inside waste.
Spoon or Small Scoop
A spoon introduces both convex and concave curves. Use a saw, carving knife, gouge, and scraper. Remove thin chips and pay close attention to changing grain.
Practice Board
A simple board can teach the most. Plane one face flat, square one edge, cut a few grooves, and shape one curved section. This exercise builds control before you work on expensive wood.
How to Get Better Results
Progress comes from observation more than force. Watch the shaving, listen to the cut, and feel how the tool moves. These clues tell you whether the edge, grain, and pressure are working together.
Keep a small piece of scrap wood nearby. Test blade settings on it before touching the project. This habit saves time and makes tool adjustments less stressful.
Work in short sessions when you are new. Fatigue causes rushed cuts and poor posture. A focused 20-minute session can teach more than two hours of frustrated work.
For steady improvement:
- Practice sharpening on inexpensive tools.
- Make the same shape several times.
- Compare your work with a template.
- Take photos before and after each stage.
- Record which grain direction worked best.
- Learn one tool adjustment at a time.
- Ask experienced woodworkers to review your setup.
The goal is not to make every cut perfect. The goal is to notice what happened and adjust the next cut. That mindset turns mistakes into useful feedback.
Frequently Asked Questions About How to Shape Wood With Hand Tools
What is the best hand tool for shaping wood?
A hand plane is best for broad, mostly flat surfaces, while a spokeshave or rasp works better for curves. A chisel is useful for corners, small details, and controlled waste removal.
Can you shape hardwood with hand tools?
Yes, you can shape hardwood with hand tools if the tools are sharp and the cuts are light. Dense or figured hardwood may require more frequent sharpening and careful attention to grain direction.
How do you prevent tear-out when shaping wood?
Reduce the cutting depth, sharpen the blade, and work in the direction of the grain. You can also use a higher cutting angle, a narrower plane mouth, or a light scraping cut on difficult areas.
Should you sand after shaping wood with hand tools?
Sanding is useful for removing small scratches and evening the surface, but it should not correct major shaping errors. A properly tuned plane, scraper, or sharp chisel can leave a surface that needs very little sanding.
How do you know when a hand tool is sharp enough?
A sharp tool cuts cleanly with light pressure and leaves smooth fibers instead of crushed or torn areas. A chisel should pare end grain cleanly, and a plane should produce thin, continuous shavings.
Is shaping wood with hand tools safe for beginners?
It can be safe when the workpiece is secured, the tool is sharp, and every cut moves away from your body. Start with small pieces, avoid rushing, and wear eye protection during sawing and chopping.
Conclusion
Learning how to shape wood with hand tools starts with sharp edges, sound wood, clear layout marks, and steady cuts. Use saws and chisels for rough work, planes for flat surfaces, and rasps or spokeshaves for curves. Check the grain often, remove small amounts, and inspect the shape from every angle.
Start with a simple project such as a wedge, handle, or practice board. Each careful cut will improve your control and teach you more about the wood. Explore more woodworking guides, practice on scrap, and share your results or questions in the comments.
