

You can make a wooden bowl with hand tools by shaping green wood, hollowing it, and smoothing it by hand.
Making a wooden bowl with hand tools is one of those projects that feels simple at first and deeply rewarding once you start. I’ve found that the process teaches patience, tool control, and a better feel for wood grain than almost any power-tool project ever could. If you want a durable, beautiful bowl made the old-fashioned way, this guide will walk you through every step of how to make a wooden bowl with hand tools, from choosing the right blank to finishing it safely and cleanly.
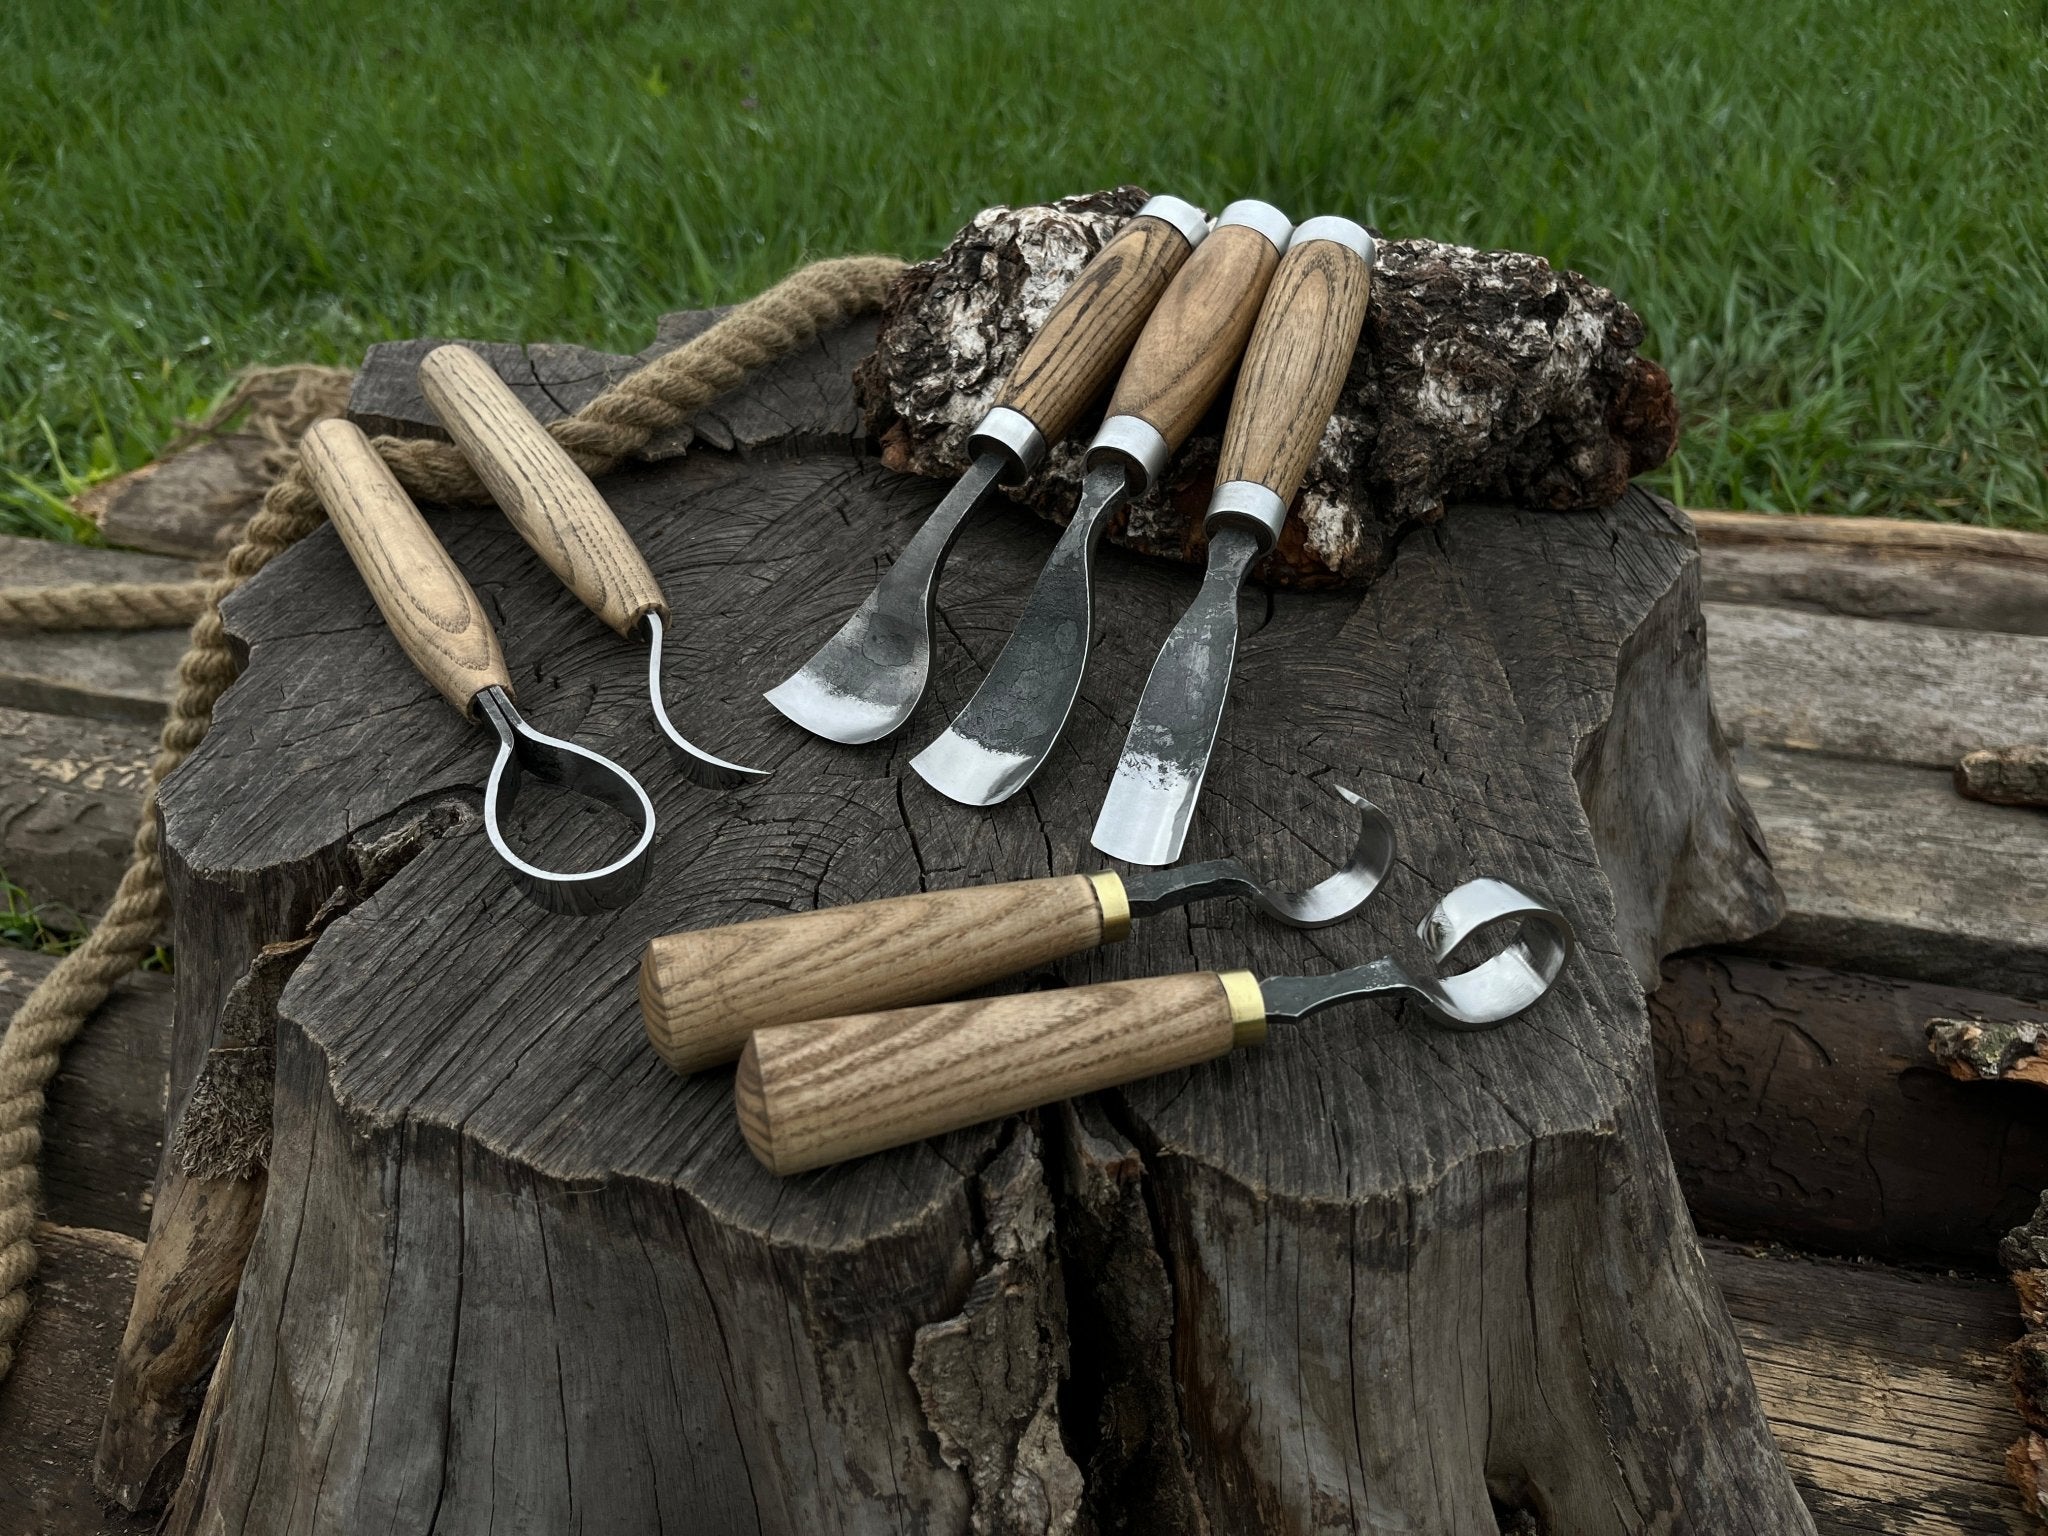
What You Need to Make a Wooden Bowl With Hand Tools
Before you start carving, it helps to gather the right tools and materials. The good news is that you do not need a full workshop. A small set of hand tools can get you a very clean result if you work carefully.
Here is a practical beginner-friendly setup:
- A bowl blank, ideally from green wood like maple, cherry, ash, or walnut
- A hand saw or bowsaw
- A hatchet or carving axe
- A bowl gouge or hook knife
- A sloyd knife or carving knife
- A chisel or spoon knife for refining the inside
- A wooden mallet
- A workbench, shave horse, or sturdy clamp
- Sandpaper in a few grits, or scrapers if you prefer a more hand-tool-only finish
- Food-safe finish such as mineral oil, walnut oil, or beeswax
From experience, the wood matters more than many beginners expect. Straight-grained, freshly cut wood is easier to carve and far less likely to split than dry, brittle stock. If you can start with green wood, your first bowl will usually be kinder to your tools and your hands.
Choosing the Right Wood for a Wooden Bowl
The best wood for a wooden bowl is stable, easy to carve, and attractive when finished. Hardwoods are usually the best choice because they hold up well to daily use.
Good options include:
- Maple for strength and a clean look
- Cherry for warm color and smooth carving
- Walnut for rich tone and fine grain
- Ash for toughness and a visible grain pattern
- Birch for a simple, light finish
A few woods are less beginner-friendly. Very knotty wood, twisted grain, or woods with cracks can make the bowl harder to carve and more likely to fail. I learned this the hard way with a piece that looked perfect on the outside but had hidden grain runout on the inside, and the bowl started checking before I finished shaping it.
If you are using green wood, look for a log section or branch crotch with even grain and no rot. If you are using dry wood, expect more effort and a higher chance of chip-out, especially when hollowing the interior.
How to Prepare the Bowl Blank
The blank is the rough block of wood that becomes the bowl. Getting this part right makes every later step easier.
Start by cutting the wood into a rough square or round shape. Leave extra material on all sides so you have room to refine the form. A common beginner mistake is making the blank too small, which limits your ability to shape a graceful curve.
Follow these steps:
- Mark the center of the blank.
- Sketch the bowl shape on the top and side.
- Cut away excess wood with a saw or hatchet.
- Flatten the base as much as possible so the bowl sits securely.
- Check the grain direction so you know where to carve carefully.
If you are working with a log section, split it if needed to reduce waste and improve grain alignment. If you are using a branch or crotch piece, pay close attention to grain direction, since it can change quickly and affect how the bowl carves.
How to Make a Wooden Bowl With Hand Tools Step by Step
This is the heart of the process. Making a wooden bowl with hand tools is really about moving in stages: rough shape first, then refinement, then smoothing. If you rush any one stage, the final bowl usually shows it.
1. Secure the blank
Clamp the wood firmly to your bench or use a carving vise. The blank should not move while you cut. A slippery blank is unsafe and makes clean cuts much harder.
2. Rough out the outside shape
Use a hatchet, axe, or saw to remove large chunks of wood. At this stage, you are not chasing perfection. You are simply bringing the blank closer to the bowl shape.
Work slowly and cut away from your body whenever possible. Keep your hands out of the path of the tool. A few controlled cuts are better than one aggressive one.
3. Shape the outer curve
Once the blank is rough, use a carving knife, spokeshave, or gouge to smooth the outside. Try to create a continuous curve from rim to foot. That curve gives the bowl its balance and its look.
A helpful tip is to carve in short passes and check your shape often. I have seen many new carvers overdo one side and end up with a bowl that sits crooked. A simple visual check from several angles saves a lot of frustration.
4. Mark the bowl wall thickness
Before hollowing, mark how thick you want the walls to be. Many functional bowls do well with walls around 1/4 to 3/8 inch thick, depending on size and wood type. Thicker walls are more forgiving for beginners.
Use a pencil or marking tool to create a guide line. This helps prevent carving too deep in one area and leaving the bowl uneven.
5. Hollow out the inside
Now the bowl begins to take shape. Use a bowl gouge, hook knife, or spoon knife to remove the interior wood in layers. Start at the center and work outward.
Keep the cut shallow at first. Deep cuts can catch fibers and split the wall. Think of it like peeling an apple in thin layers instead of trying to carve out the whole center at once.
6. Refine the interior curve
Once the inside is hollowed, smooth the surface with finer cuts. Follow the grain where possible. When the grain changes direction, slow down and adjust your angle.
If you are using only hand tools, a sharp scraper can help remove marks without leaving a rough surface. A clean interior not only looks better, it also makes finishing easier.
7. Shape the rim
The rim should feel balanced and even in your hand. Trim it carefully so the edge is smooth and consistent. A thick, irregular rim can make the bowl feel heavy and unfinished.
You can leave the rim flat, round it over slightly, or add a gentle chamfer. Small details like this make the bowl feel intentional instead of merely carved.
8. Sand or scrape the surface
If you want a smoother finish, sand the bowl through several grits. If you prefer a more traditional hand-tool finish, use very sharp scrapers and leave some tool marks as character.
A typical sanding progression might be:
- 120 grit
- 180 grit
- 220 grit
- 320 grit if you want a finer finish
Do not rush sanding. Uneven sanding can flatten curves and make the bowl look awkward. Light pressure and patience usually produce the best result.
9. Apply finish
Choose a food-safe finish if the bowl will hold food. Mineral oil is a common choice because it is simple and reliable. Beeswax blends can add a soft sheen and a bit of water resistance.
Apply finish in thin coats. Let the wood absorb it, then wipe off the excess. One of the biggest lessons I have learned is that more finish is not better; too much can make the bowl feel greasy instead of natural.

How to Work Safely With Hand Tools
Safety is part of good craftsmanship. A well-made bowl starts with a well-controlled process, and hand tools demand respect even though they feel quieter than machines.
Keep these safety habits in mind:
- Always carve away from your body when possible
- Keep tools razor sharp so they cut cleanly instead of slipping
- Secure the workpiece before cutting
- Wear gloves only if they do not reduce control; many carvers prefer bare hands for grip
- Keep your off-hand behind the cutting edge
- Take breaks when your hands get tired
Sharp tools are safer than dull ones because they require less force. That point is backed by general woodworking safety guidance from craft and occupational training sources, which consistently emphasize control, secure workholding, and tool maintenance as key risk reducers.
Common Mistakes to Avoid
If you are learning how to make a wooden bowl with hand tools, a few mistakes come up again and again. The good news is that they are easy to avoid once you know what to watch for.
Common problems include:
- Using wood with bad grain or hidden cracks
- Cutting the blank too small before shaping
- Hollowing too aggressively and blowing through the wall
- Leaving the bottom too thin
- Ignoring dull tools
- Skipping the rough shaping stage and trying to finish too early
- Sanding so much that the bowl loses its natural curve
The biggest one in my experience is impatience. The wood always tells you when you are pushing too fast. If the cut starts to tear instead of slice, stop and sharpen your tool or change direction.
Benefits of Making a Wooden Bowl by Hand
There is a reason people still learn how to make a wooden bowl with hand tools even in a power-tool world. The process has real value beyond the finished object.
Some of the biggest benefits include:
- Better feel for grain direction
- Lower tool cost compared with a full machine setup
- A quieter, calmer workshop experience
- A more personal, one-of-a-kind result
- Better control over shape and detail
- A stronger connection to traditional woodworking skills
Wooden bowls also have practical beauty. They are light, warm to the touch, and often more pleasant to use than plastic or metal for everyday serving. That handmade quality is hard to fake.
Finishing and Caring for Your Wooden Bowl
A good finish protects the bowl and brings out the grain. But the finish also depends on how you plan to use it. A decorative bowl can be treated differently than one used for fruit or dry food.
For a functional bowl:
- Use food-safe oil
- Let the oil soak in fully
- Wipe off any excess after 15 to 30 minutes
- Reapply when the bowl looks dry
For care:
- Wash by hand, never in a dishwasher
- Dry immediately after washing
- Avoid soaking the bowl in water
- Re-oil it when the surface looks faded
Wood movement is normal. If you use green wood, the bowl may shrink slightly as it dries. That can be part of the charm, but it also means you should expect some movement and plan for it.
A Simple Beginner Workflow
If you want a straightforward path, here is the easiest way to approach your first project.
- Choose straight-grained hardwood.
- Cut a rough blank with extra material.
- Secure the blank firmly.
- Rough out the outside shape.
- Hollow the inside slowly.
- Refine the walls and rim.
- Sand or scrape the surface.
- Apply a food-safe finish.
- Let the bowl cure before use.
This method keeps the work manageable and reduces mistakes. Once you complete one bowl, the second one usually turns out better because your hands start learning the rhythm.
When to Use Green Wood vs Dry Wood
Green wood is freshly cut and easier to carve. Dry wood is harder and often more stable in shape. Both can work, but they behave differently.
Green wood is best if you want:
- Easier carving
- Cleaner cuts
- A more traditional bowl-making experience
Dry wood is best if you want:
- Less shrinkage after carving
- More predictable final size
- Easier long-term storage before starting
If you are new, green wood is often the more forgiving choice for hand-tool bowl carving. Just remember that it may warp or crack a little while drying, so finish it with that reality in mind.
Frequently Asked Questions of how to make a wooden bowl with hand tools
What is the easiest wood for a beginner to make a bowl from?
Straight-grained maple, cherry, or ash are good beginner choices. They carve cleanly and hold up well after finishing.
Can I make a wooden bowl with only a knife?
Yes, but it is slower and best for small bowls. A bowl gouge, hook knife, or spoon knife will make the work easier and more controlled.
How thick should a wooden bowl be?
For a functional bowl, wall thickness around 1/4 to 3/8 inch is a good target. Beginners may want to leave the bowl a little thicker for safety and strength.
Do I need sandpaper to finish a wooden bowl?
No, not always. Very sharp tools and scrapers can leave a smooth enough surface, though light sanding is common for a softer finish.
Why did my wooden bowl crack after carving?
Cracking usually happens because of drying too fast, bad grain, or hidden checks in the wood. Keeping the bowl out of direct heat and using sound wood helps reduce the risk.
Is a hand-carved wooden bowl safe for food?
Yes, if you use clean, food-safe wood and a safe finish. Avoid toxic woods and harsh finishes that are not meant for food contact.

Conclusion
Learning how to make a wooden bowl with hand tools is a practical skill, but it is also a craft that rewards patience and attention. When you choose good wood, carve with the grain, and finish the bowl carefully, you end up with something useful, personal, and built to last.
The real payoff is not just the bowl itself. It is the confidence that comes from turning a rough block of wood into a finished object with your own hands. Start with a simple shape, take your time, and make your first bowl a learning piece you can be proud of. If this guide helped you, explore more hand-tool woodworking tips and leave a comment with your own bowl-making experience.
