

You can cut a clean groove in wood by marking it well, then guiding a chisel, plow plane, or saw carefully.
If you want to learn how to make a groove in wood with hand tools, the good news is that it is very doable with simple gear and a steady hand. I’ve found that clean grooves come down to layout, sharp edges, and control more than brute force. In this guide, I’ll walk you through the safest, easiest ways to make precise grooves, plus the mistakes I’ve seen ruin good work.
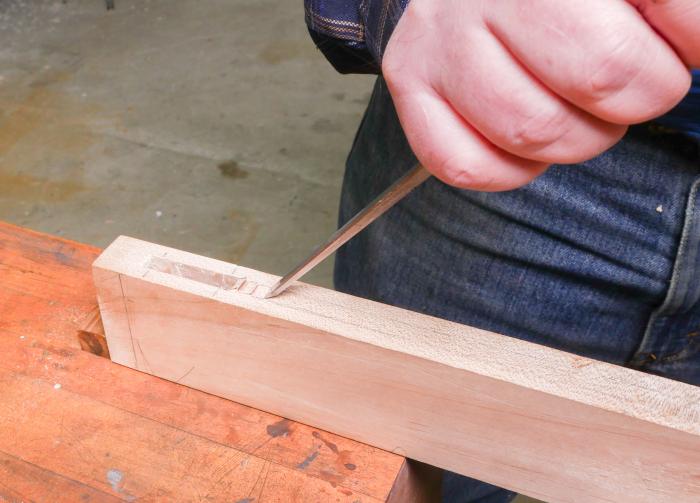
What a groove in wood actually is
A groove is a narrow channel cut into the face or edge of a board. It is often used to hold another piece of wood, such as a panel, shelf, or decorative strip.
When you learn how to make a groove in wood with hand tools, you are really learning how to control depth, width, and alignment. That matters because even a small error can throw off a joint or make a project look sloppy.
Grooves show up in many woodworking jobs, including:
- Drawer bottoms
- Frame and panel doors
- Shelf supports
- Decorative trim
- Tongue and groove joints
- Sliding parts and stopped runs
Tools you can use to make a groove by hand
There is no single best tool for every groove. The right choice depends on the groove’s width, depth, and location on the board.
Here are the most useful hand tools for the job:
- Chisel and mallet: Best for short grooves, stopped grooves, and fine control
- Plow plane: Best for long, straight grooves along the grain
- Router plane: Useful for leveling and cleaning the bottom of a groove
- Marking gauge: Helps set consistent edges
- Try square and knife: Helps with accurate layout
- Back saw or fine saw: Good for defining the groove walls first
- Scratch awl or marking knife: Better than pencil for precision work
In my own shop work, I reach for a marking knife before I touch the wood with a cutting tool. That one habit saves a lot of correction later. A crisp knife line gives the chisel or plane a clear path and helps keep the groove from wandering.
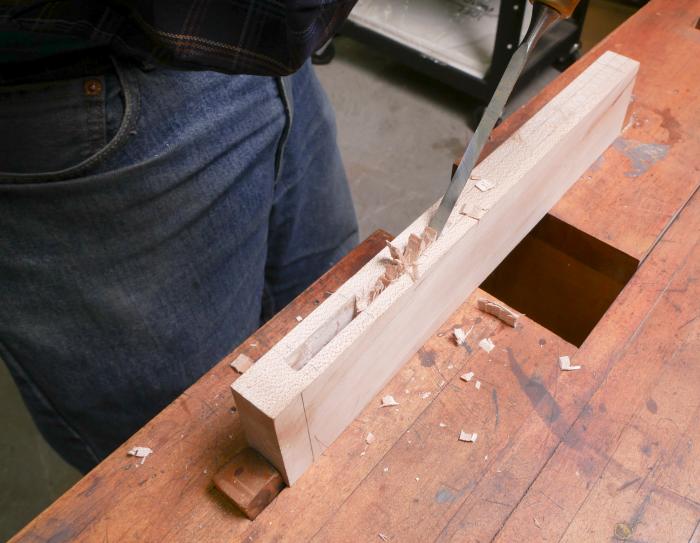
How to make a groove in wood with hand tools step by step
The cleanest way to make a groove in wood with hand tools is to break the job into clear stages. Do not rush the layout. A little care at the start pays off at the end.
1. Mark the groove carefully
Start by measuring the groove location with a ruler, try square, and marking gauge. Mark both edges of the groove so you know exactly where the cuts should stop.
For better accuracy:
- Use a marking knife instead of a pencil when possible
- Score the line more than once if needed
- Mark the waste side clearly
- Double-check the width against the part that will fit into the groove
I learned this the hard way years ago on a cabinet shelf. I trusted a pencil line and ended up with a groove that was just a little too wide. It still fit, but it looked loose, and that tiny mistake bothered me every time I saw it.
2. Deepen the lines first
Once the groove is marked, deepen the edges with a knife or chisel. This gives the cutting edge a firm boundary and reduces tear-out.
If you are using a chisel, hold it upright and lightly pare along the line. If you are using a knife, make several controlled passes instead of one hard cut.
3. Remove the waste in small passes
Now remove the wood between the lines. The best method depends on the tool you have.
With a chisel:
- Start near one end of the groove
- Angle the chisel slightly into the waste
- Take thin chips, not thick bites
- Work in small sections
- Stop before you reach final depth
With a plow plane:
- Set the fence and depth stop if available
- Make several light passes
- Keep the tool flat and steady
- Check the groove often for width and depth
With a saw and chisel combination:
- Saw down the groove edges first
- Chisel out the center waste
- Clean the bottom with short, controlled cuts
This slower method is often best for beginners because the saw cuts define the walls and reduce the chance of the chisel slipping.
4. Square the walls
A groove should have clean, straight sides. After removing the waste, use the chisel to refine the edges and make the walls square.
Keep the chisel sharp and use light pressure. Let the edge do the work. If you force it, the tool may dive or bruise the wood fibers.
5. Flatten and clean the bottom
A groove does not need a showroom-perfect bottom in every project, but it should be level enough for the part that fits inside it.
Use a router plane if you have one. If not, use a sharp chisel and shave the bottom in thin layers. Check with the mating piece often.
6. Test the fit
Slide the mating piece into the groove and check for tight spots. The fit should be snug but not forced.
If it binds:
- Remove a little from the sides
- Clean the bottom
- Check for high spots or uneven depth
If it is too loose, you may need to recut the groove or adjust the project design. That is why careful layout matters so much.

Best hand tool methods for different groove types
Different projects call for different techniques. Once you understand the shape of the groove you want, the process gets easier.
Straight grooves along the grain
A plow plane is usually the cleanest choice here. It is efficient, accurate, and easy to repeat once set up.
If you do not have a plow plane, use a saw to define the walls and then chisel out the middle. This takes more time, but it works well.
Stopped grooves
A stopped groove ends before the edge of the board. These are common in face frames, door parts, and hidden joinery.
For stopped grooves:
- Mark the stop point clearly
- Chop carefully up to the line
- Keep the chisel vertical
- Work from both ends toward the center if needed
This is one place where patience matters more than speed. A stopped groove that runs past the line is hard to hide.
Wide grooves
For wider grooves, remove the waste in stages. Do not try to reach full width in one pass.
A good approach is:
- Cut the edges first
- Remove the center in strips
- Clean and widen slowly
- Check often with a gauge or matching part
Decorative grooves
Decorative grooves need clean lines more than deep cuts. A fine chisel or plow plane works well.
These grooves are often shallow, so focus on consistency. Even a shallow wobble will show once finish goes on.

How to choose the right wood for grooving
Not all wood behaves the same way. Some species cut cleanly. Others chip, crumble, or tear if your tools are not sharp.
Generally easier woods for hand-cut grooves include:
- Pine
- Poplar
- Basswood
- Cherry
Woods that need more care include:
- Oak
- Maple
- Ash
- Hickory
Grain direction also matters. Cutting with the grain is usually smoother. Cutting across wild grain often causes tear-out, so make lighter cuts and keep your tools sharp.
If you work with hard maple or oak, I strongly recommend making extra light passes. When I rushed through oak grooves in the past, I spent more time fixing tear-out than I saved by cutting fast.
Common mistakes to avoid
Learning how to make a groove in wood with hand tools gets much easier when you know what not to do.
Watch out for these errors:
- Using dull tools: A dull chisel crushes fibers and makes rough edges
- Skipping layout: Bad marking leads to crooked grooves
- Cutting too deep too soon: Heavy cuts are harder to control
- Forcing the tool: Pressure causes slips and uneven walls
- Ignoring grain direction: Tear-out can ruin the groove edge
- Not testing the fit: Small errors become big problems later
One of the most common beginner mistakes is trying to fix a bad groove with more force. That almost never helps. Slow down, sharpen the tool, and take thinner cuts instead.
Tips for cleaner, safer work
A few simple habits can improve your results a lot.
- Hone your chisel before you start
- Clamp the workpiece so it cannot move
- Use bright light so the lines are easy to see
- Cut slightly inside the waste at first
- Keep your non-cutting hand away from the edge
- Recheck the depth before every finishing pass
I also like to dry-fit the matching part before the final cleanup. That tells me whether the groove needs a small touch-up or a deeper correction.
When hand tools are better than power tools
Hand tools are not just a backup plan. In many cases, they are the better choice.
They are useful when you want:
- Quiet work
- Better control
- Less dust
- Fine joinery
- Small-scale repairs
- A traditional look and feel
Hand tools also help when you only need one groove and do not want to set up a machine. For a single shelf or custom repair, a chisel or plow plane can be faster than dragging out a power tool setup.
There is a tradeoff, of course. Hand tools take more skill and more time. But they often give you more control and fewer surprises.

Practical example: cutting a groove for a shelf panel
Let’s say you need a groove for a thin shelf panel inside a cabinet side.
Here is a simple process:
- Measure the panel thickness.
- Mark groove lines on the inside face of the board.
- Deepen the lines with a knife.
- Cut the walls with a fine saw or chisel.
- Remove the waste in small bites.
- Flatten the bottom with a router plane or chisel.
- Test-fit the panel.
- Adjust until it slides in with light pressure.
That is the kind of task where how to make a groove in wood with hand tools becomes a repeatable skill, not just a one-time trick. Once you do it a few times, the process starts to feel natural.
How to maintain your tools for better grooves
Sharp tools make clean grooves. That is not just a saying. It is the difference between a crisp joint and a ragged mess.
Keep your tools in good shape by:
- Honing chisels often
- Flattening the back of the cutting edge
- Cleaning rust or pitch buildup
- Storing tools dry
- Checking the sole of your plane for flatness
A well-tuned tool gives you better results with less effort. It also makes the work safer because the blade is less likely to skate or slip.
Frequently Asked Questions of how to make a groove in wood with hand tools
What is the easiest hand tool for making a groove in wood?
A plow plane is often the easiest tool for long, straight grooves because it guides itself well. If you do not have one, a sharp chisel and careful layout can still do the job.
Can I make a groove in wood without a router?
Yes, you can make a groove in wood with hand tools only. A chisel, marking gauge, saw, and plow plane are all effective options for clean manual groove cutting.
How do I keep a groove straight?
Use a marking gauge, knife lines, and a fence-guided tool like a plow plane whenever possible. Taking light cuts and checking your work often also helps keep the groove straight.
What is the best way to cut a stopped groove by hand?
Mark the stop line clearly, then chisel carefully up to it in thin layers. Work slowly and use sharp tools so you do not go past the end mark.
How deep should a groove be in wood?
The depth depends on the part that will fit inside it, but many grooves are between one-quarter inch and one-half inch deep. Always match the depth to the project and leave enough wood strength around it.
Why does my groove look rough or torn out?
Rough grooves usually come from dull tools, heavy cuts, or cutting against difficult grain. Sharpen the edge, make thinner passes, and score the lines before removing waste.
Conclusion
Learning how to make a groove in wood with hand tools is one of those woodworking skills that pays off again and again. Once you understand layout, sharp cutting, and careful cleanup, you can make grooves that fit well and look professional.
Start small, work slowly, and trust the process. The more you practice, the cleaner your grooves will become. If you found this guide useful, keep going with a test board, sharpen your tools, and share your results or questions in the comments.
