

You can make a sturdy, comfortable chair with hand tools by measuring well, cutting accurately, and joining parts tightly.
Making a chair with hand tools is one of the most rewarding woodworking projects you can tackle. It teaches layout, joinery, balance, and patience all at once, and it gives you a piece of furniture you can actually use every day. I’ve found that chair making is where small mistakes matter most, but it’s also where careful work pays off the biggest.
Why make a chair with hand tools?
A chair is not just a seat. It is a test of structure, comfort, and proportion. When you build one with hand tools, you learn how wood behaves, how joints carry weight, and how slight angles change the whole feel of the piece.
Hand tools also give you better control. You can sneak up on a fit, tune a joint, and shape parts in a way that feels calm and precise. If you want a project that builds real skill, how to make a chair with hand tools is one of the best questions to start with. 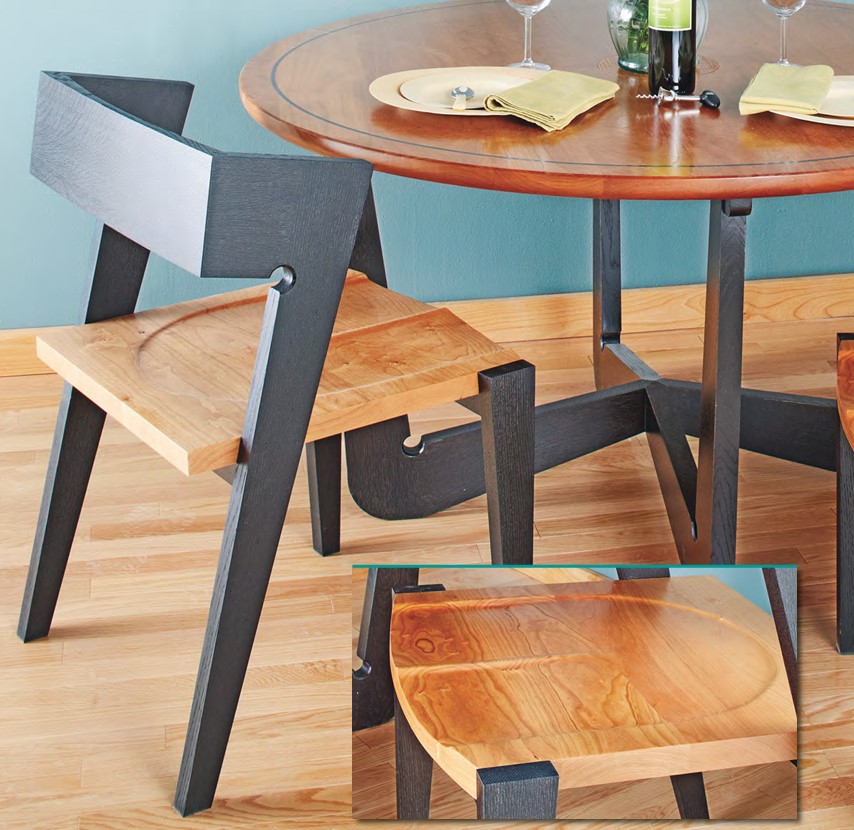
What you need before you start
Before you cut a single board, you need a clear plan. Chair building is easier when you know the style, the size, and the joinery method ahead of time. A simple side chair with a seat, four legs, rails, and a back is the best place to begin.
Here is a practical starting list:
- Wood: oak, ash, maple, cherry, or another strong hardwood
- Hand saw: crosscut saw and rip saw, or a fine dovetail saw for smaller parts
- Hand plane: jack plane or smoothing plane
- Marking tools: tape measure, marking gauge, square, pencil, and bevel gauge
- Chisels: for cleaning joints and cutting mortises
- Mallet: for controlled chisel work
- Drill and bits: for pilot holes or peg work, if needed
- Clamps: for dry fitting and gluing
- Spokeshave or rasp: for shaping curved parts
- Scraper or sandpaper: for finishing surfaces
I always recommend starting with dry, straight stock. Wood that is twisted or badly bowed makes chair work harder than it needs to be. If the lumber is sound, your joints will be better and the chair will stay stable longer.
How to make a chair with hand tools step by step
The best way to learn how to make a chair with hand tools is to break it into small, controlled steps. Do not rush the early layout work. Good chairs come from good preparation, not force.
1. Choose a simple chair design
Start with a basic design that uses straight parts and simple joinery. A ladder-back or side chair is easier than a Windsor or a sculpted lounge chair. You want a design that teaches the process without overwhelming you.
A simple chair usually includes:
- 4 legs
- Front and side rails
- Back rails or spindles
- A seat
- Optional stretchers for extra strength
From my own experience, beginners often choose a chair that looks easy but has too many curves. That usually leads to frustration. Keep the first build clean and honest.
2. Make a full-size plan
Draw the chair full-size on paper, cardboard, or directly on a plywood sheet. Mark the seat height, back angle, leg splay, and rail positions. This is where the whole chair lives or dies.
A chair is not like a box. A few degrees can change comfort and balance. If the back leans too far or the seat is too high, the chair will feel wrong even if it looks fine.
3. Select and prepare the wood
Pick straight-grained hardwood with few knots. Cut the boards into rough lengths first, then plane the faces flat and square the edges. This gives you reference surfaces for accurate layout.
Good wood preparation is part of how to make a chair with hand tools well. A flat board is easier to mark, easier to saw, and easier to join. I’ve saved myself many headaches by spending extra time here.
4. Cut the legs to length and angle
Mark each leg carefully using your plan. If the chair has splayed legs, mark the angles on the ends before cutting. Cut a little long at first so you can trim to final length later.
Use a bench hook or vise to hold the wood steady while sawing. Work slowly and stay on the waste side of your line. A small error here can throw off the whole chair.
5. Lay out and cut the joinery
Most hand-built chairs use mortise-and-tenon joints. The legs receive mortises, and the rails have matching tenons. This joint is strong, proven, and ideal for furniture that must hold weight for years.
To cut mortises by hand:
- Mark the mortise location on all sides
- Start with a bradawl or drill if you want to ease chisel work
- Chop down with a sharp chisel in small bites
- Clean the sides until the mortise is straight and even
To cut tenons by hand:
- Mark shoulders and cheeks carefully
- Saw just outside the line
- Trim with a shoulder plane or chisel until the fit is snug
A tight fit matters, but do not force it. If you need a hammer to close a dry joint, the fit is too tight.
6. Dry fit the frame
Assemble the chair without glue first. Check for square, wobble, and gap problems. This step lets you fix mistakes before they become permanent.
During dry fit, look for:
- Gaps at the shoulders
- Twisted legs
- Uneven seat height
- A chair that rocks on a flat floor
I always do at least one dry assembly. It takes time, but it prevents a bad glue-up, and chair glue-ups can move fast.
7. Shape the seat
The seat should be strong and comfortable. You can make it from a solid wooden board, woven material, or shaped slats, depending on your design. For a beginner, a thick wood seat is easiest.
If using a solid seat:
- Cut it to size
- Round the front edge for comfort
- Slightly scoop the center if desired
- Smooth all edges with a plane or scraper
The seat is where comfort shows up most. Even a strong chair feels rough if the front edge cuts into your legs.
8. Attach the back
The back determines posture and comfort. A slight backward angle usually feels best for relaxed sitting. If you are making a simple ladder-back chair, fit the back rails level and balanced.
For a spindled back, shape each spindle with care so the curve feels natural. The back should support the body without feeling stiff. Think of it like a handshake: firm, but not tense.
9. Add stretchers if your design uses them
Stretchers connect the legs and add strength. They also help keep the chair stable under repeated use. Cut and fit them just like the rails, with accurate layout and clean joints.
Stretchers are especially helpful if you want extra durability. In my shop, I’ve seen chairs last much longer when the lower structure is well braced.
10. Glue, clamp, and assemble
Once every part fits, apply glue to the mortises and tenons and bring the chair together. Work in stages if needed. A chair frame can be awkward, so think through your clamp placement before you start.
Useful glue-up habits:
- Have all clamps ready
- Do one final dry run
- Apply glue evenly, not in huge blobs
- Check the chair for twist as you tighten
- Wipe away squeeze-out while it is still fresh
Let the glue cure fully before moving the chair. Patience here protects the whole project.
11. Trim, refine, and smooth
After assembly, trim proud joints and smooth the surfaces. Use a plane, rasp, scraper, or sandpaper to remove tool marks and sharpen the shape. This is where the chair starts to look finished.
Do not over-sand everything flat if the design has nice hand-shaped curves. A little tool mark can show the handwork and make the chair feel alive. That is part of the charm of how to make a chair with hand tools.
12. Finish the chair
A good finish protects the wood and brings out the grain. Oil, wax, shellac, or a simple varnish can all work well, depending on use and style. Keep the finish thin so the chair still feels like wood, not plastic.
For most indoor chairs, a few light coats are enough. Let each coat dry fully, then buff lightly if needed. Durable finishes are useful, but comfort and feel matter too.
Best wood for making a chair by hand
The best wood for chair making is usually a strong hardwood with straight grain. Oak, ash, maple, beech, and cherry are all common choices because they hold up well under repeated stress. Their grain also makes hand shaping easier and safer.
Here is a simple guide:
- Oak: strong and classic, but can be tough to cut by hand
- Ash: excellent for chair parts because it bends well and is strong
- Maple: hard and durable, but a bit more demanding on tools
- Beech: smooth and stable, often used in traditional furniture
- Cherry: beautiful and easy to work, though not as tough as oak or ash
If you are new, ash is often a smart choice. It is strong, forgiving, and pleasant to shape. That said, the best wood is the one that matches your design and your tools.
Common mistakes to avoid
Chair making has a few common traps. The good news is that most of them are easy to avoid once you know what to watch for. A careful approach saves time and wood.
Watch out for these mistakes:
- Cutting parts before confirming the design
- Using warped lumber
- Rushing mortise-and-tenon layout
- Gluing before a full dry fit
- Forgetting to check for wobble on a flat surface
- Making the seat too high or the back too upright
One lesson I learned early: a chair that looks square on the bench may still rock on the floor. Always test stability at the end of dry assembly. That one habit can save an otherwise beautiful chair.
How to make a chair with hand tools more comfortable
Comfort is about angles, curves, and support. A chair can be strong and still feel bad if the seat is flat in the wrong way or the back leans poorly. Small changes make a big difference.
To improve comfort:
- Slightly tilt the seat back
- Round the front seat edge
- Give the back a gentle recline
- Avoid sharp corners on arms or rails
- Keep the seat height matched to the intended user
If you want a chair people will actually sit in for long periods, think like the body does. Pressure points are the enemy. Smooth transitions are your friend.
Safety tips when using hand tools
Hand tools are safer than many power tools, but they still demand respect. Sharp edges and flying chips can cause injury if you rush or hold the work poorly. Good habits keep the project enjoyable.
Follow these safety basics:
- Keep chisels sharp so they cut cleanly with less force
- Clamp the work securely before sawing or chopping
- Cut away from your body when possible
- Keep your hands behind the cutting edge
- Store tools safely when not in use
- Work in a bright, uncluttered space
A dull tool is often more dangerous than a sharp one because it slips. That is one of the simplest truths in woodworking.
Benefits of making a chair with hand tools
There is real value in building a chair by hand. You gain skills that transfer to other furniture projects, and you learn to trust your eye and hand. That kind of knowledge stays with you.
Benefits include:
- Better control over fit and finish
- A deeper understanding of joinery
- Lower startup cost than buying major machinery
- A quieter, slower, more mindful process
- A custom chair made to your needs
There is also pride in using something you made from raw stock. That matters. A hand-built chair carries your work in every joint and curve.
How long does it take?
For a beginner, a simple chair can take several weekends or more. The exact time depends on the design, the wood, and your experience with hand tools. Precision matters more than speed.
If you work steadily, you can often break the project into stages:
- Planning and layout
- Stock prep
- Joinery
- Dry fitting
- Assembly
- Shaping and finishing
Do not be discouraged if it feels slow. Chair making rewards patience more than haste.
Frequently Asked Questions about how to make a chair with hand tools
What is the easiest chair to make with hand tools?
A simple side chair or ladder-back chair is usually the easiest. These designs use straightforward parts and basic joinery, which makes them ideal for learning. They also teach the core skills needed for more advanced chairs later.
Do I need expensive tools to make a chair by hand?
No, you do not need expensive tools to get started. A sharp saw, a few chisels, a plane, and good marking tools can take you a long way. Quality matters more than quantity, and well-maintained basic tools often outperform fancy ones.
What joint is best for a handmade chair?
Mortise-and-tenon joints are the most common and reliable choice. They are strong, proven, and well suited for chair legs and rails that must handle repeated stress. If cut accurately, they can last for decades.
Can a beginner really make a chair with hand tools?
Yes, a beginner can make a chair with hand tools if the design is kept simple. The key is to work slowly, measure carefully, and choose a chair that matches your skill level. Your first chair may not be perfect, but it will teach you a lot.
How do I stop my chair from wobbling?
A wobble usually comes from uneven leg lengths, twisted assembly, or poor joinery fit. Check every leg on a flat surface during dry fit and trim the final length only after the frame is assembled. Careful layout and testing are the best prevention.
What finish works best for a handmade wooden chair?
A simple oil, wax, shellac, or wiping varnish works well for most indoor chairs. The best choice depends on how much wear the chair will get and the look you want. Thin finishes are often best because they protect the wood without hiding the handwork.
Conclusion
Learning how to make a chair with hand tools is really about learning to build with care. When you choose good wood, cut accurate joints, test the fit, and finish with patience, you end up with a chair that is strong, useful, and personal. The process may feel slow at first, but that slow pace is what gives the work its quality.
If you are ready to begin, start with a simple design, trust your measurements, and let each step teach you something. Build one chair well, and the next project becomes much easier. If you found this guide helpful, save it, share it, or leave a comment with the chair style you want to build next.
