
Introduction
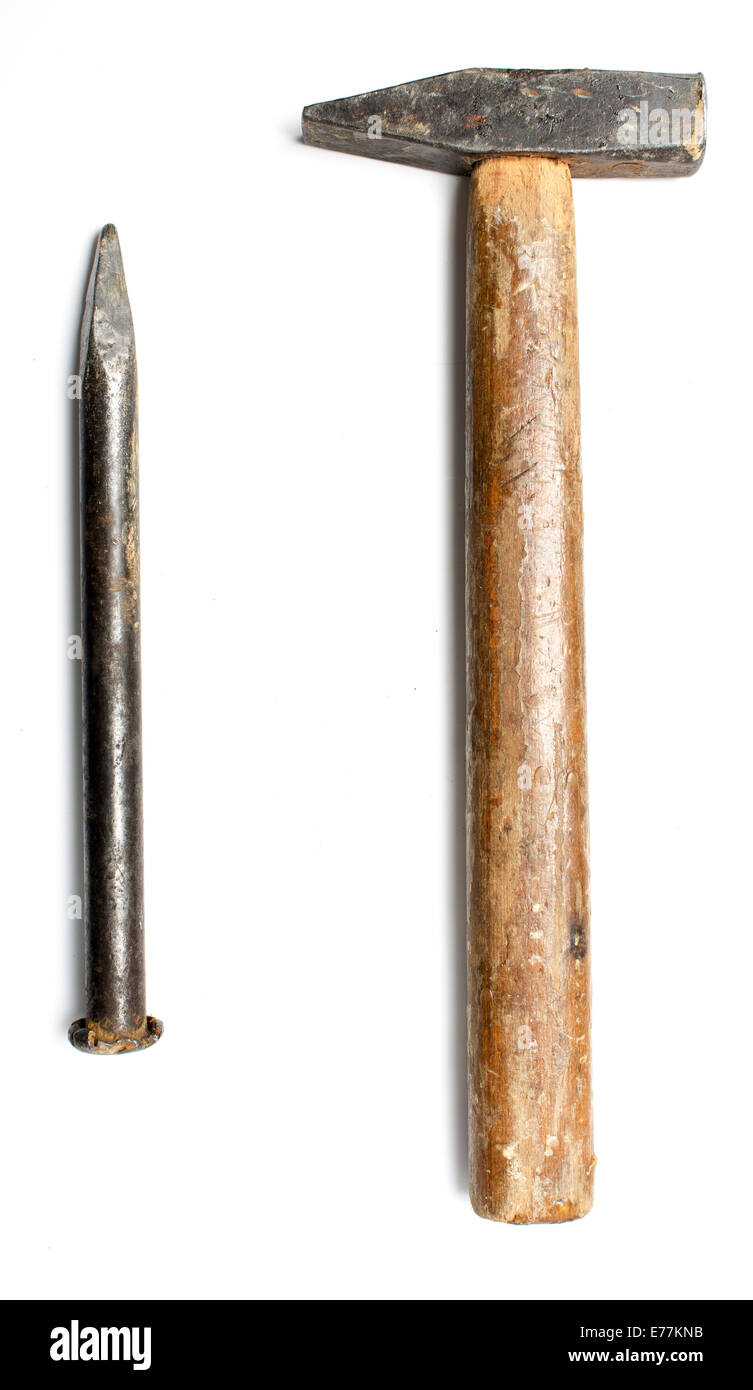
For most masonry work in the United States, use a short-handled club hammer, also called a drilling hammer, weighing about 2 to 4 pounds with a masonry chisel. This hammer gives you more control than a full-size sledgehammer and more striking power than a standard claw hammer.
Use a 2-pound hammer for light work, such as removing small amounts of mortar or trimming soft brick. Choose a 3- or 4-pound club hammer for hard brick, concrete block, or deeper cuts. Match the hammer to the chisel maker’s instructions, the material, and the amount of force needed.
A brick hammer can work for some brick-cutting tasks, but it is not the best general hammer for striking the hardened head of a masonry chisel. A claw hammer is usually too light and may be damaged by repeated heavy blows.

Quick Answer: Which Hammer Works Best?
The best general-purpose hammer for a masonry chisel is a 2- to 4-pound club hammer, often sold in the United States as a:
- Drilling hammer
- Hand drilling hammer
- Engineer’s hammer
- Short-handled sledgehammer
- Small club hammer
Use the following guide:
| Task | Recommended hammer |
|---|---|
| Removing light mortar | 1.5- to 2-pound club hammer |
| Cutting brick or concrete block | 2- to 4-pound club hammer |
| Breaking a small section of concrete | 3- to 4-pound club hammer |
| Heavy demolition | Larger sledgehammer, with a suitable chisel |
| Very light tapping or positioning | Small ball-peen or machinist’s hammer, if approved by the chisel maker |
A 4-pound hammer is not automatically better. A heavier head creates more impact, but it also increases the risk of losing control, damaging the chisel, or breaking the masonry in the wrong place.
Why a Club Hammer Is the Best General Choice
A club hammer balances impact, control, and safety. Its short handle helps you keep the blow aligned with the chisel. Its heavy head delivers enough energy to cut brick, chip concrete, and remove mortar without the large swing needed for a full-size sledgehammer.
A standard claw hammer is made mainly for driving and pulling nails. Its face and handle are not designed for repeated impact against a masonry chisel. The hammer may glance off the chisel head, and the claw can catch nearby surfaces.
A club hammer has two flat striking faces. This design lets you hit the chisel squarely. It also gives you a firm grip for work in tight areas, such as between bricks or near a foundation wall.
Match the hammer to the chisel
Masonry chisels come in several forms. The right hammer depends on the chisel’s size and purpose.
- Cold chisel: Used for cutting or chipping masonry and some metal. A small club hammer is often suitable.
- Masonry chisel: A broad, hardened blade for brick, block, mortar, and concrete.
- Brick set or brick bolster: A wide blade used to score or split brick and block. It often needs controlled blows from a club hammer.
- Plugging chisel: A narrow chisel for removing mortar from joints. Use lighter blows to avoid damaging the surrounding brick.
- Point chisel: Used to start holes or break up small areas. It may need a slightly heavier club hammer for hard concrete.
Always check the tool maker’s instructions. Some chisels are designed for hand striking only. Others are made for use with a rotary hammer or demolition hammer and should not be struck with a manual hammer.

Choosing the Right Hammer Weight
Choose the lightest hammer that completes the job without excessive force. This gives you better control and reduces damage to the chisel and the masonry.
A 1.5- to 2-pound hammer
A 1.5- or 2-pound club hammer is a good choice for:
- Soft brick
- Mortar joints
- Small chips
- Light surface work
- Removing loose material
- Work near fragile tile or finished masonry
This weight is easier to control for long periods. It also reduces the chance of taking off too much material.
A 3- to 4-pound hammer
A 3- or 4-pound hammer is better for:
- Hard brick
- Concrete block
- Dense mortar
- Small areas of concrete
- Starting a cut in tough masonry
- Breaking material that does not respond to light blows
Use this range with care. Do not swing it like a framing hammer. Raise the hammer only as high as needed and keep the blow centered on the chisel head.
A hammer larger than 4 pounds
A larger sledgehammer may be suitable for major demolition. It is usually excessive for small brick repairs, mortar removal, and controlled cuts.
A heavy hammer can:
- Crack nearby brick
- Split concrete beyond the intended line
- Bend or damage an unsuitable chisel
- Cause the chisel to slip
- Fatigue your hand, arm, or shoulder
For large demolition, use a chisel and hammer system rated for that work. In many cases, a powered demolition tool is more suitable than repeated hand blows.
A simple selection rule
Use this order:
- Start with a 2-pound club hammer.
- Move to a 3- or 4-pound hammer if the chisel does not cut with firm, controlled blows.
- Stop if the chisel head mushrooms, cracks, or slips.
- Use a larger tool only when the chisel and task are designed for it.

Club Hammer vs. Brick Hammer vs. Sledgehammer
These tools can look similar, but they serve different purposes.
| Hammer type | Main use | Suitability with a masonry chisel |
|---|---|---|
| Club hammer | Striking chisels and other hand tools | Best general choice |
| Brick hammer | Cutting, shaping, and trimming brick directly | Useful for some brick work, but not a universal chisel hammer |
| Claw hammer | Nails and light carpentry | Poor choice for repeated masonry-chisel blows |
| Ball-peen hammer | Metalwork and light controlled strikes | Suitable only for light work and compatible chisels |
| Sledgehammer | Heavy breaking and demolition | Suitable for heavy-duty work with a rated chisel |
| Dead-blow hammer | Reducing rebound and surface damage | Usually too soft for hard masonry cutting |
Club hammer
A club hammer has the best overall balance for hand-held masonry chisels. The short handle supports accurate strikes, while the head has enough mass for brick, block, and mortar.
Brick hammer
A brick hammer is designed for direct brick work. One end usually has a broad face, while the other has a cutting edge or peen. It is useful when trimming a brick without a separate chisel.
Do not assume the cutting end should strike the chisel. The chisel should normally be struck with the hammer’s intended striking face, not with a pointed or edged portion.
Sledgehammer
A sledgehammer is appropriate when the goal is to break large sections of masonry. A long handle creates a wider swing and more impact. That power comes with less control, so it is not the first choice for detail work.
Claw hammer
Avoid using a claw hammer as your regular masonry-chisel hammer. Its narrow face, curved claw, and lighter construction make it less stable for this task. A glancing blow can send the hammer or chisel sideways.

How to Use a Masonry Chisel and Hammer
Use the following method for a controlled cut or chip.
1. Check the tools
Before starting, inspect the hammer and chisel.
Do not use a chisel with:
- A mushroomed head
- A cracked shaft
- A loose handle
- A bent blade
- Deep rust or visible damage
- A cutting edge that is too blunt or badly deformed
Do not use a hammer with a loose head, cracked handle, damaged face, or sharp burrs around the striking surface.
A mushroomed chisel head can shed small metal fragments when struck. Replace the chisel or have it properly dressed by a qualified tool service.
2. Mark the cut
Mark the line with chalk, pencil, or a suitable masonry marker. For brick or block, score the line around the material when possible.
A scored line gives the crack a path to follow. It also reduces the amount of force needed.
3. Set the chisel
Hold the chisel firmly, but keep your fingers away from the striking area. Place the blade on the mark. Keep the chisel as close to perpendicular to the surface as the cut allows.
For a brick bolster, keep the broad blade aligned with the cut. A crooked angle may cause the blade to twist or the brick to break outside the marked line.
4. Start with light blows
Tap the chisel with short, controlled strikes. Do not begin with a full-power swing.
Light blows help you:
- Confirm the chisel angle
- Create a shallow groove
- Check the material’s hardness
- Keep the cut on the marked line
Once the groove is clear, increase the force only as needed.
5. Work around the line
For a clean brick or block cut, score more than one side when access allows. Turn the material or reach the opposite face rather than forcing the chisel through from one side.
This method helps limit spalling, which occurs when pieces break away from the surface around the cut.
6. Clear loose pieces
Stop often and remove loose fragments. Do not place your hand in front of the blade while striking. Use a brush or another safe method to clear dust and chips.
7. Inspect the result
A successful cut has a controlled edge, no major damage to nearby masonry, and no visible damage to the chisel. If the material keeps breaking away from the line, reduce the hammer force and improve the score line.

Safety Rules for Hammering Masonry
Masonry work creates flying chips, dust, noise, and sharp fragments. Wear safety glasses with side protection at a minimum. A face shield over safety glasses gives added protection during heavy chipping or demolition.
For work in the United States, OSHA construction rules address eye and face protection in 29 CFR 1926.102 and hand tools in 29 CFR 1926.301. These rules apply to covered construction work and do not replace the tool maker’s instructions or your employer’s safety program.
Use these basic controls:
- Wear impact-rated eye protection.
- Add a face shield for heavy chipping.
- Wear hearing protection around repeated impacts or powered tools.
- Use work gloves that allow a firm grip.
- Wear sturdy boots and long work clothes.
- Keep bystanders away from the strike zone.
- Check for hidden wires, pipes, and other services before cutting.
- Control dust with an approved method when the material or task creates respirable dust.
- Do not hold the workpiece in your hand while striking it.
- Keep the hammer face square with the chisel head.
- Never strike a chisel with a damaged or mushroomed head.
- Stop if the chisel slips, bends, cracks, or begins to overheat.
Silica dust can be a serious hazard when cutting or breaking concrete, brick, and other masonry. Dry hammering can release dust. Follow the applicable OSHA silica requirements, use local exhaust or wet methods when suitable, and wear respiratory protection only as part of a proper respiratory protection program.

Common Mistakes to Avoid
Using a claw hammer
A claw hammer is not the right default tool for masonry chisels. It may work for a very light tap in an emergency, but it is not a sound choice for repeated impact.
Use a club hammer instead.
Choosing the heaviest hammer
More weight does not always produce a better cut. Excess impact can damage the work and reduce control.
Start with a lighter hammer. Increase weight only when the material needs it.
Striking the chisel at an angle
An angled blow can glance off the head. It may also bend the chisel or send fragments sideways.
Keep the hammer face parallel to the chisel head when possible.
Ignoring a mushroomed head
A deformed chisel head is a warning sign. Continued use can cause metal chips to break away.
Dress or replace the chisel before continuing.
Using a cold chisel on the wrong material
A masonry chisel is made for masonry. It should not be used as a pry bar, punch, wedge, or replacement for a rated demolition tool.
Do not use a masonry chisel on reinforced concrete if the blade may strike steel. Choose a tool designed for that task.
Expecting a clean cut from one side
Brick and block often break unpredictably when struck hard from one side. Score the material first and work around the cut when possible.
Holding small pieces by hand
Never hold a small brick fragment close to the blade while striking. Secure the material on a stable surface or use a tool that keeps your hands away.

What to Do If the Chisel Does Not Cut
If the masonry does not respond, do not simply swing harder. Check the cause in this order:
- Confirm the chisel type. A narrow plugging chisel may not be the best tool for a wide brick cut.
- Check the cutting edge. A dull or damaged edge may skate across the surface.
- Improve the score line. A shallow groove helps control the break.
- Use a heavier club hammer. Move from 2 pounds to 3 or 4 pounds if the chisel is suitable.
- Change the angle slightly. Keep the blade aligned with the cut rather than forcing it straight down.
- Check for reinforcement. Rebar, wire mesh, anchors, or embedded metal may require a different tool.
- Stop when the task exceeds hand-tool control. A rotary hammer or demolition hammer may be safer and more effective.
If the chisel bounces, the material may be too hard, the blade may be dull, or the hammer may be too light. If the chisel twists, reduce the force and check the blade position. If the masonry cracks well beyond the line, use lighter blows and score more deeply.
Key Takeaways
- Use a 2- to 4-pound club hammer with most hand-held masonry chisels.
- Start with a 2-pound hammer for light work and soft brick.
- Choose a 3- or 4-pound hammer for hard brick, block, and small areas of concrete.
- Use a brick hammer for direct brick shaping, not as the default striking tool for every chisel.
- Avoid regular use of a claw hammer with a masonry chisel.
- Keep the hammer face square to the chisel head.
- Replace or dress any chisel with a mushroomed, cracked, or damaged head.
- Wear eye protection and control masonry dust.
Frequently Asked Questions
Can I use a regular hammer with a masonry chisel?
You can use a regular hammer only for very light tapping if the chisel maker allows it. For normal cutting and chipping, a 2- to 4-pound club hammer is the better choice because it provides more controlled impact.
Is a ball-peen hammer good for a masonry chisel?
A ball-peen hammer is mainly intended for metalwork. Its rounded end is not the best striking surface for a masonry chisel. It may be acceptable for light work with a compatible chisel, but a flat-faced club hammer is usually safer and more effective.
Can I use a brick hammer instead of a club hammer?
A brick hammer can be used for some brick-cutting tasks, especially when shaping brick directly. If you are striking a separate masonry chisel, use the flat striking face and follow the chisel manufacturer’s instructions. A club hammer remains the more versatile choice.
What hammer should I use for a brick bolster?
Use a short-handled club hammer, often in the 2- to 4-pound range. Use the lighter end for soft brick and careful trimming. Use more weight only when the bolster is rated for it and light blows do not make progress.
Should I use a sledgehammer with a masonry chisel?
Use a sledgehammer only for heavy demolition and only with a chisel designed for that level of impact. For repair work, mortar removal, and controlled brick cuts, a sledgehammer is usually too powerful.
How do I know if a masonry chisel is unsafe?
Do not use it if the head is mushroomed, cracked, badly bent, loose, or deeply damaged. A damaged head may release metal fragments when struck. Replace it or have it serviced before using it again.
Conclusion
For most masonry-chisel work in the United States, choose a 2- to 4-pound club hammer. A 2-pound model offers control for mortar, soft brick, and small repairs. A 3- or 4-pound model provides more impact for hard brick, block, and limited concrete work.
Use light blows first, keep the hammer face square, and let the scored groove guide the cut. If the job requires extreme force, produces heavy dust, or involves reinforced concrete, stop and switch to a tool and safety method designed for that work.